America’s Greatest School Nurse Contest

This post has been sponsored by Pfizer Consumer Healthcare. All thoughts and reviews are my own.

As some of you may know, I am a school nurse. So when Pfizer contacted me regarding spreading the word about America’s Greatest School Nurse contest, I was immediately on board! Do you have school age kids? Do you know your school nurse? If your child has been sick or injured at school, or you have a medically fragile child, or your child takes medication during the school day, I’m betting you’ve had a conversation or two with the nurse. They are a great liaison between parents, physicians, and school staff.

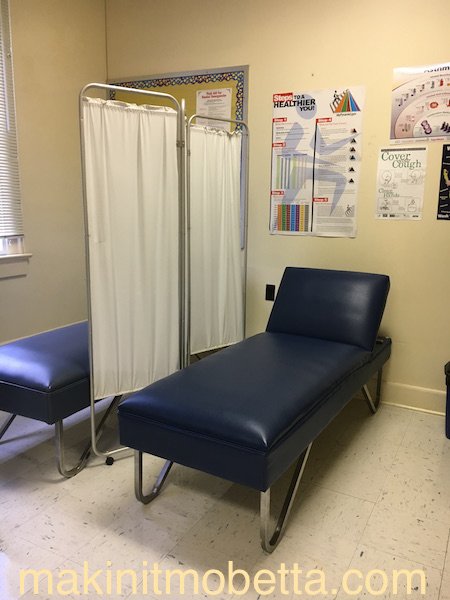
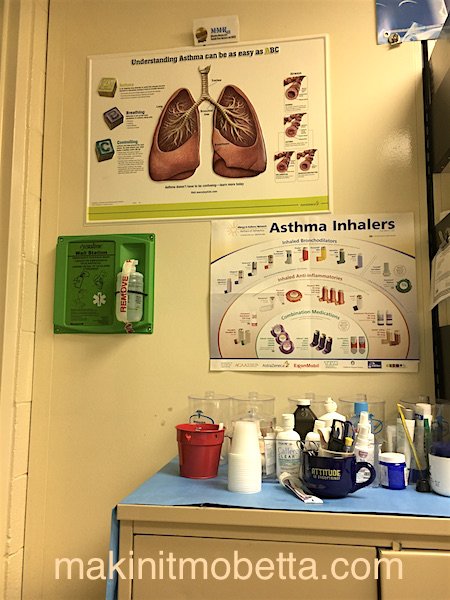
I have spoken to the school nurse at my son’s school quite often over the past couple of years! He has asthma, allergies, and migraines…so he has had many a visit to the nurse! I also know first hand that it’s not always an easy job. Kids have medical emergencies (anything from playground accidents to seizures, even drug overdoses) that require split second decision making, and require the nurse to be knowledgable of a variety of different diseases and acute illnesses. They must also be prepared for any kind of emergency, not to mention the multitude of staff trainings that go on each year for diabetes, seizures, asthma, etc. They also do a lot of parent and student education and must have the ability to multi-task – as they may have several kids coming to the office at once. The list goes on and on, and very rarely are any two days the same in a busy school!

So how do you go about nominating your awesome school nurse for America’s Greatest School Nurse contest?

* First, nominations will be accepted nationwide from anyone who would like to honor their exemplary school nurse.
* Second, one nurse from each state plus Washington D.C. will win a prize valued at $500 and will be entered to win the grand prize: the title of America’s Greatest School nurse and a trip for a getaway from school sickness.
* To submit a nomination and get more information/full contest rules, visit AmericasGreatestSchoolNurse.com. Nominations will be accepted from January 9 to February 23.
* Voting will be open from April 3 to April 16 and the winners will be announced in early May.

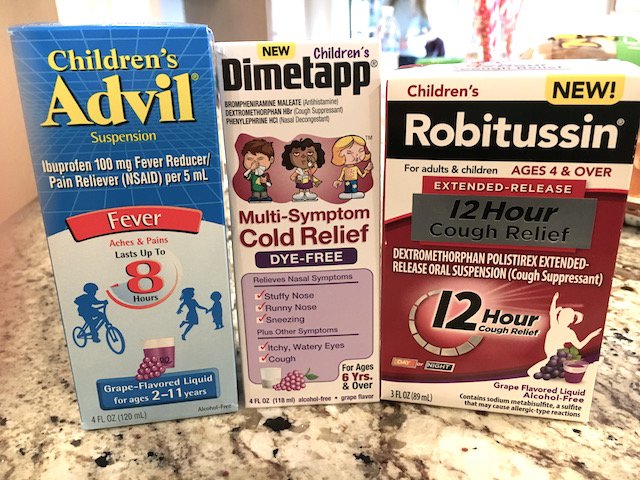
Even though I am a nurse, obviously my kids still get sick. Thankfully, the pediatric brands of Pfizer Consumer Healthcare are there to help – Children’s Advil®, Children’s Robitussin® and Children’s Dimetapp® – to tackle all kinds of symptoms.

Ironically, the Sick Just Got Real™ at my house…I have a sick one at home as I am typing this! My 8 year old woke up at 1am with a stomach virus…which of course included an accident on the carpet as he was trying to make his way to my room (doesn’t it always happen that way?!) The above products can’t help with the stomach virus, but they are great for a multitude of other illnesses.

Children’s Advil® is a go-to in my house for my son’s migraines, and it’s also good for other aches, pains, and fever for kids ages 2 to 11. There’s also Infants’ Advil® White Grape for children 6-23 months. (And if your kids are picky about how medicine tastes, and what kid isn’t, Children’s Advil® comes in several flavors, including: Sugar-free Dye-free Berry, Bubble Gum, Grape, Blue Raspberry, Fruit and Dye-Free White Grape flavors.)

Also pictured is Children’s Dimetapp® Multi-Symptom Cold Relief Dye-Free for stuffy and runny nose, while quieting a bothersome cough. It comes in grape flavor that’s dye-free, for children 6 and up. Next, for your child’s cough, there is Children’s Robitussin® Extended-Release 12 Hour Cough Relief to help relieve symptoms day or night. Available in grape or orange flavor, for children ages 4 and up. Please note, certain Children’s Robitussin® products are only suitable for children ages 6 and up.

Of course, ALWAYS remember to read and keep the cartons for complete warnings and dosing information on Pfizer Pediatric products and use as directed. If any questions regarding what product is right for your child, consult with your child’s pediatrician or pharmacist.

Hopefully, your interactions with the school nurse are limited, but show her (or him!) some love and nominate today! Again, this can be done at .

Easy Homemade Sunflower Butter & Nut-free Muddy Buddies

If you have a child with food allergies, or have them yourself, you know it can be tough. You have to monitor everything that goes into your or your child’s mouth. Reading labels becomes second nature, as does inquiring about ingredients at potlucks, family gatherings, parties, etc. It’s a full time job.

You read food labels like others read trashy novels. | 14 Things That Prove You Are A Peanut Allergy Mom

Now that my son is older (he will be seven soon!) *Side note: I started this blog when he was TWO! I can’t believe I’ve been doing it this long! He is very good about asking people “does it have nuts?” or asking me or his teacher if he can eat something. However, also now that he’s older, he realizes that he is different and that he can not participate in everything that goes on at school or eat everything the other kids eat. When a situation like that arises, he says “I wish I wasn’t allergic, and was like everyone else.” *Cue breaking heart* No mom wants her child to feel that way.

I hadn’t planned on getting into all that, I was just going to post these recipes! I’ve had this stewing in the back of my mind since his class did an activity that involved smearing peanut butter all over a pine cone and sticking birdseed to it, and my son had to leave the room! He felt so left out, but of course, I would rather he be out of harms way, but he was so sad about it. It was a parent who came in and did it, not the teachers, and I know the other parent was just trying to do something fun with the kids, but I really wanted to punch her in the face. (Just kidding. sorta.) If I had been made aware ahead of time, I could have made this quick and easy Sunflower Butter so that everyone could participate! Making it yourself is much cheaper than buying the SunButter Brand in the store.

We used the sunflower seed butter to make traditional Muddy Buddies, just subbing out peanut butter with the sunflower butter. It worked great, and tasted like “regular” Muddy Buddies…my oldest daughter thought I made them using less peanut butter, but didn’t realize they were peanut free. The sunflower seed butter has a milder flavor than peanut, but when used in recipes, it’s hard to tell the difference.
Homemade Sunflower Butter
 
2-4 cups roasted sunflower seeds (recipe will yield about half this amount once processed)
1/4-1/2 teaspoon salt (only if seeds are unsalted; add to taste. Start with a small amount, grind seeds, then add more as needed)
oil – as needed to thin to desired consistency, we used coconut oil, but you can use any you like. I didn’t add quite enough, so my butter is a little thicker than I would like. If spreading on bread, it would need to be a little thinner.
(optional) sweetener: this can be sugar, honey, agave, whatever you choose. We used about a teaspoon of honey.
  • Add ingredients to bowl of food processor and blend until smooth!


Nut-Free Muddy Buddies
9 cups Chex Cereal (we used a combo of Rice, Corn and Wheat Chex)
1 cup semi-sweet chocolate chips
1/2 cup Sunflower Butter (*see above; can also use peanut butter or any other peanut butter replacement.)
1/4 cup butter
1 teaspoon vanilla extract
1 1/2 cups powdered sugar
  • Place cereal in a large bowl
  • In a 1-quart microwavable bowl, heat chocolate chips, sunflower butter, and butter in microwave on High for 1 minute; stir. Microwave about 30 seconds more or until mixture can be stirred smooth. Add vanilla, stir to incorporate.
  • Pour chocolate mixture over cereal, and stir until cereal is coated.
  • Add 1/2 the powdered sugar to a gallon size baggie, and add to it half the cereal mixture. Shake until cereal is coated in powdered sugar. Pour contents of baggie onto a waxed line cookie sheet to completely cool. Repeat step with remaining sugar and cereal.
  • You can also add in sprinkles, candy, etc if desired. We made this for Valentine’s so we used some Red Velvet MM’s, leftover from these cookies!
(recipe from back of Chex Party Mix Variety Pack box)
If you like Muddy Buddies, you may also like this Brownie Biscoff version!
Any allergy moms out there? My son is allergic to peanuts and tree nuts. He outgrew his egg allergy when he was four…that was a happy day!

I may be linking up at any of the following – (Monday)  (Tuesday) , , (Wednesday)  (Thursday)  (Friday) ,,

Black Bean Brownies – Take 2

You’ve probably heard of making desserts with chickpeas, avocados and black beans. Have you tried any? I was on the chickpea train for a while, and now I’ve made black bean brownies for the second time. All of my avocados end up as guacamole, except that time I attempted to make chocolate pudding (you should read it, it’s comical), but I plan on giving it another shot (and follow a recipe this time). So anyway, I’m here to tell you, desserts can be made healthier AND still taste good. These brownies are a perfect example!

Fudge-y, chocolate-y, and no, they do not taste like beans at all. As a matter of fact, the only difference between black bean brownies and regular brownies is the texture. It’s not a bad texture, just a little different. They are moist without being too gooey and they are not crumbly.
This recipe came from the cookbook by Kelsey Kinser.
I was interested in reviewing the cookbook because my family definitely does not eat enough beans. Since beans are loaded with protein, vitamins, and minerals (and they are cheap!) I would love to incorporate more into our diets. Even if it is in brownie form!
I also want to try Kelsey’s Chickpea Cupcakes and plan on making the Crunchy Roasted Chickpeas very soon! Of course, if you are a more ‘traditional’ bean eater, there are salads, soups, burgers, etc. to choose from.
Black Bean Brownies from
(reprinted with permission)
 
Either you’ve heard of this recipe before and love it or you are scratching your head and thinking, “There is no way this is going to be good.” Trust me. It’s good. It’s really, really good. Also, this recipe benefits from the surprising bonus of being a gluten-free dessert option. So go ahead and try it. With about 5 to 10 minutes of actual active cooking time and a brief and inexpensive ingredient list (for which you probably already have everything already), you have nothing to lose and a delicious, fudgy, surprisingly guilt-free world to gain. Canned black beans are used in this recipe for convenience, and the point is to not taste that is made from beans so the quality of flavor is not as important, but feel free to substitute 2 cups of well-cooked black beans.
(Note: This recipe produces a more fudge-like brownie. If you prefer yours more on the cakelike side, double the amount of flax seeds and water.)
Serves 9 to 12
1 (15.5-ounce) can of black beans, rinsed and drained (or 2 cups of well-cooked black beans)
3 tablespoons vegetable oil (coconut oil can be used but will result in a slight coconut taste)
2 1/2 tablespoons of fresh ground flax seeds whisked into 3 tablespoon of warm water*
1⁄4 cup sugar
1/4 cup brown sugar
1⁄4 cup and 1 tablespoon cocoa powder (sifted if need be)
1 teaspoon baking powder
pinch salt
1 teaspoon vanilla extract
1 teaspoon coffee (optional but worth it; can be left over from the morning)
1 teaspoon cinnamon

walnuts or dairy-free chocolate or carob chips for topping (optional)
     *Blogger’s Note: if not vegan, can use an egg in the place of flax and water 
 
Preheat the oven to 350°F.
Using either a food processor or blender, combine all ingredients except for toppings. Blend well, stopping at least once to scrape down the sides of the blender carafe and blending again. You do not want any large chunks of beans in this batter. It should be very smooth.
Pour batter into 8- by 8-inch glass baking dish. *Blogger’s Note: I suggest spraying pan with cooking spray.
Bake on middle rack of oven for 20 to 25 minutes, or until a knife poked into the center comes out clean.
  
Cool for at least half an hour before cutting and serving. 
*I added chocolate chips to the tops after removing from oven
 
Do you have any “unconventional” desserts that you and your family enjoy? My kids have actually enjoyed my bean desserts, and considering how uber picky they are, that’s saying a lot! (If interested in checking them out. – Biscoff Cookie Dough Dip, Double Dark Chocolate Cookie Balls, Deep Dish Cookie Pie)
I was sent the above cookbook for review. No compensation was received, all opinions are my own.


This recipe was featured at:

I may be linking up at any of the following – (Monday)  (Tuesday) , ,,, (Wednesday) , (Thursday) , (Friday) ,,(Saturday) 

No-Bake Chocolate Pie

So…it’s the later part of January. How are those resolutions going? I know most of us are trying to get our healthy on, but it doesn’t stop our brain from telling us to EAT CHOCOLATE does it? I crave chocolate on a pretty regular basis, and have been pretty creative in coming up with ways to satisfy those cravings without using a days allowance of points. (Weight Watcher talk) This Chocolate Pie is a delicious way to satisfy cravings, without totally breaking the calorie bank.

This recipe came from Mr. Brown. Alton Brown that is. It was pretty awesome. You would never know the main ingredient was tofu. I was calling this ‘Special Ingredient Chocolate Pie‘…but then I saw the movie ‘The Help’ based on a comment a reader made. So, I decided a new name was in order!

No-Bake Chocolate Pie

1 bag (13 ounces) semisweet chocolate chips
1/3 cup coffee liqueur (store bought or )
1 teaspoon vanilla extract
1 pound silken tofu, drained
1 tablespoon honey
1 (9-inch) prepared chocolate wafer crust (I used chocolate graham cracker but Oreo would have been better!)

  • Place about an inch of water in the bottom of a 4-quart saucepan. Bring to a simmer over medium heat.
  • Melt the chocolate chips, coffee liqueur and vanilla in a medium metal bowl set over the simmering water, stirring frequently with a rubber or silicone spatula. 
  • Blend the tofu, melted chocolate and honey in a blender or food processor until smooth (about a minute)
  • Pour the filling into prepared pie crust and refrigerate for 2 hours, or until set. 

Source: Alton Brown’s


You will be amazed at how unhealthy this chocolate pie tastes. And I’m pretty sure no one will be able to guess the special ingredient!

If interested in other special ingredient desserts, you might want to check out my Biscoff Cookie Dough Dip, Deep Dish Cookie Pie, or Double Dark Chocolate Cookie Balls!

I may be linking up at any of the following – (Monday) , , , , , , , , , , (Tuesday) , , ,,, ,  and ,  ,  (Wednesday) , , , , , ,   (Thursday)  ,, , ,  (Friday) ,  , , , , ,, , , ,, , , ,, , (Saturday)  , , , 

Egg & Nut Free Holiday Treats – Round Up

The holidays are a little tough when you or someone in your family has food allergies. My son was diagnosed with egg, peanut and tree nut allergies at a very young age. He is now 5 and has outgrown the egg allergy, so things have gotten easier. However, this time of year, with food pretty much everywhere, I have to be diligent in monitoring what my son eats.

Here is a collection of things I have made in the past that are egg and nut free, and make tasty treats for everyone, food allergic or not! (Just click on the title and it will take you to the recipe) First up –

Chocolate Chocolate Chip Cookies
These were really good, and I don’t think anyone would realize they are egg free. You could also add some colorful sprinkles or candies on top to make them more festive.


Reindeer Mix, affectionately known by some as ‘White Trash’ Mix, is a sweet and salty combo that is always a hit. Whatever you call it, I call it good!


Oreo Truffles  Oreos, cream cheese and chocolate are all that makes up these delicious little treats.


Egg free gingerbread men Fun to decorate and have a good flavor too!


Faux Toffee‘ Sorry for the blurry pic, I will try to update this one very soon. The treat however…there is a reason it’s called Christmas Crack. So good, so addictive!


DIY Twix Bars with Biscoff  Ohmigosh…I absolutely love these tihings!


Egg free Sugar Cookies  This is a good egg free cookie recipe for cut out cookies. They are great for decorating with the kids and hold up well to cutting out and frosting.

Pretzel Turtles Super easy and yummy treat. You can tell we like the sweet and salty thing.


Old Fashioned Fudge  Fudge is my all time favorite Christmas treat. I only make it at Christmas, and you do need a candy thermometer for this one, but it is ohhhh so worth it! This one has nuts, but it is delicious without. I usually make a batch of both. This is the only “real” fudge in my book!


Rolo Brownies  An easy brownie recipe starting with a mix and using yogurt instead of eggs.


Monster Magic Bars  These are another holiday favorite, and no eggs or nuts needed to have one fabulous treat. OR this version –

Not Your Mama’s Magic Bars (just leave off the nuts)


No Peanut Butter Blossoms These are a delicious version of a Christmas classic using a peanut butter substitute. SunButter is my favorite, but SoyNut Butter is cheaper and easier to find around here. I’d like to try these using Biscoff one day too. Hmmm, sounds like a plan for later in the week!

NOTE: It is very important to always check your labels on all ingredients used when baking for someone with food allergies (even if you have checked them before, b/c sometimes manufacturers change things without warning!) You would be surprised how many “hidden” allergens can be in foods. Also, my advice is that if you are baking for someone else, and trying to be allergy friendly, it is still best to let that person or parent look at the labels of the products used. I have been really touched by the extra efforts some people have made to accommodate my son’s allergies, even though I always say – do whatever you have planned and I will make accommodations for him. Of course, I’ve also gotten pretty pissed off irritated at some people’s insensitivity or deliberate ignorance. But that’s a story for another day. Right now, let’s go
EAT DRINK AND BE MERRY 🙂 Safely!

I may be linking up at any of the following – (Monday) , , , , , , , , , , (Tuesday) , , ,,, ,  and ,  ,  (Wednesday) , , , , , ,   (Thursday)  ,, , ,  (Friday) ,  , , , , ,, , , ,, , , ,, , (Saturday)  , , , (Sunday) 

Peanut Butter Cookies {4 ingredients; GF; low carb option}

When I discover a recipe that allows me to make cookies by only messing up 1 bowl, 1 spoon and uses 4 ingredients…I’m so in. This is a great recipe for the kids to make for the same reasons – super easy, and not so messy! In fact, my kids made at least 3 batches of these cookies in one week! (One batch was included in the end of the year teacher gifts.)

You can make them with the traditional criss cross markings on top, which for whatever reason is my favorite.
You can make them as drop cookies or roll them into balls, AND you can add chocolate chips – if you want to make it 5 ingredients. Chocolate makes everything mo’betta.
You can also make these with regular peanut butter, natural peanut butter, or peanut butter replacements (WowButter, Sunflower butter). You can also make them with sugar substitutes, like Splenda, for a low carb, low sugar version. {and yes, I’m aware that some people are totally against Splenda. I personally prefer Stevia as a sugar sub, but Splenda seems to work better in baking. When you have a diabetic in your family, sugar substitutes are going to be a part of your life.}
We tried different versions, and the best texture comes from regular peanut butter and powdered sugar. The ones with Splenda were a little crumbly, with a slight artificial sweetener aftertaste, but were still good and a treat when you need something low in sugar and carbs. The ones with the natural peanut butter were also good, they are just a little greasier than when using regular peanut butter, but I always buy natural peanut butter (the no-stir kind with no hydrogenated oils), so this is how we will usually make them. When made with peanut butter replacements, they are going to taste like the replacement used, and depending on which one is used, they may be a little greasy or crumbly. I like the flavor of Sunbutter best (I have an easy homemade version here), but WowButter is cheaper and easier to find around here. *There are a couple of other cookies on the blog using PB replacements here and here*  These cookies are flourless, so they make a great snack for anyone who is following a gluten-free diet too! (Just make sure other ingredients used are gluten free.)
Peanut Butter Cookies
from
1 cup peanut butter
1 cup powdered sugar (or Splenda for sugar free)
1 egg
1 tsp vanilla extract
1/2 cup chocolate chips (optional)
Preheat oven to 375 degrees F. 
Line cookie sheet with parchment paper or silicone liner.
Add all of the ingredients to a medium size mixing bowl, and stir until combined and smooth.
Take about a tablespoon of dough and (1) roll in a ball, then use a fork to press down in one direction, then the opposite direction to make your criss cross markings on top OR (2) drop onto cookie sheet 2 inches apart and bake for 8-10 minutes. *The original recipe said 10, ours only needed 8-9 minutes*
Remove from oven and cool on cookie sheet for 5 minutes, then transfer to a wire rack to cool completely.
Have any low carb dessert recipes? I’d love to hear about them!
 
I may be linking up at any of the following – (Monday) , , , , , , , , , , ,  (Tuesday) , , ,,, ,  and , ,  ,  (Wednesday) , , , , , , ,   (Thursday)  ,, , , , (Friday) ,  , , , , ,, , , ,, , , ,, (Saturday) ,  , , ,  (Sunday) , , 

{egg free} Lemon Curd

I L-O-V-E me some lemon curd.  Creamy, sweet, tart, lemon-y deliciousness. Of course, as with most things I adore, it isn’t all that good for you. I have wanted to try an egg free version for a while, and I have to say, I was quite pleased with my first attempt at homemade lemon curd! I guess I should point out, this version isn’t healthy either, it’s just eggless. Oh well..can’t win them all.

Egg Free Lemon Curd

adapted from
1/2 cup unsweetened almond milk
1/4 cup heavy cream (can also use Half and Half creamer)
3/4 cup lemon juice (I used meyer lemons)
4 tablespoons cornstarch (Update: I now make this with 3 Tablespoons)
1/2 cup granulated sugar
1 teaspoon vanilla extract
lemon zest (from squeezed lemons *optional)

Zest lemons (about 3 large or 5 Meyers – depending on size), then juice.
Whisk together lemon juice, almond milk, cream, cornstarch, and sugar in a medium saucepan.
Continue to whisk while heating on high heat until mixture is hot, but not boiling.
Reduce heat to medium, and whisk until mixture thickens.
Once it has thickened, remove from heat and add vanilla and lemon zest.
Remove from saucepan immediately and allow to cool. Once cool, store in refrigerator in a sealed container.
I used some of mine to make these…Blueberry Muffins with Lemon Curd, which I have deemed the best muffins ever. I love, love, love them. 
The muffins pictured above were made with store bought lemon curd (with eggs)…you can see how it is much more yellow, but other than that, the flavor was very close.  The only thing about my homemade version, is once it was refrigerated, it got thick and pasty/lumpy looking. I am guessing due to all the cornstarch? But it still tasted delicious and when heated in the muffins, it was nice and smooth.  I will definitely be making my own lemon curd again!
I may be linking up at any of the following – (Monday) , , , , , , , , , ,  (Tuesday) , , , ,,, ,  and ,  (Wednesday) , , , , , , , Cherished Handmade Treasures,   (Thursday)  ,, , , , (Friday) ,  , , , , ,, , , ,, , , ,, (Saturday) ,  ,  (Sunday) 

Brownie Graduation Hats

For Mr. Three’s pre-school graduation party last week, I made little graduation hats. (I can’t believe my baby is going to Kindergarten in the Fall!)
 (You may have seen this pic on already.)  I got the idea from Pinterest (of course), but most used a Reese Cup as the base.  Mine needed to be peanut free, since my son and another classmate are allergic.  So, I decided on brownies, baked in a mini muffin pan. (You could buy pre-made brownie bites making these a quick, no-bake treat!)
 I thought they turned out pretty cute for my first attempt, and the kids & parents alike enjoyed them. {Yes, I was *that* mom who brought in something cutesy off Pinterest. But hey, sometimes I’m that “crap! I forgot to buy something for the party, let me grab some Little Debbie snacks” mom too. It’s called balance. Can’t be on top of my game all the time. lol}
Since these were for preschoolers, the mini brownies made the perfect size snack!
Brownie Graduation Hats
 
1 box brownie mix, plus ingredients on box
1 package chocolate covered graham cookies
candy for ‘tassels’*
mini M and M candies
melted chocolate for ‘gluing’ everything together
  • Mix brownies according to directions on package (or try this egg free, lower fat version!).
  • Bake brownies in a mini muffin pan until done (they will not take as long to bake as directed on package since they are minis. Do I really need to point that out? probably not)
  • Once cool, carefully cut rounded tops off brownies so they will sit flat (if needed)
  • Flip brownies over, so the widest side is down.
  • Use some melted chocolate to attach a graham cookie to the now upside down brownie.
  • Use more melted chocolate to attach candy tassels to top of cookie, and the mini M candy on top of tassel.
*The candy that I used for the tassels was some rope candy I had never seen before (and don’t remember the name of). It is similar to the pull-apart Twizzlers in shape. The problem I had with this candy is that it was kind of hard and round, and it was a little difficult to get the round rope pieces to sit on top of the cookie, and they were a little too big. I ended up cutting each rope piece in half (vertically), and then cut them to the desired length.  My recommendation, and what I will do in the future, is use something that is flat…like a fruit roll up, or maybe a flattened Tootsie roll? And cut it into strips. I think that would be much easier to work with.
Other tips: You could use cookie icing to “glue” your pieces together, b/c it hardens pretty quickly and comes in a handy little squeezable pouch. The only color I had on hand was red…so I ended up using melted chocolate. You don’t need that much…I might have used 1/4 cup?
I may be linking up at any of these places – 

(Monday) , , , , , , , , , ,  (Tuesday) , , , ,,, , ,  (Wednesday) , , , , , , , Cherished Handmade Treasures,   (Thursday)  ,, , , ,  (Friday) ,  , , , , ,, , , ,, , , , , (Saturday) ,  ,  (Sunday) 

 This post was featured at , , , , , and ! Thank you ladies!
   

Low Carb Pizza Crust (that you can pick up, hold and fold!)

I’m not a newbie to low carb, and I’ve experimented with different low carb pizza crusts before. There was the egg and cream cheese crust and a previous cauliflower pizza crust attempt. The cauliflower crust had potential, so I decided to give it another try after I saw ‘‘ by The Detoxinista.  The key, she said, was to really squeeze all the liquid from the cauliflower before mixing your other ingredients.  I gave it a try.

Tip: Make your crust thicker than you think you need bc it will flatten out quite a bit once cooked (because of the moisture drying out.)  Once you bake your crust, add toppings and bake a few more minutes.
We had a little meat lover’s action going on.
But check it out!  Low carb pizza that you can pick up, hold, and fold, just like regular pizza!  Pretty cool.
It is also pretty tasty.  The only thing I will do differently next time is to add more spices to the crust.  The cauliflower has a little natural sweetness to it once baked, so I think adding more spices would help.

 Cauliflower Pizza Crust 

adapted from  – my changes in italics
{makes 1 large crust}

4 cups raw cauliflower ‘rice’*
1 egg, beaten
1/3 cup mozzarella cheese
1 teaspoon dried oregano
1/2 teaspoon garlic powder
1/2 teaspoon basil
pinch of salt

*pulse cauliflower in a blender or food processor to achieve a rice-like consistency

  1. Preheat your oven to 400 F.
  2. Cook your cauliflower ‘rice’ by boiling about an inch of water in a large pot.  Add the cauliflower, and cover. Cook for about 4-5 minutes, then drain with a fine-mesh strainer.
  3. Place your drained cauliflower ‘rice’ on a clean, thin dishtowel. Wrap up the steamed rice in the dishtowel, twist it up, and squeeze all the water out! This is the key to having a crust that will hold together! Be careful, the cauliflower and water is hot, but squeeze it good (rubber gloves are handy for this step!)
  4. In a large bowl, mix your strained rice with the beaten egg, cheese, and spices. Mix well.
  5. Press the mixture onto a baking sheet lined with parchment paper or sprayed aluminum foil (mine still stuck to the foil a little, but not bad) into your desired pizza shape. Keep it about 1/3 to 1/2 inch in thickness.
  6. Bake crust for 35-40 mins in preheated oven. The crust should be firm and golden brown when done.
  7. Remove crust from oven and add toppings of choice.  I used pizza sauce, turkey pepperoni, turkey sausage, Canadian bacon, and real bacon bits, and cheese, of course!  Return the pizza to the oven, and bake an additional 5-10 minutes, until the cheese is hot and bubbly.
 **There are excellent step by step pics in the original post.
Verdict? Definitely the best low carb crust I’ve made so far, and I plan on making it again.
I am linking this recipe up at (Monday) , , , , , , , , , ,  (Tuesday) , , , , ,, (Wednesday) , , , , , , , ,  (Thursday)  ,, , ,  , , (Friday) ,  , , , , ,, , , , ,,  (Saturday) , ,  ,  (Sunday) 


Homemade Peanut Butter Eggs

Somehow, Easter is right around the corner.  Like, this weekend around the corner! Things have been quite hectic around here.  Between volleyball for my 2 girls, and a nasty virus/strep going around the house, things have been out of sorts.  Everything was kind of on hold last week, b/c my 4 y/o was sick, and when you have a little one that is sick (high fever, headache, feeling miserable) he/she only wants their mommy!  Thankfully, towards the end of the week, he started feeling better.  Just in time for dentists appointments and Number One’s 12th birthday!  Yikes…I have a child that is almost a teenager!! (and the tween years are proving to be challenging as well.)  So, I feel stretched a little thin right now.  So much to catch up on, and so much to do this week.  BUT, I definitely wanted to share these homemade peanut butter eggs asap!
Homemade better-than-Reese’s Peanut Butter Eggs!!
I kid you not, these things are SO.GOOD.  And better yet, they are EASY.  Except for the whole dipping in chocolate thing.  I really suck at that.  Ever since the allergy doctor told me that I had a false positive on my peanut allergy test…I’ve been a little peanut butter obsessed.  (He said that adults can NOT develop a peanut allergy, but you can to all other nuts. I’ve been testing the theory out, and I have had no problems eating peanut butter.  I may need stretchier pants due to peanut butter cup consumption, but no rash, itching or hives!)  So…enough rambling, on with the copycat recipe!  I’ve played around with ingredients and combos, and this is my favorite ratio.

Homemade Peanut Butter Eggs

1/2 cup peanut butter* (your favorite brand, but I don’t recommend the kind that has to be stirred)
1/2 cup powdered sugar
1/4 cup finely ground graham cracker crumbs (I ground my own in a food processor)
a good pinch of salt (this amount will vary depending on your preference, and peanut butter used. Start with a small pinch, mix, taste, and add more if needed.)
chocolate chips (about a cup)
coconut oil/butter/criscoif needed to thin out chocolate, I used about a teaspoon of coconut oil
*I think these would still be delicious with Sunbutter or WowButter if you need to avoid nuts.  They won’t taste exactly the same, but still good! I made a version with soynut butter that was quickly devoured.
  • Add all ingredients into a bowl and mix, mix, mix.  It’s thick and difficult to incorporate, but keep at it and it will come together.  Or, use a mixer/food processor. I didn’t try this, since I was working with a fairly small quantity.  However, it only makes a few, so feel free to double the recipe. I wish I had!
  • After mixing the ingredients together, form into ‘egg’ shapes, place on wax paper, and place in freezer to get nice and firm.  I didn’t time this, but maybe 20-30 minutes?  While the eggs are in the freezer, melt your chocolate (and oil/butter if needed) in a microwave safe bowl.  (Place in microwave for 1 minute, stir well, continue heating in 30 second intervals until completely melted)
  • When chocolate is melted, remove peanut butter eggs from freezer. Dip peanut butter into chocolate, one at a time, to coat.  When peanut butter is completely covered in chocolate, place on wax paper to cool and harden.  If the peanut butter starts to soften too much, put back in freezer.
Other than me not being much of a chocolatier, these were pretty easy to make, and they tasted great.  My girls and I loved them, and I just had to compare them to a real Reese egg, and I have to say, I thought mine were better!  I think it’s because the homemade version had more filling and a thicker layer of chocolate.  I also used a semi-sweet chocolate instead of milk.  YUM.
This made about 6 good size eggs…but I also did some taste testing of the filling 😉  Research people. Research!
I am linking this recipe up at (Monday) , , , ,, , , , , , , ,  (Tuesday) , , , , , ,, ,  (Wednesday) , , , , , , , ,  (Thursday) , , ,  , , (Friday) ,  , , , , ,, , , , ,, , (Saturday) , ,  , ,  (Sunday) ;
This recipe was featured at