Loaded Cauliflower Casserole

For those of you watching your carb intake, cauliflower can be used as a decent substitute for potatoes in some dishes. I say ‘decent’ because I don’t really like cauliflower but have been successful (and sometimes not so successful) in using it in the place of potatoes for a low carb side dish and my favorite way to eat it….as pizza crust!

Loaded Cauliflower Casserole

For Thanksgiving, I knew my low-carbing, diabetic husband would have a lack of options for sides, since he would not be eating the awesome stuffing, or the potatoes. (I think we had rice too!) So I made this cauliflower casserole and included lots of cheese-y goodness, and bacon. Because we know bacon makes everything mo’betta.

Cauliflower Casserole

Did it taste like a loaded baked potato? No. It tasted like cooked cauliflower with cheese and bacon. However, it wasn’t bad for us non-cauliflower people and it was down right tasty to those who like it (aka my mom. The only one out of the 10 of us.) But, it gave my husband a low carb option, so my job was done.

[amd-zlrecipe-recipe:12]

Thanksgiving plate

This. This is how you do Thanksgiving. And this (in conjunction with cookies, fudge and egg nog) is why I need to be at the gym right now.

I may be linking up at any of the following – (Monday) , ,  (Tuesday) ,, ,  (Wednesday) , , ,  (Thursday) , ,  (Friday) , , , ,, , , , 

Low Carb Cheesecake (with optional Blueberry Topping)

For those of you following a low carb diet, or have ever tried following a low carb diet, you know how hard it can be to satisfy those cravings for something sweet. I have attempted to low carb it many times, each time failing miserably! My husband however, has been eating low carb for years now to help control his diabetes. This cheesecake is one of his favorite indulgences, minus the blueberry topping…he prefers his plain.

Low Carb Cheesecake

3 (8 ounce) packages Cream Cheese, softened (I usually use 2 ‘regular’ cream cheese and 1 reduced fat)
 
3 eggs, room temperature
 
3/4 cup Splenda (or artificial sweetener of choice. I’ve had good luck with xylitol, but haven’t used it for this yet.)
 
1 tablespoon lemon juice
1 tablespoon vanilla extract
  • Preheat oven to 300 degrees F.
  • Lightly spray pie plate with cooking spray.
  • Mix together cream cheese, Splenda, lemon juice and vanilla until well blended.
  • On low speed, add eggs, one at a time, mixing until just blended after each one.
  • Pour mixture into pie plate, bake 45 minutes or until center is almost set (but still slightly jiggly)
  • Cool, add fresh fruit or fruit topping if desired (see below for blueberry topping)
Recipe adapted from
Blueberry Topping
2 cups fresh or frozen blueberries
1 Tablespoon desired sweetener (less if berries are very sweet)
1 Tablespoon water
Heat on medium high heat until berries are bursting and sauce begins to thicken. Reduce heat and let simmer to desired thickness, stirring occasionally. Cool slightly and add to top of cheesecake.
This is a crustless cheesecake, but you could always add a low carb almond crust.
Anyone out there low carbing it? How’s it going? What’s your favorite low sugar treat?
I may be linking up at any of the following – (Monday) ,  (Tuesday) , , (Wednesday)  (Thursday)  (Friday) ,, ,

Cream Cheese Chicken Enchiladas

If you want to make a good meal better, add cream cheese. It makes baked spaghetti creamy and fabulous, turns regular crock-pot beef into something my family will actually eat, and it transformed chicken enchiladas from something my kids wouldn’t touch into a meal they want on a regular basis. I think this would be the perfect meal for Cinco de Mayo! Followed by Margarita Cake for dessert:-)

Unfortunately, my pics are terrible. We have the worst artificial lighting in our house and it was one of those super gray, dreary days when I made these. But, y’all know I’m no fancy pants food blogger. Just keepin’ it real. Hey, at least I didn’t use paper plates.

It’s been pretty well established here how picky my kids are. None of the three will eat enchiladas because of the red sauce. When a friend mentioned she was making chicken enchiladas with a white sauce, I thought ‘hmmm…that just might work’. The girls love Alfredo sauce, so I thought they might give this a try. They also love the white cheese dip you can get a Mexican restaurants. Once they tried these, they loved it and requested I make it on a regular basis. Super picky Mr. Three had a tortilla filled with cheese only, but he liked the sauce too.

Oh yeah, and no “cream of” anything. Just good ol’ fattening ingredients like cream cheese, butter and flour tortillas. I used low-carb tortillas, making these pretty low carb overall, which is good for the diabetic hubby.

Cream Cheese Chicken Enchiladas

6-10 flour tortillas (depending on size you choose) I use low-carb
2 cups chicken, cooked and shredded (crock-pot is great for this)

1 (8 ounce) package of cream cheese; divided (reduced fat is ok)

2 cups Mexican Blend or preferred cheese, shredded; divided
salt and pepper, to taste
3 tablespoons butter
3 tablespoons flour
2 cups chicken broth
1 (4 ounce) can diced green chillies

  • Preheat oven to 350 degrees F. Lightly spray a 9 x 13 baking dish with cooking spray.
  • In a mixing bowl, stir together your chicken, 3 ounces of the cream cheese (my package was marked, but if yours is not, just a little less than half the brick is fine), and one cup of cheese. Season with salt and pepper. *I recommend going light on the salt because broth is full of sodium and you may have salt in the butter as well.
  • Divide chicken mixture evenly among tortillas and roll them up. Place seam side down in prepared baking dish.
  • In a sauce pan, over medium heat, melt butter. Add flour and cook one minute while stirring. Whisk in broth until smooth, and heat until mixture is thick and bubbly.
  • Add remaining cream cheese and stir until melted.
  • Stir in green chilies. Remove from heat and pour over chicken enchiladas.
  • Top with remaining cheese and bake for approx. 20-25 minutes or until cheese is melted and mixture is bubbling around the sides. (If desired, place under broiler for a few minutes to brown the cheese…I skipped this part as we were hungry!)
  • Let cool for a few minutes for sauce to thicken.
Recipe adapted from
I may be linking up at any of the following – (Monday)  (Tuesday) , , (Wednesday)  (Thursday)  (Friday) ,, ,

B-Up Bars – Product Review (#lowcarb #highprotein #cleantreat)

This is a sponsored post from Yup Brands and Blog Meets Brand. All opinions are my own (or that of my hubby).

This is a product that I was excited to review since my husband is diabetic and follows a low carb diet to help control his blood sugars. It is so hard to find tasty snack options that are not full of junk because let’s be honest, snacking on vegetables gets old. It’s nice to have some other low carb snack options that he can enjoy on the go and satisfy that sweet tooth. Not to mention, I like to have high protein/low sugar bars to keep in my gym bag for post-workout snacks. (Protein helps build lean muscle and the more muscle you have, the more your metabolism increases. Since my metabolism slowed down to a slugs pace after age 35, it’s important for me to incorporate weight lifting in with my cardio.) I also need to lay off the chips, but that’s a different post all together!

A huge issue I have with most low carb bars is the amount of sugar alcohols in them. Sugar alcohols are those sweeteners that come with a warning about causing GI distress if you consume to much. Uhmmm, no thank you. I also only like to use sweeteners from natural sources, like stevia and xylitol. I am really trying to limit our intake of aspartame and sucralose.

So, my “dream bar” would be high in protein, low in carbohydrates, low in sugar/sugar alcohols/artificial sweeteners…in other words – no junk! Well, guess what? are a dream come true! They are all those things plus high in fiber, low in sodium and they taste good! (Not that weird “protein-y” funky taste, but actually taste good.) My husband, who is super picky (sorry honey, but it’s true!) really enjoyed the bars and tried to take them all for himself. The bars have a nougat type texture/consistency, and come in several flavors. (Peanut Butter, PB and J, Chocolate Mint, Sugar Cookie, Cinnamon Roll, and Vanilla Peanut)

 *As a matter of fact, you can sign up to receive a 6-pack trial of the bars  to give each flavor a try. ALSO, readers can save 12% on box orders by entering code yup29 at checkout.*

So, bottom line… have 20 grams protein and 18-20 grams fiber, with only 2-3 grams of sugar and only 4-5 grams of net carbs. AND, they have no artificial flavors, sweeteners, or preservatives, are low in sodium and gluten free. If I had not tried them for myself, I would not even believe it! If you would like to learn more about the products above and this awesome company, check them out on , and . I, for one, am very glad to have some healthier pre-packaged options for my diabetic hubs and for me too! I also love the company’s tag line…Be Healthy. Be Better. B-Up. (UP stands for Unlimited Potential!)

 
Anyone else lead a low carb lifestyle? What about that mid-life metabolism? Can anyone else relate or is it just me?!

Low Carb Cinnamon Crunchies

If you are following a low carb diet, you know how difficult it can be to satisfy that sweet tooth sometimes. Several years ago, a co-worker told me about these cinnamon snacks and I’ve been making them ever since. When I tell you the ingredients, you may think I’m a little nuts, but seriously, they are good! (I can’t say they are good for you, but there is a lot of debate about low carb diets and the amount of fat in them.)

These are similar to the cinnamon twists from Taco Bell. Can you figure out the main ingredient from the picture? Pork rinds! Yep, I’m not kidding…

Low Carb Cinnamon Crunchies

  • 1 bag plain pork rinds (full size bag, not snack size)
  • 4 T. butter, melted
  • 1 T. cinnamon
  • 1-2 tsp. sweetener of choice (I prefer to use stevia)
Place pork rinds in a gallon size ziploc bag. Pour melted butter over pork rinds. Close bag and shake until pork rinds are coated in butter. Mix together cinnamon and sweetener, sprinkle over pork rinds, shake bag again until pork rinds are coated in cinnamon mixture. Store in air-tight container.
You can also place the coated pork rinds on a baking sheet and heat for a few minutes to make them warm and extra crispy. You can also do this if they start to get soft and they will crisp up again. Ours usually don’t last long enough! You may need to play with the cinnamon-sweetener ratios to get your desired flavor. Check out my Pinterest Board for more recipes and ideas!

Peanut Butter Cookies {4 ingredients; GF; low carb option}

When I discover a recipe that allows me to make cookies by only messing up 1 bowl, 1 spoon and uses 4 ingredients…I’m so in. This is a great recipe for the kids to make for the same reasons – super easy, and not so messy! In fact, my kids made at least 3 batches of these cookies in one week! (One batch was included in the end of the year teacher gifts.)

You can make them with the traditional criss cross markings on top, which for whatever reason is my favorite.
You can make them as drop cookies or roll them into balls, AND you can add chocolate chips – if you want to make it 5 ingredients. Chocolate makes everything mo’betta.
You can also make these with regular peanut butter, natural peanut butter, or peanut butter replacements (WowButter, Sunflower butter). You can also make them with sugar substitutes, like Splenda, for a low carb, low sugar version. {and yes, I’m aware that some people are totally against Splenda. I personally prefer Stevia as a sugar sub, but Splenda seems to work better in baking. When you have a diabetic in your family, sugar substitutes are going to be a part of your life.}
We tried different versions, and the best texture comes from regular peanut butter and powdered sugar. The ones with Splenda were a little crumbly, with a slight artificial sweetener aftertaste, but were still good and a treat when you need something low in sugar and carbs. The ones with the natural peanut butter were also good, they are just a little greasier than when using regular peanut butter, but I always buy natural peanut butter (the no-stir kind with no hydrogenated oils), so this is how we will usually make them. When made with peanut butter replacements, they are going to taste like the replacement used, and depending on which one is used, they may be a little greasy or crumbly. I like the flavor of Sunbutter best (I have an easy homemade version here), but WowButter is cheaper and easier to find around here. *There are a couple of other cookies on the blog using PB replacements here and here*  These cookies are flourless, so they make a great snack for anyone who is following a gluten-free diet too! (Just make sure other ingredients used are gluten free.)
Peanut Butter Cookies
from
1 cup peanut butter
1 cup powdered sugar (or Splenda for sugar free)
1 egg
1 tsp vanilla extract
1/2 cup chocolate chips (optional)
Preheat oven to 375 degrees F. 
Line cookie sheet with parchment paper or silicone liner.
Add all of the ingredients to a medium size mixing bowl, and stir until combined and smooth.
Take about a tablespoon of dough and (1) roll in a ball, then use a fork to press down in one direction, then the opposite direction to make your criss cross markings on top OR (2) drop onto cookie sheet 2 inches apart and bake for 8-10 minutes. *The original recipe said 10, ours only needed 8-9 minutes*
Remove from oven and cool on cookie sheet for 5 minutes, then transfer to a wire rack to cool completely.
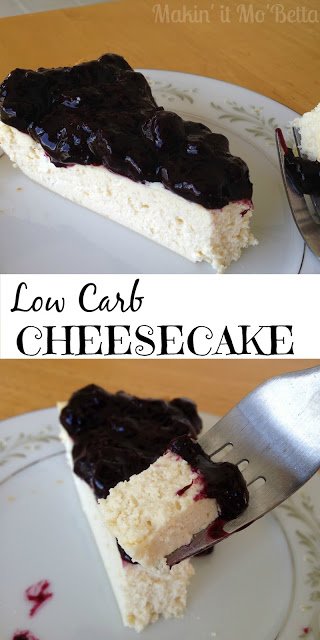
Have any low carb dessert recipes? I’d love to hear about them!
 
I may be linking up at any of the following – (Monday) , , , , , , , , , , ,  (Tuesday) , , ,,, ,  and , ,  ,  (Wednesday) , , , , , , ,   (Thursday)  ,, , , , (Friday) ,  , , , , ,, , , ,, , , ,, (Saturday) ,  , , ,  (Sunday) , , 

Low Carb Pizza Crust (that you can pick up, hold and fold!)

I’m not a newbie to low carb, and I’ve experimented with different low carb pizza crusts before. There was the egg and cream cheese crust and a previous cauliflower pizza crust attempt. The cauliflower crust had potential, so I decided to give it another try after I saw ‘‘ by The Detoxinista.  The key, she said, was to really squeeze all the liquid from the cauliflower before mixing your other ingredients.  I gave it a try.

Tip: Make your crust thicker than you think you need bc it will flatten out quite a bit once cooked (because of the moisture drying out.)  Once you bake your crust, add toppings and bake a few more minutes.
We had a little meat lover’s action going on.
But check it out!  Low carb pizza that you can pick up, hold, and fold, just like regular pizza!  Pretty cool.
It is also pretty tasty.  The only thing I will do differently next time is to add more spices to the crust.  The cauliflower has a little natural sweetness to it once baked, so I think adding more spices would help.

 Cauliflower Pizza Crust 

adapted from  – my changes in italics
{makes 1 large crust}

4 cups raw cauliflower ‘rice’*
1 egg, beaten
1/3 cup mozzarella cheese
1 teaspoon dried oregano
1/2 teaspoon garlic powder
1/2 teaspoon basil
pinch of salt

*pulse cauliflower in a blender or food processor to achieve a rice-like consistency

  1. Preheat your oven to 400 F.
  2. Cook your cauliflower ‘rice’ by boiling about an inch of water in a large pot.  Add the cauliflower, and cover. Cook for about 4-5 minutes, then drain with a fine-mesh strainer.
  3. Place your drained cauliflower ‘rice’ on a clean, thin dishtowel. Wrap up the steamed rice in the dishtowel, twist it up, and squeeze all the water out! This is the key to having a crust that will hold together! Be careful, the cauliflower and water is hot, but squeeze it good (rubber gloves are handy for this step!)
  4. In a large bowl, mix your strained rice with the beaten egg, cheese, and spices. Mix well.
  5. Press the mixture onto a baking sheet lined with parchment paper or sprayed aluminum foil (mine still stuck to the foil a little, but not bad) into your desired pizza shape. Keep it about 1/3 to 1/2 inch in thickness.
  6. Bake crust for 35-40 mins in preheated oven. The crust should be firm and golden brown when done.
  7. Remove crust from oven and add toppings of choice.  I used pizza sauce, turkey pepperoni, turkey sausage, Canadian bacon, and real bacon bits, and cheese, of course!  Return the pizza to the oven, and bake an additional 5-10 minutes, until the cheese is hot and bubbly.
 **There are excellent step by step pics in the original post.
Verdict? Definitely the best low carb crust I’ve made so far, and I plan on making it again.
I am linking this recipe up at (Monday) , , , , , , , , , ,  (Tuesday) , , , , ,, (Wednesday) , , , , , , , ,  (Thursday)  ,, , ,  , , (Friday) ,  , , , , ,, , , , ,,  (Saturday) , ,  ,  (Sunday)