Meat Lover’s Pizza Dip

So, I heard there’s a big football game coming up pretty soon. And y’all know me, any excuse to make & eat party food. This pizza dip would be great for a Super Bowl party (or any party), for after school snacking, or you can go crazy and eat it for dinner (which is exactly what my husband did one night recently.) It can be a low-carb alternative to traditional pizza, depending on what you eat it with.

Meat Lovers Pizza Dip

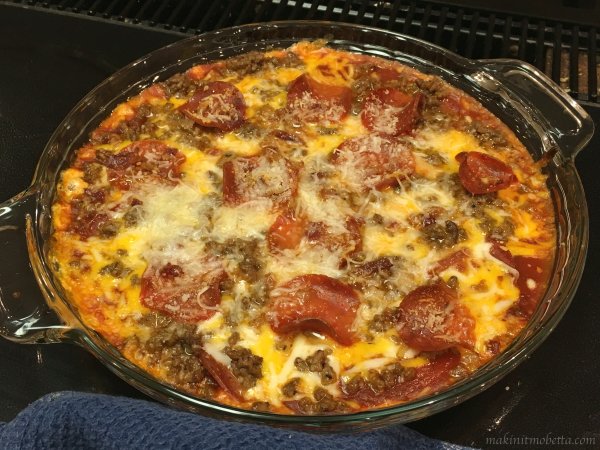
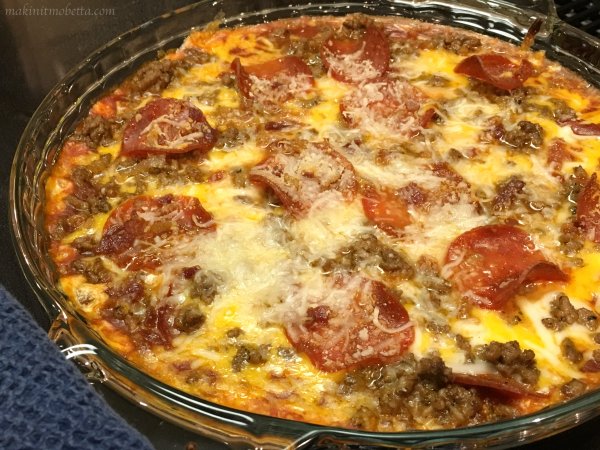
You can also add whatever pizza toppings you like. I made this a ‘Meat Lover’s’ version, full of (turkey) pepperoni, seasoned ground beef, and bacon. Sausage and Canadian Bacon would have been good too.

Meatza Pizza Dip

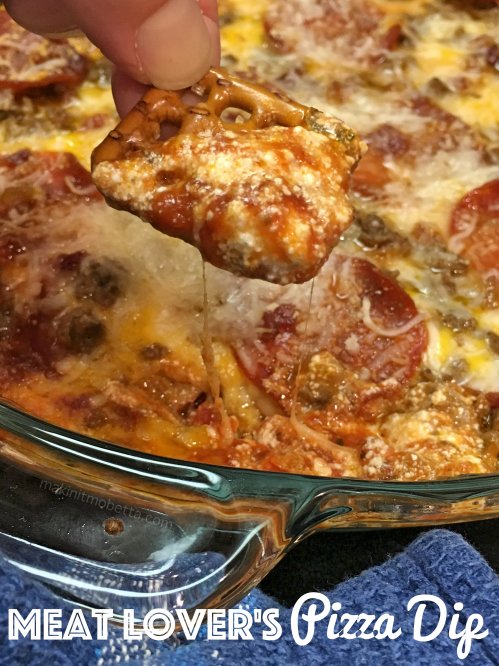
This is a cheesy, creamy dip, that is good with tortilla chips, corn chips, pita chips, toasted French bread, bread sticks, and the list goes on. I wasn’t a big fan of the pretzels used in the above pic however. They turned a little soft & I didn’t like the texture. Of course, the dip is also good eaten with a spoon!

Pizza Dip

I used: 

1 lb ground turkey sausage

1 jar No sugar added Ragu Light Spaghetti Sauce (with lots of added oregano!) – feel free to use your favorite pizza or pasta sauce

 1 cup shredded cheddar cheese

2 cups shredded mozzarella cheese

1/2 cup shredded parmesan cheese

turkey pepperoni – to taste

1/2 small diced onion

**These cheese quantities are estimates.  My crowd likes LOTS of cheese, so you can adjust it to suit your fancy.  I mean taste buds.  You can also add mushrooms, peppers, whatever your family likes on a pizza.  I’ve also made this with eggs mixed in with the meat to form a ‘base’ …more like a traditional pizza. However, since Mr. Three is allergic to eggs, I can’t do that anymore.

DIRECTIONS:

Cook your ground turkey and onion together, drain if needed.  Place a little sauce on the bottom of your casserole dish (I used a 9×13), dump your turkey/onion on top, add the rest of your sauce, top with cheese, place pepperoni on top.  Bake until golden brown and bubbly.

Recipe adapted from  and my Pizza Casserole

As you can see, the amounts and ingredients are very versatile. Anything you like on pizza will probably work well in this dip. Feel free to add more or less meat, cheese, and spices.

Will you be watching the Super Bowl? Thought about what food you will be serving? That is the most important part, right?
I may be linking up at any of the following – (Monday) , , ,  (Tuesday) ,, ,  (Wednesday) , , ,  (Thursday) , ,  (Friday) , , , ,, , , ,  (Sunday)

Easy Homemade Sunflower Butter & Nut-free Muddy Buddies

If you have a child with food allergies, or have them yourself, you know it can be tough. You have to monitor everything that goes into your or your child’s mouth. Reading labels becomes second nature, as does inquiring about ingredients at potlucks, family gatherings, parties, etc. It’s a full time job.

You read food labels like others read trashy novels. | 14 Things That Prove You Are A Peanut Allergy Mom

Now that my son is older (he will be seven soon!) *Side note: I started this blog when he was TWO! I can’t believe I’ve been doing it this long! He is very good about asking people “does it have nuts?” or asking me or his teacher if he can eat something. However, also now that he’s older, he realizes that he is different and that he can not participate in everything that goes on at school or eat everything the other kids eat. When a situation like that arises, he says “I wish I wasn’t allergic, and was like everyone else.” *Cue breaking heart* No mom wants her child to feel that way.

I hadn’t planned on getting into all that, I was just going to post these recipes! I’ve had this stewing in the back of my mind since his class did an activity that involved smearing peanut butter all over a pine cone and sticking birdseed to it, and my son had to leave the room! He felt so left out, but of course, I would rather he be out of harms way, but he was so sad about it. It was a parent who came in and did it, not the teachers, and I know the other parent was just trying to do something fun with the kids, but I really wanted to punch her in the face. (Just kidding. sorta.) If I had been made aware ahead of time, I could have made this quick and easy Sunflower Butter so that everyone could participate! Making it yourself is much cheaper than buying the SunButter Brand in the store.

We used the sunflower seed butter to make traditional Muddy Buddies, just subbing out peanut butter with the sunflower butter. It worked great, and tasted like “regular” Muddy Buddies…my oldest daughter thought I made them using less peanut butter, but didn’t realize they were peanut free. The sunflower seed butter has a milder flavor than peanut, but when used in recipes, it’s hard to tell the difference.
Homemade Sunflower Butter
 
2-4 cups roasted sunflower seeds (recipe will yield about half this amount once processed)
1/4-1/2 teaspoon salt (only if seeds are unsalted; add to taste. Start with a small amount, grind seeds, then add more as needed)
oil – as needed to thin to desired consistency, we used coconut oil, but you can use any you like. I didn’t add quite enough, so my butter is a little thicker than I would like. If spreading on bread, it would need to be a little thinner.
(optional) sweetener: this can be sugar, honey, agave, whatever you choose. We used about a teaspoon of honey.
  • Add ingredients to bowl of food processor and blend until smooth!


Nut-Free Muddy Buddies
9 cups Chex Cereal (we used a combo of Rice, Corn and Wheat Chex)
1 cup semi-sweet chocolate chips
1/2 cup Sunflower Butter (*see above; can also use peanut butter or any other peanut butter replacement.)
1/4 cup butter
1 teaspoon vanilla extract
1 1/2 cups powdered sugar
  • Place cereal in a large bowl
  • In a 1-quart microwavable bowl, heat chocolate chips, sunflower butter, and butter in microwave on High for 1 minute; stir. Microwave about 30 seconds more or until mixture can be stirred smooth. Add vanilla, stir to incorporate.
  • Pour chocolate mixture over cereal, and stir until cereal is coated.
  • Add 1/2 the powdered sugar to a gallon size baggie, and add to it half the cereal mixture. Shake until cereal is coated in powdered sugar. Pour contents of baggie onto a waxed line cookie sheet to completely cool. Repeat step with remaining sugar and cereal.
  • You can also add in sprinkles, candy, etc if desired. We made this for Valentine’s so we used some Red Velvet MM’s, leftover from these cookies!
(recipe from back of Chex Party Mix Variety Pack box)
If you like Muddy Buddies, you may also like this Brownie Biscoff version!
Any allergy moms out there? My son is allergic to peanuts and tree nuts. He outgrew his egg allergy when he was four…that was a happy day!

I may be linking up at any of the following – (Monday)  (Tuesday) , , (Wednesday)  (Thursday)  (Friday) ,,

Football Party Food

I’m the first to admit that I know nothing about football. However, I’m all about some party food. Even though I will not be having a party…it’s a school night, ya know…I will be fixing up some yummy snacks so we can gather around the TV and watch the Super Bowl (mainly the commercials and .) So, if anyone is still working on their menu, here are a few ideas –

 
Queso Dip {2-ingredients}
Meatball Sliders (also see 3-Ingredient Meatballs made in the crockpot)
Pork BBQ {Crockpot}
Pizza Puffs (these are good at room temp too)
And *some* of you may be interested in this bright GREEN punch….
Obviously, minus the rubber duckies 😉
And for that sweet tooth
~or~
For my low carb or diabetic friends…
So, is football your thing? Will you be watching or grazing the food table like me?

Queso Dip { 2 ingredients!} #QuesoForAll #sponsored

This post brought to you by . The content and opinions expressed below are that of Makin’ it Mo’Betta.

Two ingredients? I’m in. I love quick and easy, and when it tastes good AND a majority of my house will eat…it’s a total win.

Therefore, Queso Dip made with RO*TEL and VELVEETA was a winner in my house! This would be great for “the big game” (don’t ask me to talk football, but I can talk football food all day long) or any social gathering. I made it recently for my daughter’s birthday party.

I blend my RO*TEL with an immersion blender so that the dip is smooth…because my kids will not eat chunks of tomato *insert eye roll*.

Either way it’s flavorful, creamy, and spicy (but not too spicy!). 

Queso Dip 

(from the back of the RO*TEL can)

  • 16 ounces VELVEETA
  • 1 (10 ounce) can RO*TEL (you could use Mild, Original, or Hot)

Melt VELVEETA in a sauce pan over medium heat with can of undrained RO*TEL until cheese is melted and sauce is heated through. Use immersion blender to blend until smooth if desired. (You could also run the tomatoes through a regular blender and then add to cheese.) 

Queso Dip is awesome served with tortilla chips, but we also enjoyed it over nachos.

Pile tortilla chips with Queso Dip and whatever else you like!

YUMGet more Queso recipe ideas at , as well as,  and .

What’s on your Super Bowl menu? Inquiring minds want to know!

Baked Shrimp Won Ton Cups & other (healthier) Appies! {#Nasoya #Sponsored}

This post is sponsored by Nasoya. All opinions are 100% my own.

Well, somehow Christmas is OVER. As I say every year, I have no idea how it came and went so fast. It doesn’t matter that I started listening to Christmas music in November and *gasp* had my tree up BEFORE Thanksgiving. Yep, I sure did…doesn’t matter however, because Christmas still came and went too fast.

Oh yeah, and 4 weeks before Christmas…Number One got sick. Three weeks before Christmas, Mr. Three got sick. Two weeks before Christmas, Miss Two got sick. And guess what happened ONE week before Christmas? You guessed it…mama got sick. So, that is why my last blog post was December 16. *insert sad face* I have all this cool Christmas stuff to share too…and who wants to read about that now? It’s New Year’s Eve. Party time! Then it’s ohmigahhh….resolution time. Time to give up everything we indulged in over the past month. *insert crying sad face*.

Luckily, I have something that will make the transition from indulgent eating to healthy eating virtually painless. It’s also party ready, fun, cute, portioned controlled, low fat. low in Weight Watchers points…no, I’m not talking about air. These actually taste great and are portable! Great for New Year’s, football, appetizers, or if you are like me, can make a meal out of them. They are Baked Shrimp WonTon Cups. They are quick and easy to prepare too. You can make the filling with whatever veggies and quantities you like. I’m just going to give what I use, and you can play with the recipe to make them your own.

Baked Shrimp Won Ton Cups

Filling:
1 bag Cole Slaw Mix (or you can shred your own cabbage and carrots)
3-4 green onions, chopped (I usually use whatever onion I have on hand, green/red/yellow)
1/4 – 1/2 cup celery, finely chopped (just depends on how much you like celery!)
1-2 cloves of garlic, minced
1 bag frozen small shrimp, thawed and cut in half or thirds (can also use chicken/beef/pork)
2 Tablespoons soy sauce (I prefer tamari)
1/2-1 tablespoon hoisin sauce (Hoisin is strong and sweet. I use it if I have it, but it’s not mandatory)
salt and pepper, (to taste)
1 tablespoon olive oil


  • Preheat oven to 375 degrees.
  • Place won tons in a mini muffin pan, one won ton per muffin cup. (Just push them down in the cup, there will be some overlapping). Set aside.
  • In a skillet over medium heat, heat tablespoon of olive oil. Add onions and celery. Heat until onions begin to soften. Add garlic, heat a minute or two until fragrant.
  • Add bag of cole slaw mix, soy sauce, hoisin sauce and salt and pepper. Carefully stir (my skillet is always very full until cabbage begins to wilt.)
  • Add thawed shrimp, stir frequently until shrimp is pink. Once shrimp is done and cabbage is softened, remove from heat.
  • Place a tablespoon of mixture into the won ton cup. Bake won tons approximately 5-7 minutes, until lightly browned and crisp.
  • Remove cups from oven and place on serving tray. Top with cilantro and drizzle with Ponzu Sauce if desired.

*Feel free to add any veggies and seasonings you like. My only recommendation is watch the amount of liquid produced (some veggies leach a lot of water out). You want as little liquid as possible in your wrappers because it will cause them to fall apart.

This is the same filling I use for egg rolls too. I love baked egg rolls, which is odd, because I do not like fried egg rolls, and we all know everything is usually better fried. To make the baked egg rolls, use the same filling, put a few tablespoons of filling in an (fold them better than I do!), place on a baking sheet, spray both sides with olive oil or cooking spray. Bake about 10 minutes per side. They are healthy and delicious!

My kids love these Baked Mozzarella Sticks. They are so easy, as it is just a mozzarella cheese stick (“string” cheese) wrapped in an egg roll wrapper and baked. Spraying both sides with olive oil or cooking spray just like with the egg rolls. They can be dipped in marinara or pizza sauce too.

Since my kids love Baked Cheese Sticks, I knew they would like Baked Cheese Cups too. I was right! Just add cheese to your won ton cups and bake until the cheese is melted and won tons are brown and crisp. You could serve these along side a sauce as well. So much healthier than frying and I love the little cups for a party or as an appetizer. You could add anything really…any dip can be placed in a won ton cup and suddenly becomes portable! Tonight I am making Buffalo Chicken Dip in won ton cups…it will make it so easy to eat! You can also bake the shells then add things like chicken salad or pimento cheese…the possibilities are endless. It makes me want to put pretty much everything in a won ton cup. What can I say, I love party food.

Happy New Year’s Eve as my little one said first thing this morning! I’d love to hear what’s on your menu for tonight. Or tomorrow…I haven’t fully decided what I’m cooking for New Year’s Day yet…but I’m pretty sure it won’t be black eyed peas!

I may be linking up at any of the following – (Monday)  (Tuesday) , ,, (Wednesday) , (Thursday) , (Friday) ,,(Saturday) 

3 ingredient Meatballs & other time-saving Holiday Hacks (#sponsored)

This is a sponsored post written by me on behalf of . All opinions are 100% mine.

The Christmas countdown is ON in the Mo’Betta house! I have a 6 year old that is literally counting down the days, and his excitement is contagious. (Let’s just hope the cold he had last week is not. ‘Tis the season.) I’m sure we all have some favorite recipes for the holidays, some being more labor intensive than others (can you say old-fashioned fudge?!), but we all need a few quick and easy ones lined up that will feed a crowd, yet be delicious. I thought I would share a few that have served me well over the years. These little ‘holiday hacks’ get me out of the kitchen, and able to spend more time with my friends and family.

These 3-ingredient meatballs have been around for years. They make an appearance around the holidays, as well as baby showers, bridal showers, you name it. I got the recipe from one of my uncles many years ago, and I’m surprised it has not made the blog before now. The ingredient list seems a little odd, but it works! I always have people asking for the recipe…and it’s SO easy! 

3-ingredient Meatballs

  1. 2 lbs. frozen meatballs
  2. 1 bottle (12 ounces) chili sauce 
  3. 1 bottle (12-15 ounces) grape jelly

*These can be prepared on the stove top, or in a slow cooker. The slow cooker is also great for keeping them warm during a party or get-together. Amounts can also be adjusted based on the number of people you are feeding. 

Add meatballs to crock-pot aka slow cooker. Mix together the chili sauce and grape jelly, then pour over meatballs. Heat through on high for 3-4 hours, stirring occasionally, then turn heat to low or ‘warm’ setting for serving.

I’ve seen many variations of this recipe so feel free to play with it…you can use barbecue sauce in the place of chili sauce; you can use cranberry sauce in the place of grape jelly; you can use turkey meatballs instead of beef, which I do often.  makes original and turkey meatballs that are also gluten free. They look like this:

but you can use the  to find them near you. Before heading out, I would go  coupon! Another quick and easy meal is to heat up your meatballs, and add them to slider buns with a little pizza sauce and mozzarella cheese. Stick them in the oven to melt the cheese…

In addition to frozen meatballs, you can save yourself a lot of time by stocking the freezer with other snacks that can easily be heated and served like Farm Rich Mozzarella Sticks, Loaded Potato Skins, Pepperoni Pizzeria Bites, Toasted Ravioli, and Breaded Mushrooms. My girls and I LOVE Loaded Potato Skins. Top with a little sour cream (or plain yogurt) and green onion and you are good to go. 

Sausage Balls are another family favorite, and to save time, I mix up a batch early in the season, roll into balls, and freeze. Then when company comes or we want sausage balls, I can pop them in the oven straight from the freezer. 

What about a breakfast timesaver?

These Oven Baked Pancakes can serve a crowd quickly with all the great comforting taste of pancakes, without all the standing and flipping over a griddle. Or this Make Ahead Breakfast Casserole that can be made up the night before and just baked when ready in the morning.

And of course, if you know me, you know that I will definitely have plenty of sweets…our favorites being a sweet and salty combo…

This Chocolate Lover’s Snack Mix can be whipped up fast and easy, using basically whatever is in your pantry. Also, these little gems…

These easy Turtle treats can be made in minutes. 

So, these are a few of my ‘Holiday Hacks’…feel free to share yours!

You can find more recipe ideas by following Farm Rich on . (They are also on , , and )

Chocolate Peppermint Cookies, Santa’s Snack Mix & ‘Twas…Before Christmas!

This is a sponsored post written by me on behalf of . All opinions are 100% mine.

‘Twas the days before Christmas when all through the store, the moms were all busy buying more, moRE, MORE!! When what to my wondering eyes should appear, but a display full of Christmas candy that I raced to get near! Red ones, greens, big ones and small….I just knew I had to have them all, aLL, ALL!
They had dark chocolate, pretzel, and mini’s too…and when I saw M&M;’S® White Chocolate Peppermint I thought it was too good to be true!

So I grabbed them all up and raced towards the door, I had cookies to bake and egg nog to pour! I would take cookies to neighbors so they wouldn’t be sad, but just then I spotted Holiday Storage products by GLAD!
These would be perfect for the cookies I bake, making it easy and convenient for the goodies I take. I grabbed a few and checked out with a swipe of my card, got home and searched Pinterest long and hard. 

Found the perfect recipe, it was out of sight! And when the cookies were all done I exclaimed “Happy Christmas to all…and to all a goodnight!”

Triple Chocolate Peppermint Cookies

1 1/2 cup all-purpose flour
1/2 cup unsweetened cocoa (I used 1/4 cup Hershey’s Special Dark and 1/4 cup regular Hershey’s cocoa)
3/4 teaspoon baking soda
1/2 teaspoon salt
2 tablespoons instant coffee crystals
1/2 cup butter, slightly softened
1 1/2 cup sugar
2 eggs
1 teaspoon vanilla
1 cup White Chocolate Peppermint M&M;’s ()
1 cup semi-sweet chocolate chips (I used the red and green holiday ones)

  • Whisk together flour, cocoa, baking soda, salt, and coffee crystals together in a medium sized mixing bowl.
  • In a separate bowl, cream together butter and sugar until well mixed, add vanilla.
  • Slowly add in flour mixture to the butter/sugar (I say slowly since I use my stand mixer and everything will be covered in a flour cloud if you pour it all in too quickly). Batter will be thick.
  • Fold in candy and chocolate chips.
  • Chill in refrigerator for 30 mins.
  • Preheat oven to 350 degrees. Line a baking sheet with a silicone mat or parchment paper.
  • After dough has chilled, scoop about a tablespoon of dough and roll into a ball.
  • Place on cookie sheet approx. 2 inches apart.
  • Bake for 9-10 minutes. (The inside will seem slightly underdone.)
  • Allow to cool on wire rack and then consume several. Or package in your Holiday Glad containers and get them over to the neighbors ASAP!

Recipe Source:

Not only are the Glad Holiday Storage containers great for gifting, they also include recipes on the back! Each recipe will fit in the container it comes with. Of course, I just had to try out the Santa’s Snack Mix. The sweet and salty combo is always a favorite around here.

How yummy does that look?!

Santa’s Snack Mix from Glad

  • 8-10 cups Popped popcorn
  • 2-3 cups Holiday shaped pretzels
  • 1 cup red and green Holiday sprinkles
  • 1 package DOVE® Dark Chocolate candies *I used white chocolate drizzle 
  • 2 cups Peanuts *I omitted due to my son’s peanut allergies and used Cheerios instead
  • 3/4 c. Corn syrup
  • 1 tsp. Vanilla extract
  • 1 1/2 c. Sugar
  • 1/2 c. Butter (1 stick)
  • 1 package M&M;’S® Holiday Baking Mini’s and/or M&M;’S® Holiday Mint candies
1. Preheat oven to 325 degrees.
2. In a bowl combine the popcorn, pretzels, and peanuts Cheerios. Set aside.
3. In a small saucepan, melt butter, vanilla, sugar, and corn syrup over low heat until melted and smooth, stirring constantly.
4. Pour over the ingredients in the bowl. Toss until all covered.
5. Spread the popcorn mix on a baking tray or cake pan (may want to use two pans). Bake for 15 minutes. Remove from oven and sprinkle with 1/2 cup Holiday sprinkles, stir. Sprinkle with M&M;’S ® candies, stir again.
6. Place DOVE® chocolates (or white chocolate) in a small microwave safe bowl. Heat for 30 seconds and stir. Repeat until melted and smooth. Drizzle over the popcorn. Sprinkle with remaining sprinkles. Let cool approximately 10-20 minutes (may put in refrigerator so chocolate hardens more quickly. Once cool, break into chunks.
Tip: Store in a perfectly sized GLAD® storage container for up to 7 days.
Perfect 🙂
M&M;’S® White Chocolate Peppermint and Glad Holiday Storage products are ONLY available at Target. Just another reason for me to love them so!
 

Homemade Hummus, Lunchbox ideas & Mason Jar Salads Cookbook Review

I’m a Southern girl, and I’ll admit, we do love our mason jars! But for something that was mainly used for canning (and moonshine!), mason jars are seen everywhere and used for everything nowadays. Just hit up Pinterest and you will see what I mean. What many have come to realize, and we Southern women have known for decades *grin*, is that glass mason jars are great for storing things…especially food because you don’t have to worry about any weird chemicals leaching out. Making salads ahead of time and storing them in the fridge for a weeks worth of healthy lunches/dinners has been all the rage recently, and everyone I’ve seen is stored in a mason jar. So, when given the opportunity to review the cookbook  by Julia Mirabella,  I was more than eager to check it out, as were my Pinterest loving daughters.

First I have to say that the photography in this book is AMAZING. Almost every recipe comes with a gorgeous color photo. The other thing that I loved about the book is it is not just salads in a mason jar, even though everyone in it looks delicious. It gave me ideas on storing other foods, and lunchbox ideas!! This is huge since I have 3 kids who all carry their lunches to school almost everyday. That’s a lot of lunches in a year, and ideas run out quick. So, when my 11 year old saw the Spicy Hummus and vegetables recipe, she asked could she make it and take it for her lunch. Absolutely! I was pleased that we had everything to make it, and she was able to do it almost entirely by herself. I loved the way the homemade hummus and veggies were packaged in a small mason jar. It is such a handy and unique way to carry hummus to school. AND it’s healthy, homemade, and my daughter loved it! I’m thinking I could send my dessert hummus to school for snack the same way….maybe stick apple slices in it?

Spicy Hummus and Vegetables

reprinted with permission from Mason Jar Salads and More
There’s no better midday snack than veggies with hummus — and the great thing about this snack is that you don’t need separate containers for the dip and the vegetables. All you have to do is plant your veggies upright in the dip, close the Mason jar, and voilà, you have something to see you through the afternoon at work.
Makes 4 servings
1 (15-ounce) can chickpeas, rinsed and drained
5 to 6 tablespoons olive oil, as needed
1 clove garlic, roughly chopped
3 tablespoons tahini
1⁄2 teaspoon salt
1⁄2 teaspoon black pepper
6 tablespoons lemon juice
1 teaspoon red pepper flakes
celery and carrots, for dipping
4 half-pint Mason jars
  •  Place the chickpeas in the bowl of a food processor along with 5 tablespoons of the olive oil. Add the garlic, tahini, salt, pepper, lemon juice, and red pepper flakes. Process to blend the ingredients together. If needed to achieve the desired smooth consistency, add another tablespoon of olive oil.
  • Cut the celery and carrots into strips that will fit into the Mason jar with the top closed. Scoop 1⁄2 cup of hummus into the bottom of the jar and then set the vegetable strips upright in the hummus. Seal the jar and refrigerate until ready to use.

This is just one of many recipes that I have bookmarked. Next on my list is a Blueberry Vinaigrette that sounds amazing, along with a Citrus-Soy Vinaigrette, I want to make ahead some salads for my own lunches as well. The Orzo Pasta Salad, the Cobb Salad, and the Asian Greens Salad all sound really good. I also want to get back to my overnight oats, which I always prepare in a mason jar. There are several smoothie recipes in the book as well. So, if you are part of the mason jar (my kids taught me this word) then you should enjoy this cookbook!

   I may be linking up at any of the following – (Monday)  (Tuesday) , ,, (Wednesday) , (Thursday) , (Friday) ,,(Saturday) 

Last Minute Halloween Treats

I pretty much do everything last minute. So…everything I do has to be quick and easy. If you are like me and really don’t have things planned out for this little holiday weekend we have coming up, or you just need another idea or two, here are a few Halloween treats I have done in the past…

Halloween Chicago Mix – I’m a huge fan of the sweet and salty combo.


Pumpkin Spice Chex Mix

Halloween Muddy Buddies

Halloween Candy Bark

Soft Batch Double Fudge Brownie Cookies or you could add Halloween candy or chocolate chips to my favorite chocolate chip cookie base

Cereal treats with fun sprinkles and/or candy mixed in – these are Rolo Cereal Treats with Brownie Mix


Homemade Caramel Apples – a little more labor intensive, but the kids love to decorate them.

Exhibit A

And I made all this for my son’s preschool Halloween party a couple of years ago (except for the pumpkin veggie tray). There isn’t a link for them, but the are pretty self explanatory – the gift bags have tags made out of foam sheets (from the dollar store). I traced cookie cutters and cut them out. Upper right – Popcorn Hand: plastic glove filled with popcorn with candy corn at the finger tips, Below that are Lollipop Ghosts: Tootsie Pops wrapped in a white napkin, tied with ribbon and ‘googly’ eyes stuck on (they had adhesive backs, but could be glued as well; the ‘witches hats‘ are fudge striped cookies (upside down) with Hershey Kisses on top (held on with melted chocolate) and decorated with green cookie icing, Pumpkin veggie tray – broccoli, carrots, cucumbers with dip for “eyes”; Cookie Spiders: Oreos with green apple twizzlers as ‘legs’ and mini green MandM candies for eyes.

And these are one of my favorite creations ever…the recipe for the cookie wasn’t that good, so I’m going to try to find another one that works. You need something that will not rise or spread a lot, like a shortbread recipe. I added green food coloring to the dough, shaped them, and decorated as creepy as possible. The kids wouldn’t eat them the year I made these! The fingernails (sliced almonds) are held on with strawberry jam, which gets oozy and gross while cooking. They are so awesome to look at…now to work on making them taste good 🙂 {They weren’t bad, just really bland.}

So that’s it. I’ll be taking my crew to a friend’s house to trick-or-treat and I plan on bringing chips and Restaurant Style Salsa; a variation of one of the above snack mixes, and if time permits. the creepy finger cookies! Oh, and an adult beverage or six, Ha! Have fun and be safe.

White Chocolate Popcorn {Party Favors}

Having your guests have a little something to take home at the end of a party is a fun thing to do. I, of course, like for it to be something edible. Everyone likes food right? If they are friends with me, the answer to that is yes. Because seriously, who wants to hang out with someone who doesn’t like to eat? Don’t answer that. You people out there who just “forget to eat”…I have issues with you. I’m kidding. Sort of. 

For my sister’s baby shower, I made white chocolate popcorn with pink, green, and white M&M candies.
It looked cute bagged up, and it tastes good. We placed a framed sign on the table with the favors that said ‘Ready to pop’. My cousin made it and it was very cute (it was also done in pink and green), but somehow I didn’t get a picture. That’s the downside to hosting a party, it’s hard to get as many pics!
The popcorn was tied with pink and white curling ribbon and I found little strollers, pacifiers and baby blocks at a dollar store (The Dollar Tree), so we tied those to each bag. It’s similar to the Birthday Cake Batter Popcorn party favors I did for my daughter’s 10th bday party.

White Chocolate Candy Popcorn

*The amounts are going to vary depending on how much you want to make. We made 25 favor bags, and I am guessing it was about 2 cups per bag, maybe a little more. The recipe is for one ‘batch’ and I doubled it.
 
12 cups popped popcorn (1/2 cup unpopped kernels)
1 (24 oz) package of white almond bark or white chocolate chips, melted
*sea salt (optional)
desired candy or sprinkles
  • In a large bowl, pour the melted chocolate or almond bark over the prepared popcorn.
  • Stir to mix.
  • Spread chocolate covered popcorn out on wax paper.
  • *Sprinkle with sea salt if desired (this is not needed if using salted microwave popcorn. I used plain popcorn from my air popper) You can also skip the salt all together, but I like the sweet-salty combo.
  • Add candy to popcorn BEFORE CHOCOLATE HARDENS. Lightly press candy down onto the popcorn. (You can mix the candy in with the chocolate, but then it gets covered in white chocolate so it’s not as pretty. I like to add it on the tops, you just have to work quickly before the chocolate hardens.)
  • Once chocolate/bark is set, break apart and place in bags.
This simple recipe can be adapted to pretty much any party or theme. Just change up the candy used, add sprinkles, etc. I don’t recommend making it more than 24 hours in advance because the chocolate coating causes the popcorn to get soft…it’s still good however!
If looking for a good party punch, you can check out this post.
If looking for more baby shower ideas, you can check out my .
I may be linking up at any of the following – (Monday)  (Tuesday) , ,,, (Wednesday) , (Thursday) , (Friday) ,,(Saturday)