Wine Jelly

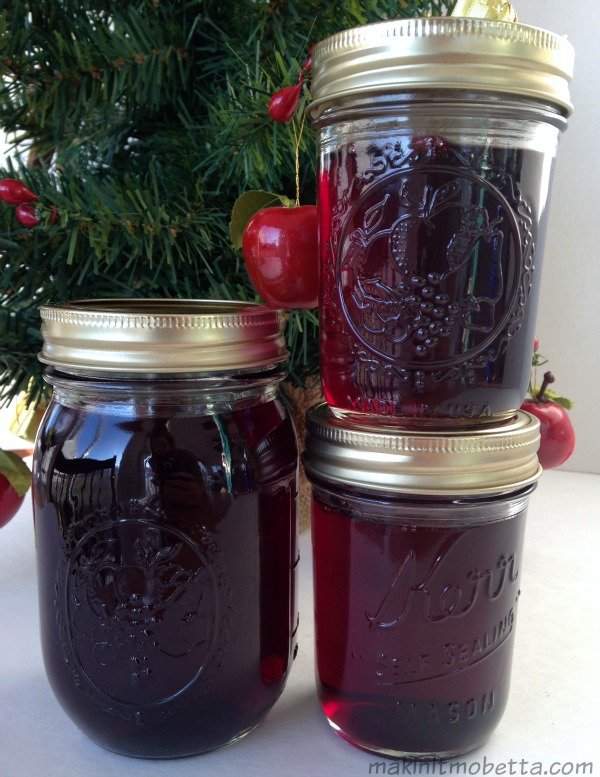
This wine jelly is perfect for the holidays. Or any day in my opinion. It can be served at brunch with croissants, etc. or it can be served over cream cheese with crackers for a nice appetizer.

wine jelly

It’s relatively easy to make and you can use red or white wine. Another plus is that you can use cheap wine, no need to use anything expensive. So, cheap and easy. The way I like it. *ahem* I’m talking about recipes of course.

[amd-zlrecipe-recipe:2]

Recipe Source:

This makes a nice gift for the holidays, and I loved the flavor. I look forward to making it again, experimenting with different wines.

This post was featured at:

Feature 300x300

I may be linking up at any of the following – (Monday) , , , ,  (Tuesday) ,, ,  (Wednesday) , , , ,  (Thursday) , ,  (Friday) , , , ,, , , , 

Pumpkin Mesh Wreath

First, YAY!! This is my first “official” post on my new site! And WOW…what a pain in the rumpkus (is that a word?) the Blogger to WordPress move has been. THANK GOODNESS for . Without them, this site would still be sitting here blank I’m afraid. I will spare you all of the details, but it has definitely been one thing after another. Oh, and did I mention that I happened to have surgery AND my computer crashed during all of this as well? Ha! Fun times. Not! Moving on…

Pumpkin Wreath

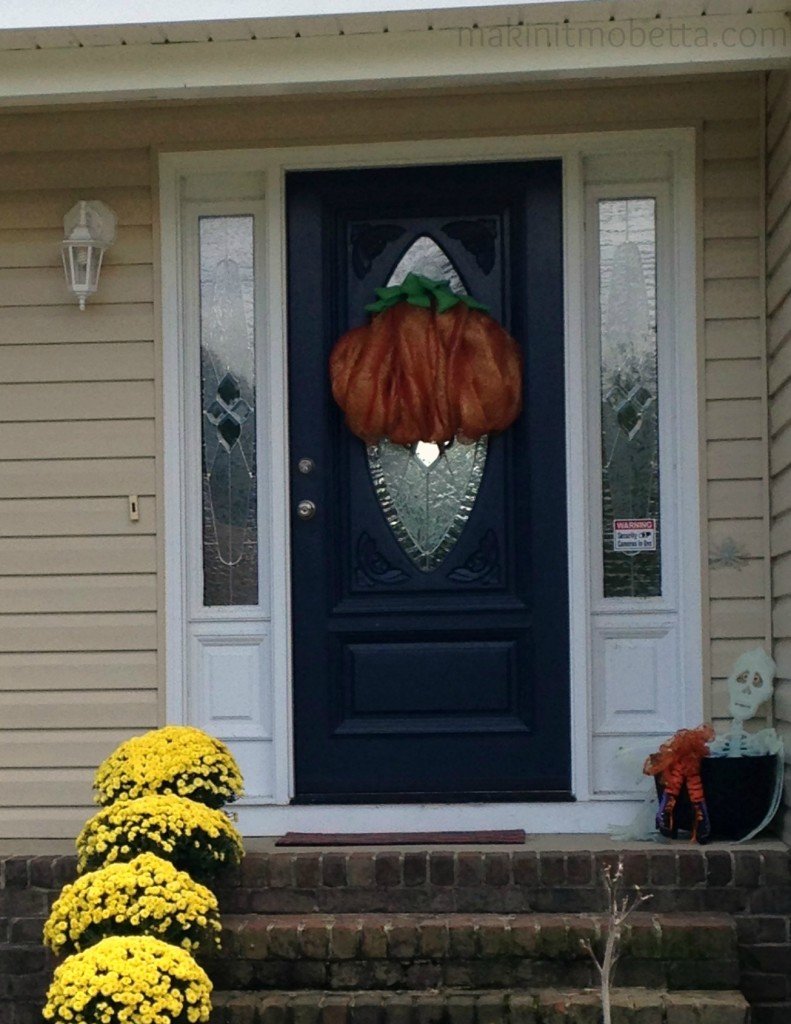
This Pumpkin Mesh Wreath is festive, (I think it’s cute), cheap, and super easy to make. I don’t do a lot of Fall decorating, but I usually have a Fall wreath, a couple of garden flags, mums, and pumpkins. Our weather has been so wacky, that my mums are already mostly dead (or lack of water could have caused that. Go figure.)

Since I’m a visual person, I’m going to show each step in pictures. I will explain the best I can, but it’s really easy.

Wreath Supplies

Step One: Supplies

  • One wire wreath (I bought mine at Walmart, I think it was $5)
  • Pipe cleaners (ideally in orange, but I already had these from another wreath. $1 from Dollar Tree)
  • long roll of mesh ribbon (This was from Walmart or Sam’s Club, also around $5)
  • ribbon for the top of pumpkin (I used green burlap – $1 from Dollar Tree. See Step 3)

How to begin

Step Two: Making Body of Wreath

  • Place six pipe cleaners at the top and six at the bottom of  the wreath form. If you look at it as a clock, place the first one at 10:00, the last one at 2:00, and put the other four randomly in between for the top. (You can adjust to exactly where you need them as you go along.) The bottom ones can go between 4 and 8:00.
  • Start at the top “10:00” pipe cleaner, attaching the end of your wire mesh. Pull the mesh down and attach at 8:00 as pictured above (is this clock reference getting old, or is it just me?!).

Body of wreath

  • Repeat the up and down pattern with the mesh until the wire wreath form is covered. If you want it fuller/thicker, just add more pipe cleaners to hold in place. Once the wire is covered, you can adjust/fluff wreath to get the look you want.

Final step

Step 3: ‘Stem’ of Pumpkin

  • I used the above pictured burlap ribbon. However, I think a wired ribbon would look better, and give the “stem” some shape and hold. The burlap kind of just lays there.
  • There is no technique for the stem…I just attached it to the top in and up and down pattern, using the ends of the pipe cleaners that were already in place holding the mesh.

And that’s it! I spent $12 and technically I already had the wreath form and pipe cleaners. You can remove the mesh and add something different for Christmas, or you can save the pumpkin to use next year. It’s nothing fancy, and I may tweak it here or there, but overall, I think it’s cute.

I never thought I would like the mesh wreaths, but somehow they grew on me. How about you? What kind of decorations do you have for Fall? Any Blogger to WordPress nightmares you’d like to share?!

This post has been featured at:


I may be linking up at any of the following – (Monday) , , , ,  (Tuesday) ,, ,  (Wednesday) , , ,  (Thursday) ,  (Friday) , , , , ,  

Congrats! It’s a….watermelon? {Watermelon Baby Carriage} #babyshower ideas

Last summer, I helped throw my sister a baby shower. It was so much fun, and I did a post sharing the punch recipe and the party favors. My plan was to share a bunch of other things…and per usual, life got in the way. Well, better late than never right?!

One of my favorite things was this watermelon baby carriage. I was so proud of myself for actually pulling it off! Granted, there are much more intricate ones online, but I love my creepy grapefruit baby and it’s simple watermelon carriage. It looks cute on the food table, and it can be used for a boy or girl, and with pretty much any theme!
This was our food table, with a side table to the far right (not pictured) with meatballs, and we had some candy that matched our color scheme (pink/green/white) sitting around throughout.
Since we had the shower in the summer, watermelon was in season, as well as most of the other fruits used, which was a money saver. You can use any combination of fruits you like or have available.

Watermelon Baby Carriage

  • 1 watermelon (any size, and make it easy on yourself and get a seedless one!)
  • 1 grapefruit, size will depend on the size of the watermelon. It’s going to become the baby’s head, so think about how much space you want it to take up. Note: You can also use an orange, if you need something smaller than a grapefruit
  • 1 pink or blue pacifier
  • grapes/blueberries or other small fruit to make “eyes” and “nose”
  • toothpicks
  • assorted fruit to fill “carriage”, again the amounts will depend on the size of the watermelon.
To prepare-
  1. Place watermelon on a flat surface (on top of newspaper or towels to catch the juice). If needed, cut a small slice of rind off the bottom to help it sit flat.
  2. Use a marker (or visualize) a line down the middle of the watermelon horizontally. Vertically, you will draw a line that is not quite centered…at about 1/3 or a little more of the watermelon.  Using a sharp knife, cut from the top vertical line, down to the center horizontal line. This is easier than it sounds…just take a look at a pic and cut accordingly. (I didn’t measure anything, and I just freehanded my lines. No perfectionism here! If your lines aren’t perfectly straight, it’s okay. If needed, you can go back and neaten/trim them up.)
  3. After you have cut out the top quarter of the watermelon, scoop out all the fruit. I used a melon baller, so my pieces looked nice and were ready to add back into the watermelon.
  4. Add some of the watermelon and assorted fruit to the bottom and back of the watermelon. Add whole grapefruit in center. Place fruit around grapefruit until “carriage” is full.
  5. Use 2 pieces of fruit to make eyes – I used a grape, cut in half. Place toothpick into grapefruit, where you want the eyes to go…leave enough of the toothpick sticking out to secure the eyes in place. Do the same for the nose…I used a blueberry for this. Make a small slit in the grapefruit for the mouth. Insert pacifier.
Congrats! You have a watermelon baby. This is just a basic one, if you have creativity and artistic ability, you can get as fancy as you want. I’ve seen some with scalloped edges, a handle for the carriage, wheels, etc.
This post was featured at:
I may be linking up at any of the following – (Monday)  (Tuesday) , , (Wednesday)  (Thursday)  (Friday) ,, ,

Candy Bouquet {Dollar Tree DIY}

Since I’ve been MIA from the blog, I wanted to give you all a special gift. Like a bouquet of flowers maybe? Flowers are nice….but a candy bouquet is even better!
This is something I very quickly and easily put together from supplies found at my local Dollar Tree store. It would make a great “little something extra” for that special teacher (end-of-the-year is near!), graduations, birthdays or let the kids put one together for Father’s Day (June 21st!)
This one has a ‘base’ made of my oldest daughter’s favorite candy…Swedish Fish, but any “movie theater” box of candies will work. Then I added various candy, suckers, fun straws, and a balloon in the center. On the balloon, I put her name, using stick-on letters and her jersey # since this was for a sports thing (8th grade recognition night for Volleyball). The Skittles and gum packets were taped to lollipop sticks.
To make…you need 4 boxes of candy, the same size. Then you need one foam block, usually found with floral supplies, like this one…
Photo from
It doesn’t really matter what size, as long as the boxes of candy fit around it. You can also trim the blocks down if too tall.
  • Place the boxes of candy around the foam block, using duct tape, packaging tape, or glue to keep the boxes stable and adhered to block. Next, add your candy. If using suckers/lollipops, stick them evenly into and around the foam block, like you would flowers! Then, fill in spaces with other candy (attached to lollipop/cake pop sticks) or use straws or anything else you would like. Get creative! Now you have your own bouquet to share…
At least she was supposed to share…
I may be linking up at any of the following – (Monday)  (Tuesday) , , (Wednesday)  (Thursday)  (Friday) ,, ,

Fun Graduation Treats

Whether you are celebrating high school, college, or Kindergarten graduations soon, these fun graduation treats will make any age graduate feel extra special. We will be celebrating 1st, 6th and 8th grade graduations so I will have an excuse to make them as well! (As an added bonus, they are no-bake treats!)

Easy Homemade Sunflower Butter & Nut-free Muddy Buddies

If you have a child with food allergies, or have them yourself, you know it can be tough. You have to monitor everything that goes into your or your child’s mouth. Reading labels becomes second nature, as does inquiring about ingredients at potlucks, family gatherings, parties, etc. It’s a full time job.

You read food labels like others read trashy novels. | 14 Things That Prove You Are A Peanut Allergy Mom

Now that my son is older (he will be seven soon!) *Side note: I started this blog when he was TWO! I can’t believe I’ve been doing it this long! He is very good about asking people “does it have nuts?” or asking me or his teacher if he can eat something. However, also now that he’s older, he realizes that he is different and that he can not participate in everything that goes on at school or eat everything the other kids eat. When a situation like that arises, he says “I wish I wasn’t allergic, and was like everyone else.” *Cue breaking heart* No mom wants her child to feel that way.

I hadn’t planned on getting into all that, I was just going to post these recipes! I’ve had this stewing in the back of my mind since his class did an activity that involved smearing peanut butter all over a pine cone and sticking birdseed to it, and my son had to leave the room! He felt so left out, but of course, I would rather he be out of harms way, but he was so sad about it. It was a parent who came in and did it, not the teachers, and I know the other parent was just trying to do something fun with the kids, but I really wanted to punch her in the face. (Just kidding. sorta.) If I had been made aware ahead of time, I could have made this quick and easy Sunflower Butter so that everyone could participate! Making it yourself is much cheaper than buying the SunButter Brand in the store.

We used the sunflower seed butter to make traditional Muddy Buddies, just subbing out peanut butter with the sunflower butter. It worked great, and tasted like “regular” Muddy Buddies…my oldest daughter thought I made them using less peanut butter, but didn’t realize they were peanut free. The sunflower seed butter has a milder flavor than peanut, but when used in recipes, it’s hard to tell the difference.
Homemade Sunflower Butter
 
2-4 cups roasted sunflower seeds (recipe will yield about half this amount once processed)
1/4-1/2 teaspoon salt (only if seeds are unsalted; add to taste. Start with a small amount, grind seeds, then add more as needed)
oil – as needed to thin to desired consistency, we used coconut oil, but you can use any you like. I didn’t add quite enough, so my butter is a little thicker than I would like. If spreading on bread, it would need to be a little thinner.
(optional) sweetener: this can be sugar, honey, agave, whatever you choose. We used about a teaspoon of honey.
  • Add ingredients to bowl of food processor and blend until smooth!


Nut-Free Muddy Buddies
9 cups Chex Cereal (we used a combo of Rice, Corn and Wheat Chex)
1 cup semi-sweet chocolate chips
1/2 cup Sunflower Butter (*see above; can also use peanut butter or any other peanut butter replacement.)
1/4 cup butter
1 teaspoon vanilla extract
1 1/2 cups powdered sugar
  • Place cereal in a large bowl
  • In a 1-quart microwavable bowl, heat chocolate chips, sunflower butter, and butter in microwave on High for 1 minute; stir. Microwave about 30 seconds more or until mixture can be stirred smooth. Add vanilla, stir to incorporate.
  • Pour chocolate mixture over cereal, and stir until cereal is coated.
  • Add 1/2 the powdered sugar to a gallon size baggie, and add to it half the cereal mixture. Shake until cereal is coated in powdered sugar. Pour contents of baggie onto a waxed line cookie sheet to completely cool. Repeat step with remaining sugar and cereal.
  • You can also add in sprinkles, candy, etc if desired. We made this for Valentine’s so we used some Red Velvet MM’s, leftover from these cookies!
(recipe from back of Chex Party Mix Variety Pack box)
If you like Muddy Buddies, you may also like this Brownie Biscoff version!
Any allergy moms out there? My son is allergic to peanuts and tree nuts. He outgrew his egg allergy when he was four…that was a happy day!

I may be linking up at any of the following – (Monday)  (Tuesday) , , (Wednesday)  (Thursday)  (Friday) ,,

Peppermint Hot Chocolate Mix

Winter is…cold. (Thank you Captain Obvious) I’m not a fan. Therefore, there have been lots of hot bevvies filling my day – mainly coffee, but a little hot tea, some apple cider, a hot toddy here or there, and of course, hot chocolate.

I made these for Christmas gifts, and thought they turned out pretty cute…I do love a mason jar. Since my kids are constantly asking for hot chocolate, I am getting ready to mix some up to have on hand at home. It’s nice to have a dry mix available that the kids can prepare themselves.

You can layer it all pretty for gift giving, or mix everything together and store in a sealed container so it’s ready to go. One of my friends who received this did say it wasn’t quite sweet enough for her taste, so you may have to adjust the amount of sugar to your liking.

Peppermint Hot Chocolate Mix

1/2 cup dry (powdered) milk
1/2 cup cocoa, unsweetened
1/2 cup sugar (adjust to taste)
pinch of salt
1/4 cup mini chocolate chips
1/4 cup crushed peppermint candy
1/4 cup mini marshmallows

 Layer ingredients in order listed in a pint sized jar or mix all together and store in an airtight container. For serving, place 1/3 cup mix in a mug, add one cup (8 ounces) boiling water. Stir well. Enjoy.
Recipe Source and Printable from
*For adults, you may want to add a little homemade Peppermint Vodka!
Maybe this will get me through another six weeks of winter. Damn Groundhog.
I may be linking up at any of the following – (Monday)  (Tuesday) , (Wednesday) , (Thursday)  (Friday) ,  ,

DIY Candy Flavored Vodka

I know, I know. This would have been nice to have posted before Christmas. But…uhm…yeah. Didn’t happen. See previous post for all the pre-Christmas drama. However, even though this was an awesome (if I do say so myself) Christmas gift, it would be an equally awesome Valentine’s gift, birthday gift, etc. For the over 21 crowd of course.

This is SO easy to make, and it doesn’t have to be candy cane…it can be any hard/sugar candy you like. For example, lemon drops are sitting on my counter right now, just waiting.
For Valentine’s Day you might want to use Red Hots for a Cinnamon Vodka, Cherry Sours for a Cherry Vodka, Starlight Mints for Peppermint Vodka…and of course, I’m sure there are still candy canes sitting in a clearance section somewhere!
All you have to do is add about a cup of candy to each pint of vodka. I put mine in mason jars. Because I love mason jars. Give it 2-3 days to dissolve, shaking occasionally, and viola! You’ve made your own flavored vodka.
I just love the color! I can’t wait to try other flavors. I will let you know how they turn out. Also, not only do they make pretty gifts, they taste really good too. I had just a tiny taste, before giving these away, but it tasted so much like a candy cane. The lushes friends I gave them to also gave them a thumbs up. They mixed it with a little Sprite, but you could also use this flavor to make Peppermint White Russians, or add to this Peppermint Hot Chocolate Mix! You can always pin them for next year! #betterlatethannever
I found this gem of an idea over at  and I found the label at . Thank you ladies, and thank you Pinterest!
I may be linking up at any of the following – (Monday)  (Tuesday) , ,, (Wednesday) , (Thursday) , (Friday) ,,(Saturday) 

Quick & Easy Pancake Syrup

Sometimes you just know you have something in your refrigerator or pantry, just to go grab it and realize…nope, you’re out. This happened to me the other night when we had breakfast for dinner. We had fixed Belgian waffles, pancakes, Monte Cristo Waffle sandwiches…and there was no syrup. Then I remembered that I had wanted to buy real maple syrup on my last trip to the grocery store, and apparently it had been made with gold because it was outrageously expensive. I passed on it, but couldn’t bring myself to buy the imitation syrup either. With all the caramel coloring and other weird ingredients, I just left the aisle in disgust.

Well, it turns out, pancake syrup is pretty darn easy to make. Like 4 ingredients easy (and one of those is water). It also only takes about 5 minutes. I know a lot of people are very anti corn syrup right now, but I’m still on the fence. It obviously has it’s negatives, but I have 2 words for you…Pecan. Pie. Y’all have to remember I’m from the South, and pecan pie is a tradition. As is Karo syrup. So, I wasn’t too worried about making pancake syrup with it…especially since I’ve been eating that other artificial stuff for years.

Easy Maple Syrup

1/2 cup Karo® Light Corn Syrup
1/2 cup sugar
1/4 cup water
1/4 teaspoon maple extract

  • Combine corn syrup, sugar and water in a medium sized sauce pan. Bring to a boil over medium-high heat.
  • Remove from heat and stir in maple extract.
  • Let cool to desired temp. (It will thicken as it cools)
  • Serve over pancakes/waffles, etc.
*I keep mine stored in the fridge
Recipe Source:  


I may be linking up at any of the following – (Monday)  (Tuesday) , ,, (Wednesday) , (Thursday) , (Friday) ,,, (Saturday) 

Easy Homemade Toaster Strudels and a prayer request

If you follow me or other food bloggers on Facebook, you may have heard about the terrible accident another blogger’s daughter was in yesterday. The little girl was apparently walking to school and was hit by a car. She is in ICU in a medically induced coma due to her injuries. I don’t know details, and really, it’s none of my business since I don’t know the family personally, but as a parent my heart goes out to them. When you follow someone’s blog for a period of time, you start to feel like you know them! So, please take a minute and say a prayer for this little girl and her family. Thanks!

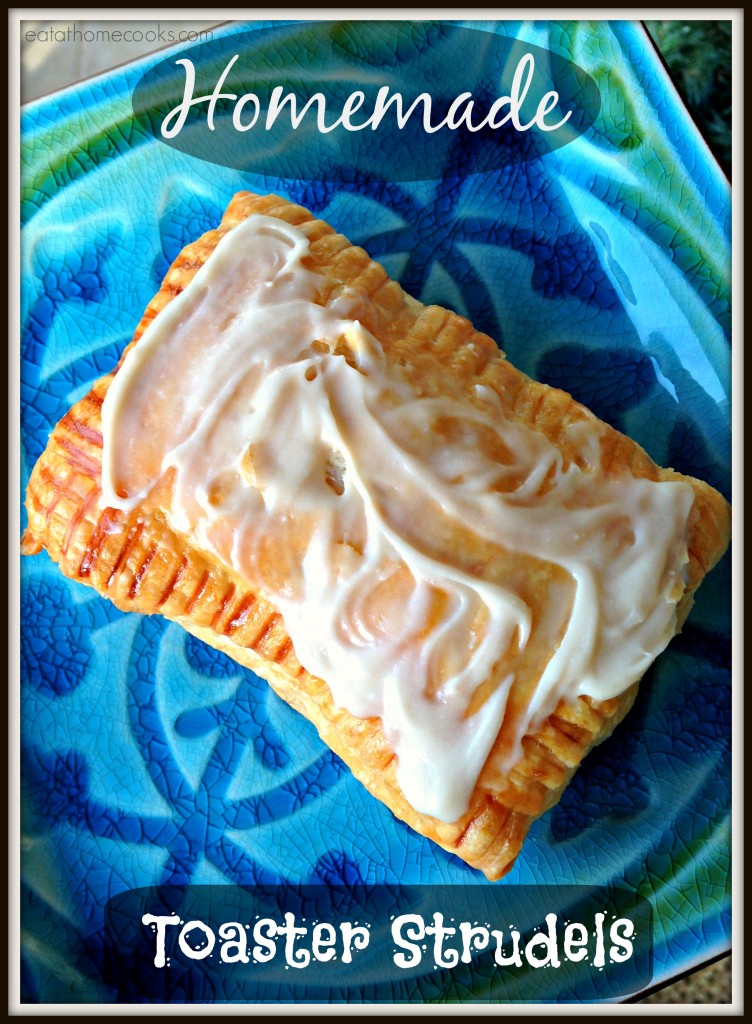
These homemade toaster strudels were very easy, very quick, and VERY awesome!

Homemade Toaster Strudels
I have them posted today over at (where I am a contributing writer for those of you who may not know.) I’d love for you to pop over and check them out!