Pumpkin Pie Millet Porridge

I have been trying out some different grains over the past year or so, and most recently it has been . I wasn’t sure what to do with it, so I went to my favorite source, ! I’ve tried serving it as a side, like I would rice or cous cous, but I wanted to have other options too. Since I’ve made pumpkin pie oats, and pumpkin pie quinoa, I figured a pumpkin pie millet was in order!

It was hearty, filling and very tasty! Oats will always be my favorite “porridge” I think, (because I don’t consider grits to be porridge. Grits will always be number one with this Southern gal!) but this was a nice change that only has 2 grams of fat (zero saturated), 9 grams of fiber, and 7 grams of protein per serving! Not to mention other vitamins and minerals. So…that’s a pretty healthy bowl of porridge in my opinion. (And it’s gluten free!)

Pumpkin Pie Millet Porridge

1/2 cup millet, uncooked
1 1/3 cups water
1/3 cup pumpkin puree
1 1/2-2 teaspoons pumpkin pie spice
maple syrup, honey or brown sugar – to taste
pecans, walnuts, etc for topping (optional)

milk or cream for topping (optional)

  • Combine millet and water in a sauce pan. Bring to a boil, then cover and simmer for 10 minutes. 
  • Add pumpkin puree and pie spice. Stir and let simmer another 10-15 minutes until millet is tender, stirring occasionally and adding extra water if needed. (The amount of water will depend on personal preference as far as consistency goes. I let my water absorb, and then added milk once done.)
  • Add a little sweetener if desired, and serve with a drizzle of syrup or honey and nuts, if using. Toasting the pecans really gives them a wonderful flavor, but I skipped this step because I was hungry! You can also top with milk or cream – however you like your porridge!
  • This recipe makes 2 servings. Add water or milk when reheating to reach desired consistency. This reheats well and does not get as “mushy” as reheating oatmeal.

Recipe Source:

Anyone else trying new foods? I am trying to decrease the amount of gluten in my diet, just to see if it makes a difference in how I feel. Some days I do really well, and other days….not so much!

I may be linking up at any of the following – (Monday)  (Tuesday) , , (Wednesday)  (Thursday)  (Friday) ,

Easy Homemade Sunflower Butter & Nut-free Muddy Buddies

If you have a child with food allergies, or have them yourself, you know it can be tough. You have to monitor everything that goes into your or your child’s mouth. Reading labels becomes second nature, as does inquiring about ingredients at potlucks, family gatherings, parties, etc. It’s a full time job.

You read food labels like others read trashy novels. | 14 Things That Prove You Are A Peanut Allergy Mom

Now that my son is older (he will be seven soon!) *Side note: I started this blog when he was TWO! I can’t believe I’ve been doing it this long! He is very good about asking people “does it have nuts?” or asking me or his teacher if he can eat something. However, also now that he’s older, he realizes that he is different and that he can not participate in everything that goes on at school or eat everything the other kids eat. When a situation like that arises, he says “I wish I wasn’t allergic, and was like everyone else.” *Cue breaking heart* No mom wants her child to feel that way.

I hadn’t planned on getting into all that, I was just going to post these recipes! I’ve had this stewing in the back of my mind since his class did an activity that involved smearing peanut butter all over a pine cone and sticking birdseed to it, and my son had to leave the room! He felt so left out, but of course, I would rather he be out of harms way, but he was so sad about it. It was a parent who came in and did it, not the teachers, and I know the other parent was just trying to do something fun with the kids, but I really wanted to punch her in the face. (Just kidding. sorta.) If I had been made aware ahead of time, I could have made this quick and easy Sunflower Butter so that everyone could participate! Making it yourself is much cheaper than buying the SunButter Brand in the store.

We used the sunflower seed butter to make traditional Muddy Buddies, just subbing out peanut butter with the sunflower butter. It worked great, and tasted like “regular” Muddy Buddies…my oldest daughter thought I made them using less peanut butter, but didn’t realize they were peanut free. The sunflower seed butter has a milder flavor than peanut, but when used in recipes, it’s hard to tell the difference.
Homemade Sunflower Butter
 
2-4 cups roasted sunflower seeds (recipe will yield about half this amount once processed)
1/4-1/2 teaspoon salt (only if seeds are unsalted; add to taste. Start with a small amount, grind seeds, then add more as needed)
oil – as needed to thin to desired consistency, we used coconut oil, but you can use any you like. I didn’t add quite enough, so my butter is a little thicker than I would like. If spreading on bread, it would need to be a little thinner.
(optional) sweetener: this can be sugar, honey, agave, whatever you choose. We used about a teaspoon of honey.
  • Add ingredients to bowl of food processor and blend until smooth!


Nut-Free Muddy Buddies
9 cups Chex Cereal (we used a combo of Rice, Corn and Wheat Chex)
1 cup semi-sweet chocolate chips
1/2 cup Sunflower Butter (*see above; can also use peanut butter or any other peanut butter replacement.)
1/4 cup butter
1 teaspoon vanilla extract
1 1/2 cups powdered sugar
  • Place cereal in a large bowl
  • In a 1-quart microwavable bowl, heat chocolate chips, sunflower butter, and butter in microwave on High for 1 minute; stir. Microwave about 30 seconds more or until mixture can be stirred smooth. Add vanilla, stir to incorporate.
  • Pour chocolate mixture over cereal, and stir until cereal is coated.
  • Add 1/2 the powdered sugar to a gallon size baggie, and add to it half the cereal mixture. Shake until cereal is coated in powdered sugar. Pour contents of baggie onto a waxed line cookie sheet to completely cool. Repeat step with remaining sugar and cereal.
  • You can also add in sprinkles, candy, etc if desired. We made this for Valentine’s so we used some Red Velvet MM’s, leftover from these cookies!
(recipe from back of Chex Party Mix Variety Pack box)
If you like Muddy Buddies, you may also like this Brownie Biscoff version!
Any allergy moms out there? My son is allergic to peanuts and tree nuts. He outgrew his egg allergy when he was four…that was a happy day!

I may be linking up at any of the following – (Monday)  (Tuesday) , , (Wednesday)  (Thursday)  (Friday) ,,

Double Chocolate Banana Muffins

My son always asks for bananas when I am forced to go grocery shopping with my children, and it’s really hard to deny your children fruits and vegetables if they ask for them…even when I know they will not get eaten. Unless I buy one, which I never do, because lets face it – having bananas sitting around going bad is an excuse to make stuff like these muffins. Or this!

Y’all…these are good! As I’ve mentioned every time I post something with bananas, I don’t even like bananas, but these were really good. They had a good texture, they rose well, they were nice and chocolate-y, with only a hint of banana flavor (of course, I didn’t use the full amount of banana called for….I subbed in some Greek yogurt to make up the difference.) All THREE of my kids liked them, which almost NEVER happens..but admittedly happens much more frequently when chocolate is involved!
Double Chocolate Banana Muffins
(Yields 12 standard muffins)
 
1 1/2 cups mashed banana*
1/3 cup oil (I used this )
1 egg
3/4 cup sugar*
1 1/2 cups flour
1/4 cup unsweetened cocoa
1 teaspoon baking soda
1/4 teaspoon baking powder
1 cup mini chocolate chips
Raw sugar for tops (optional)

*If you do not have the full amount of banana, you can sub in applesauce, yogurt, pumpkin…pretty much any pureed fruit or mild flavored veggie to make up the difference. I used Greek yogurt.)
*The original recipe called for one cup of sugar. I reduced it since my bananas were very ripe and therefore very sweet.

  • Preheat oven to 350 degrees F. Spray a muffin pan with non stick cooking spray or line with cupcake liners.
  • In a large mixing bowl, combine mashed bananas (and yogurt in my case), oil, and egg. 
  • In a separate bowl, whisk together sugar, flour, cocoa, baking soda, and baking powder. 
  • Add the flour mixture to the banana mixture, stir until just combined. Fold in chocolate chips, reserving a few extra for the tops if desired. (This just makes them look pretty!)
  • Fill prepared muffin cups approximately 3/4 full. Sprinkle the tops with raw sugar and remaining mini chocolate chips if desired. 
  • Bake for 20 to 25 minutes or until done. (Can check centers with toothpick if unsure…should come out clean, unless you hit a melty chocolate chip!)
Recipe Source:
 I may be linking up at any of the following – (Monday)  (Tuesday) , , (Wednesday)  (Thursday)  (Friday) ,,


Chewy Chocolate Chip Cookie Bars {my favorite bar recipe!}

I know I post a lot of cookies. Like…a lot.of.cookies. I love cookies. Cookies are probably my dessert of choice. And I’ve already typed cookies several times and I’ve just started. Well, I’m not breakin’ out the thesaurus. My point is I’ve baked a lot of cookies, and I have my “go-to” cookie recipe, but these are cookie BARS. Meaning, they are even easier because you don’t have to measure them out, space them, stand near by to bake batch after batch. Yep…these are homemade cookies, made easier, and just as awesome. You’re welcome.

This is my favorite cookie bar recipe to date. No waiting for butter to soften, no scooping out even amounts of dough, just mix it up, slap it in a pan, and bake. Did I mention they are soft, chewy and delicious? These were made with all chocolate chips, but we made some for Thanksgiving with chocolate chips and M and M’s.

I like the ease of this recipe, and you can cut them into any size you want, so they can feed a crowd if needed. I hate to say how quickly the 4 of us can go through a batch. It’s embarrassing.

Chewy Chocolate Chip Cookie Bars

2 1/8 cups flour
1/2 teaspoon salt
1/2 teaspoon baking soda
3/4 cup butter, melted and slightly cooled
1 cup brown sugar

1/2 cup white sugar

1 large egg
1 large egg yolk*
2 teaspoons vanilla extract
1 cup semi-sweet chocolate chips

*we have made this without the additional yolk and they were just as good, in my opinion
  • Preheat the oven to 325 degrees. Grease an 11×7 inch baking pan. (Can use a smaller pan for thicker bars or a 9×13 pan for thinner bars, adjust bake time accordingly.)
  • In a medium sized bowl, whisk together the flour, salt, and baking soda.
  • In a large mixing bowl, whisk melted butter, brown sugar and white sugar until combined.
  • Add the egg, egg yolk, and vanilla to the sugar mixture and mix well.
  • Add the dry ingredients to the wet, and mix just until combined; do not overmix. 
  • Fold in chocolate chips. (Can reserve a few for the tops if desired.)
  • Press the dough into prepared pan and level out with spatula (or hands). Sprinkle reserved chocolate chips on top if desired. 
  • Bake approximately 25 minutes (depending on pan size), until the top of the bars are a light golden brown. They should still be a little glossy on top, like they are not quite fully baked so they will be nice and chewy.
Recipe Source:
So…who’s ready to make cookies?! Above is my favorite homemade cookie bar recipe (as of this posting anyway!), this is my favorite for individual cookies, and this is my favorite cookie bar using a cake mix!
I may be linking up at any of the following – (Monday)  (Tuesday) , , (Wednesday)  (Thursday)  (Friday) ,

Creamy Lemon Chicken & Rice Soup

I know I’ve been whining about the cold a lot…but it’s so dang COLD! My Southern blood just can’t handle it! Therefore, there has been a lot of soup and hot beverages going on around here. This soup has been a favorite. It’s makes you feel like you are eating a warm blanket. No…wait…that doesn’t sound very good. It’s warm and comforting like a warm blanket? Maybe that’s better. Maybe I should just shut up and post the recipe…

You could make this with rice or orzo. I actually made both, left them out of the soup, and let everyone choose…because one child likes orzo and hates rice, and the other loves rice…and it was just easier this way. Trust me. But you can totally choose. I bet dinner is easier at your house. *sigh*

Creamy Lemon Chicken and Rice Soup

1 tablespoon olive oil
1/2 small onion, chopped
1 carrot, chopped (I was out, so didn’t use in pictured soup)
1 celery stalk, chopped
1 glove garlic, minced
6 cups chicken broth
2/3 cups rice (I used Jasmine)
1 lemon (zest removed and juiced)
1 lb chicken breast, cooked and shredded
1/4 cup heavy cream
salt and pepper, to taste
parsley (optional)
In a stock pot, saute onion, carrot and celery on medium heat in tablespoon of olive oil. Once onions are soft and translucent, add garlic. Stir for about 30 seconds. Add chicken stock and bring to a boil. At this point, you can blend your veggies and broth with an immersion blender or you can leave chunky. (Remember my picky kids? I love my immersion blender!) Add rice, cover, and cook 10-15 minutes or until rice is tender. Reduce heat to low, add chicken, lemon juice, lemon zest, and salt and pepper. Let simmer for 15-20 mins. Remove from heat, add heavy cream, stir and serve. Top with dried parsley if desired.
I may be linking up at any of the following – (Monday)  (Tuesday) , , (Wednesday)  (Thursday)  (Friday) ,

Red Velvet Cookies

In honor of that sappy holiday coming up, the kids and I made some treats. One being these Red Velvet Cookies

Because even though Valentine’s is all lovey, dovey, romance-y grossness…I will use any excuse to make cookies! That’s how I roll.

The dough was delicious, but not as red as it was supposed to be since I thought we had plenty of red food coloring, and of course, we didn’t. Story of life. The MM’s are Red Velvet too! They were just okay IMO (in my opinion. I’m getting all text savvy. Not really.) You know I love you little hard shelled candies, but this was not my favorite flava. Sorry love. Obviously, you could use any M’s you choose (html code hates the ‘and’ symbol and does weird things if you are wondering why I am not writing MM’s correctly. Just a little useless fyi.)


Red Velvet Cookies

1-1/2 cups all-purpose flour

1/4 cup unsweetened cocoa powder

1 teaspoon baking soda
1/4 teaspoon salt
1/2 cup unsalted butter, softened
3/4 cup brown sugar
1/4 cup granulated sugar
1 egg
1 tablespoon milk
2 teaspoons vanilla extract
1.5 tablespoons red food coloring (we only had a scant tablespoon)
3/4 cup Red Velvet MandM’s candy

1/4 semi-sweet chocolate chips
  • Whisk together flour, cocoa, baking soda, and salt together in a large bowl. 
  • In a separate mixing bowl, beat the butter and sugars together until creamy. 
  • Add the egg, milk, and vanilla; mix until combined. 
  • Add food coloring and mix.
  • Add the dry ingredients to the wet and mix on low until soft dough is formed.
  • Stir in MM’s and chocolate chips.
  • Cover the dough and chill for at least 1 hour (recipe source says up to 4-5 days and to make sure you let the cookie dough sit at room temperature for 45 minutes before baking if chilling for more than 1 day.) We let ours chill overnight.
  • When ready to bake, preheat oven to 350 degrees F.
  • Line baking sheet with parchment paper or silicone mat. Roll dough into balls (about a tablespoon) and bake about 7-9 minutes. 
  • These cookies do not spread. At all. So when they come out of the oven, press down on the tops to slightly flatten them. You can add a couple of candies or chocolate chips to the tops if desired. 
Recipe Source: (visit source for great detailed baking info. I’m more of a ‘wham-bam, thank you, here’s a cookie’ gal)

 I may be linking up at any of the following – (Monday)  (Tuesday) , , (Wednesday)  (Thursday)  (Friday) ,

Meyer Lemon Recipe Round Up

I’m pretty much in love with Meyer lemons right now, so I thought I would do a little round-up. It’s helping me cope with the winter blues. I’m ready for Spring!

Low Fat Meyer Lemon Muffins – I know I just posted these, but just in case you missed them!
Citrus Blueberry Loaf with Meyer Lemon Glaze (this is a shortcut recipe using a mix)
Meyer Lemon Chicken Soup with Orzo –  I love this soup, and have some in my fridge right now!
Egg Free Lemon Curd – made with Meyer Lemons and would be really good on the above baked oatmeal!
Glazed Meyer Lemon Almond Cookies – I really need to make these again soon.
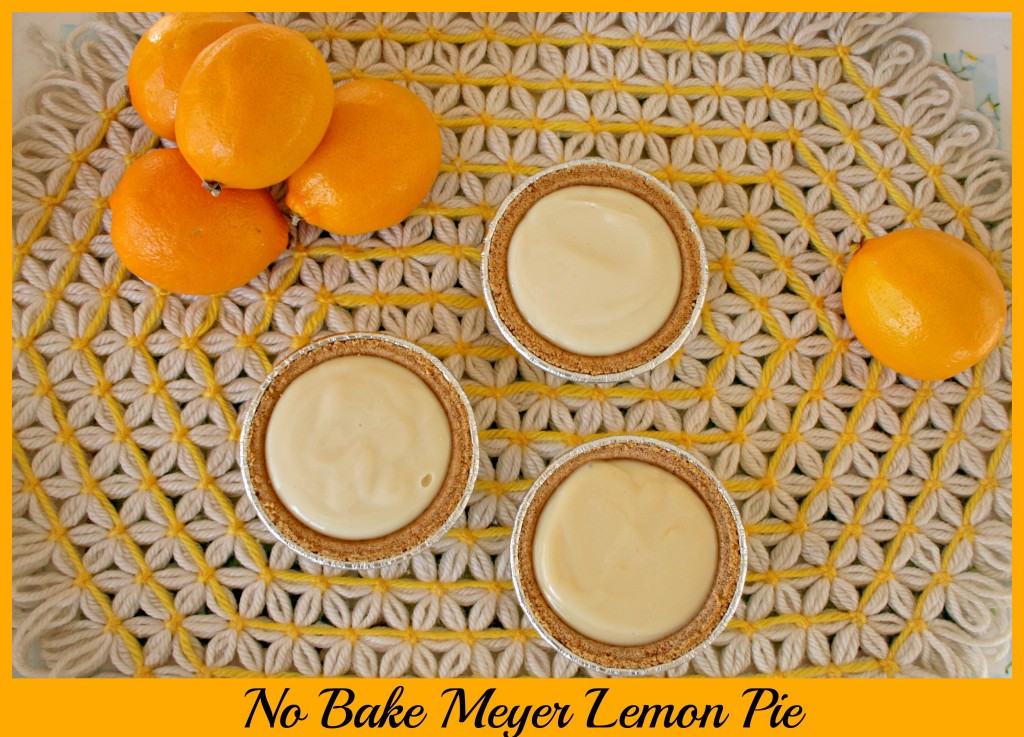
No Bake Meyer Lemon Pie – Love these, and only 2 ingredients…what’s not to love!
Are you Team Lemon? What’s your favorite lemon recipe?

Meyer Lemon Muffins {low fat}

Meyer lemons are like the regular lemon’s more awesome cousin. They are a cross between a lemon and an orange, and are less acidic and slightly sweeter. They are also only in season for a few short months in the winter. I’m wondering if they are having a bad season because I haven’t seen too many of them. However, I have bought them from Sam’s Club and Wal-Mart.

Aren’t they pretty? It’s nice to have something so bright and cheerful in season during the gray, cold, gross and dreary winter. Winter isn’t my favorite season, can you tell?! Even though I would love to bake and bake and bake with these lovelies, my waistline just can’t afford it. That’s why when I discovered this low fat recipe, I was all over it.
Meyer Lemon Muffins {low fat}
2 cups all purpose flour
2/3 cup granulated sugar
1/2 teaspoon baking powder
1/2 teaspoon baking soda
1/4 teaspoon salt
zest from 2 Meyer lemons
1 cup low fat milk 

1 tablespoon fresh Meyer lemon juice

2 large eggs
3 tablespoons oil (I used a canola/olive oil blend)
Glaze:
1 cup confectioner’s sugar
Meyer lemon juice – enough to achieve desired consistency
1/2 teaspoon vanilla extract (optional)
  • Preheat oven to 400 degrees. Spray a 12-cup muffin tin with non-stick cooking spray or use paper liners. (Since this was a low fat recipe, I sprayed my liners just to be sure they didn’t stick.)
  • Zest your lemons and add zest to medium sized mixing bowl.
  • Juice lemons and add one tablespoon lemon juice to one cup low-fat milk in a separate bowl or measuring cup. Set aside. (Save remaining juice for glaze. See note regarding lemons.)
  • To the zest in mixing bowl – add flour, sugar, baking powder, baking soda and salt. Whisk together until blended.
  • In a separate bowl, whisk together eggs and oil. Add the milk and lemon juice mixture – it should look lumpy (it is a buttermilk replacement. You could use buttermilk instead.) Whisk until blended.
  • Add wet ingredients to the dry ingredients and mix until just combined.

NOTE: if the Meyer lemons are very ripe, with a thin soft skin, you can finely chop up the entire lemon (or both if you really like lemons) that you have juiced and zested and add to batter. If the lemons have a thick, firm skin, you may not want to do this as it will cause you to have bitter chunks in your muffins.

  • fill muffin cups 3/4th full and bake for 15-20 minutes or until done.
  • While muffins are baking, mix together confectioner’s sugar and enough lemon juice to achieve desired consistency of glaze. Add vanilla if using. If you do not have enough lemon juice to thin out the glaze, add milk until desired consistency is achieved.
Recipe Inspired By:  (Weight Watchers info can be found at source. Keep in mind that Renee made 16 servings from recipe and I made 12, and I added a glaze.)
These were good re-heated in the oven the next day, and freeze well too.

This recipe was featured at:

I may be linking up at any of the following – (Monday)  (Tuesday) , , (Wednesday)  (Thursday)  (Friday) ,

Easy Ice Cream Kit Kat Cake

I know, some of you are thinking ice cream?! As cold as it is? Is she nuts?! Well, uh..probably, but that’s not the point. The point is…my middle child had a birthday in January (she’s twelve!) and this is the cake she wanted.

She is also the reason behind the now infamous (at my house anyway) Kit Kat Candy Cake and last year’s Reese’s Peanut Butter Better Than $#% Cake (so.good.) This year, she wanted an ice cream cake – but not a traditional one with layers of cake and ice cream…she doesn’t allow her ice cream and cake to touch. *insert eye roll* Nope, this ‘cake’ is made entirely of ice cream. And candy of course. With some Oreos thrown in for good measure.

I have to admit, it was very good. It has also given me some great ideas for future ice cream cakes. It was also much easier than I thought it was going to be, which is always a plus. My only complaint is she didn’t want chocolate ice cream. Are we related? I’m not so sure. (I’m kidding daughter of mine. KissKiss LoveYouMeanIt). 

Don’t let the long list of “instructions” fool ya, it’s not difficult, I just added a lot of commentary in there. “Tips” if you will. You’re welcome or I’m sorry. Whichever fits.

Ice Cream Candy Cake 

  • 2 quarts of your ice cream of choice (We used mint chocolate chip and vanilla)
  • 1 package Oreo cookies
  • 1/4 c. milk
    Kit Kat candy bars (I used about 10 Kit Kat bars…which is 40 ‘sticks’)
  • toppings of choice (we used leftover Kit Kat bars, mini M’s, chocolate chips)
  • (optional) 1 tub Cool Whip, thawed enough to spread, for ‘frosting’
 
*You will also need a 9 inch springform pan*
  • Remove ice cream from freezer and let soften so that it is soft enough to remove from carton, but not completely melted (The more melted it is, the more the ice cream will ooze through the Kit Kat bars surrounding the cake. This isn’t a big deal, but just something I learned in the process. It can always be cleaned up afterwards, if you want it really “pretty” on the outside.)
  • While ice cream is softening, combine 24 Oreo cookies and the milk in a food processor (a blender would probably work for this as well). Set aside. This will form the bottom layer or “crust” for the ice cream cake.
  • Spray the springform pan with non-stick spray. Cut a piece of parchment or wax paper into the same size circle as the bottom of the pan. Line the pan with the paper, then line the Kit Kat bars (standing upright) around the inside of the pan. I find that working with the bars in pairs of two works best. Place bars as close as possible to each other, all facing out the same way. You may find that you need a single bar to close a gap. (Another tip I’ve learned along the way…if you are making Kit Kat cakes in the hot summer time, refrigerate the candy bars and remove from the fridge a few at a time. It makes handling them a little less messy.) 
  • Once Kit Kats are in place, press the Oreo crumb mixture evenly on the bottom of the pan.
  • Place in the freezer for 10 minutes.
  • Remove pan from freezer and spread one quart of ice cream evenly over the Oreo crust. I added some chopped Oreos over this bottom layer to kind of break it up. You could layer anything you wanted, or nothing at all…your choice! Place pan back in the freezer for 10 more minutes.
  • Remove from freezer again, and spread the second quart of ice cream over the first, and freeze again for 10 minutes.
  • At this point you can either leave cake in the freezer for 8-10 hours to firmly set or you can add the thawed Cool Whip topping as a ‘frosting’, then freeze for 8-10 hours. Since we used vanilla ice cream on top, I didn’t add the Cool Whip.
  • Remove from freezer 10 minutes prior to serving. Add your toppings of choice, and remove the springform outer ring of pan. Slice and serve! 
*Tip – buy an extra Kit Kat bar or two in case you have a few broken sticks in your packs. Perk: you get to eat all the broken ones.
Source:
I may be linking up at any of the following – (Monday)  (Tuesday) , , (Wednesday)  (Thursday)  (Friday) , ,

Peppermint Hot Chocolate Mix

Winter is…cold. (Thank you Captain Obvious) I’m not a fan. Therefore, there have been lots of hot bevvies filling my day – mainly coffee, but a little hot tea, some apple cider, a hot toddy here or there, and of course, hot chocolate.

I made these for Christmas gifts, and thought they turned out pretty cute…I do love a mason jar. Since my kids are constantly asking for hot chocolate, I am getting ready to mix some up to have on hand at home. It’s nice to have a dry mix available that the kids can prepare themselves.

You can layer it all pretty for gift giving, or mix everything together and store in a sealed container so it’s ready to go. One of my friends who received this did say it wasn’t quite sweet enough for her taste, so you may have to adjust the amount of sugar to your liking.

Peppermint Hot Chocolate Mix

1/2 cup dry (powdered) milk
1/2 cup cocoa, unsweetened
1/2 cup sugar (adjust to taste)
pinch of salt
1/4 cup mini chocolate chips
1/4 cup crushed peppermint candy
1/4 cup mini marshmallows

 Layer ingredients in order listed in a pint sized jar or mix all together and store in an airtight container. For serving, place 1/3 cup mix in a mug, add one cup (8 ounces) boiling water. Stir well. Enjoy.
Recipe Source and Printable from
*For adults, you may want to add a little homemade Peppermint Vodka!
Maybe this will get me through another six weeks of winter. Damn Groundhog.
I may be linking up at any of the following – (Monday)  (Tuesday) , (Wednesday) , (Thursday)  (Friday) ,  ,