Vanilla Pound Cake with Cinnamon-Vanilla Cream Glaze

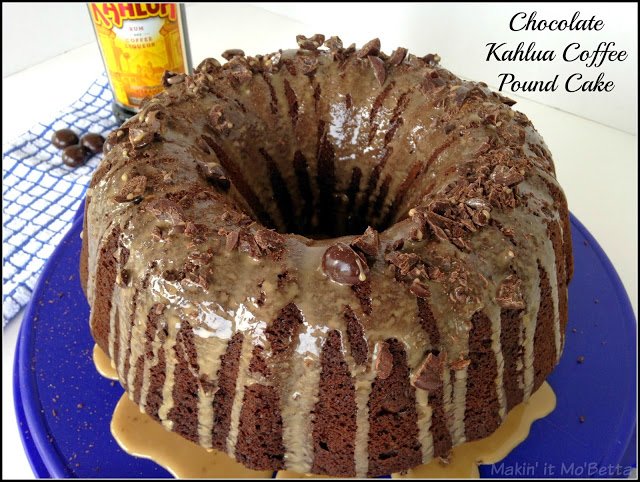
I know it’s taboo to post sugar the first week of the new year, with everyone on the diet train and all, but since it’s the SECOND week in January…I think we all deserve a treat for making it this far. Am I right, or am I right?! First, I have to admit that I’m am so not a vanilla person. I will choose chocolate every time. Or maybe lemon. But never vanilla. However, my daughter had a friend over recently and it was the little girl’s birthday. Me, being the awesome mom that I am (so says I), offered to bake a cake. The girl requested vanilla. I was like “huh?” She said she didn’t like chocolate. So I made her leave. Just kidding…but seriously?

Vanilla Cake with Glaze

Well, I may just be a vanilla convert. I never knew the quality of the vanilla would make such a difference. I mean, you usually only add a teaspoon or so to baked goods, so what’s the big deal right?

Nielsen Massey Mexican Vanilla

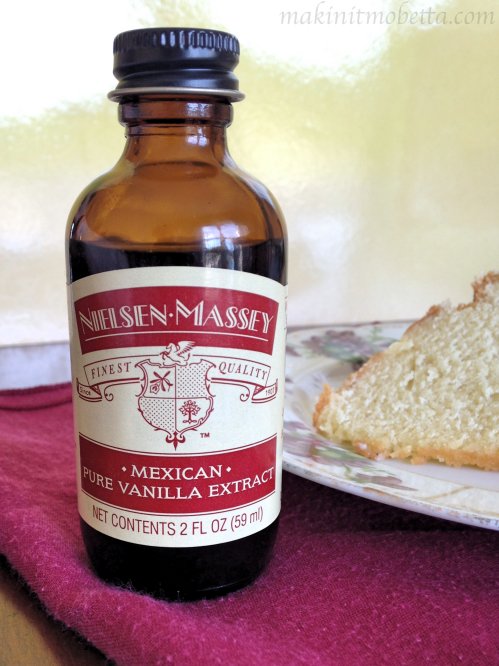
It makes a difference. Trust me! I was sent some Mexican Vanilla to sample and used it in this cake…it was so good! Granted, the predominant flavor of this cake, is in fact, vanilla. So it would make sense that a good quality extract would up the yumminess factor.

vanilla pound cake without glaze

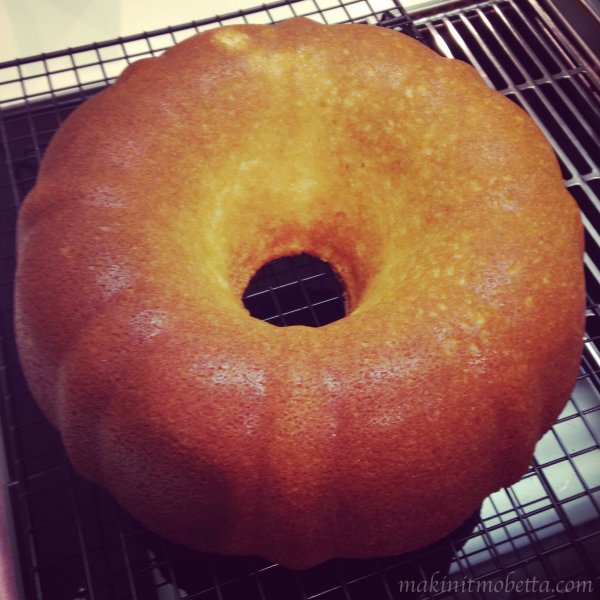
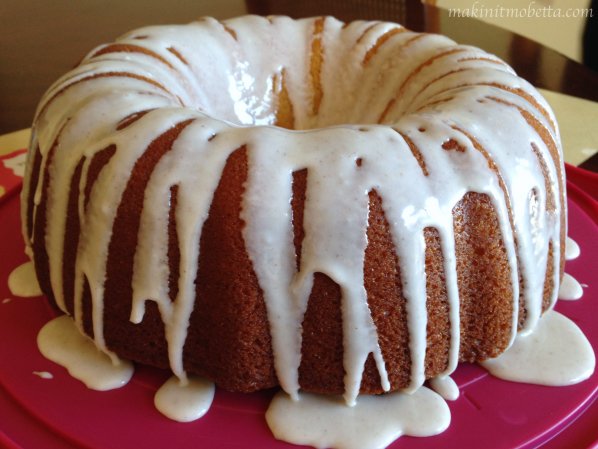
The cake itself is lighter than a traditional pound cake, but still nicely dense. It has a good flavor and would be excellent with a chocolate ganache, lemon glaze, or pretty much anything you want to top it with. It’s even good plain!

Vanilla Pound Cake Pin

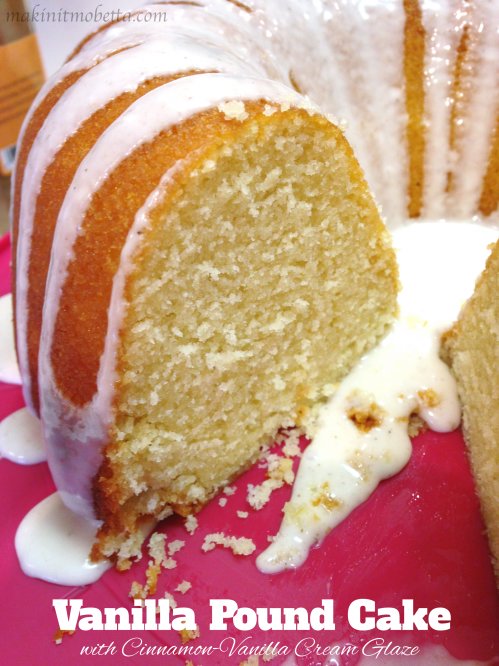
I decided I would go all-out vanilla, and added vanilla cream glaze, with a little cinnamon.

[amd-zlrecipe-recipe:11]

Recipe Source:

So what are you…a chocolate or vanilla person? Or lemon, or strawberry….we can still be friends.

I was provided a sample of the Nielsen Massey vanilla mentioned in the post but was not compensated nor obligated to right about them. All thoughts expressed are my own. 

This Vanilla Pound Cake was featured at the Party, , and chosen as a host favorite at !


I may be linking up at any of the following – (Monday) , , ,  (Tuesday) , ,, ,  (Wednesday) , , ,  (Thursday) , ,  (Friday) , , , ,, , , ,  (Sunday)

Chocolate Kahlua Coffee Pound Cake

When I see a title that includes chocolate, Kahlua, coffee AND pound cake…it gets my attention. And it goes in the “must make” category. My mom also loves chocolate and coffee, so I made this on an occasion I was visiting so we could share in the rum/chocolate/coffee fabulousness together.

I’m considerate like that. And it might have been Mother’s Day. I’m pretty sure I was the favorite child until my sister went and had the most adorable baby you have ever seen…but this cake definitely puts me ahead of my brother. haha

Chocolate Kahlua Coffee Pound Cake

1 box Devil’s Food Cake Mix
1 small box instant chocolate pudding
4 eggs, room temp
3/4 cup brewed coffee, room temp (leftover coffee is fine. I usually re-use my morning’s K-cup)
1/2 cup canola oil
1/2 cup Kahlua coffee liqueur
chocolate covered coffee beans, chopped (optional)

Glaze:
2 cups confectioners sugar
1/2 cup Kahlua*  – add in small increments until glaze reaches desired consistency. Mine ended up being a little too thin.

  • Preheat oven to 350 degrees F. Grease a bundt pan or spray well with baking spray.
  • Whisk together the dry cake mix with the dry instant pudding mix.
  • Add the eggs, coffee, oil and Kahlua to the dry mix. Stir until combined, then beat on medium speed for 2 minutes.
  • Pour mix into prepared bundt pan. Bake for 45-55 minutes or until done. Cake should spring back when lightly pressed and toothpick should come out clean when inserted into middle of cake.
  • Let cake cool for 15 minutes in pan, then invert onto cooling rack to finish cooling.
  • Pour glaze over cooled cake, top with chocolate covered coffee beans if desired.
Recipe Source:  (the name alone can tell you why it’s one of my favorite blogs!)

I may be linking up at any of the following – (Monday) ,  (Tuesday) , , (Wednesday)  (Thursday)  (Friday) ,, ,

Oreo Cake with Oreo Whipped Cream Frosting

I guess it’s Cake Week on the blog! I have almost always made my kids’ birthday cakes. My mom always made mine (and my siblings’…I would always choose chocolate cake with chocolate icing and my brother would want strawberry cake with chocolate icing and I would get mad. I hated strawberry cake! #itsallaboutme) Now that my girls are getting older, they like to go on Pinterest and find cakes that generally go beyond the “chocolate or vanilla – or strawberry“. I’m sure one day soon their requests will exceed my skill level, but for now, it’s pretty fun!
My oldest chose this Oreo Cake for her birthday this year. Somehow, I have a 14 year old. I’m not sure how this happened. Why does time speed up once you have children? (Unless they have a stomach virus in the middle of the night. Time slows WAY down then.)
The cake has Oreo cookies in the cake itself, Oreos in the icing, and then I added some mini Oreos on top. Both layers had Oreos baked right in, and I loved the flavor and crunch of the baked Oreos.
The only negative is that the whole Oreos made the cake a little difficult to slice. Next time I may use mini Oreos instead.
Oreo Cake with Oreo Whipped Cream Frosting
1 box chocolate cake mix (without pudding in the mix)
1 box (4 serving size) instant chocolate pudding mix (I used Hershey’s)
1 cup sour cream (can also use plain yogurt)
1/2 cup canola oil
3 eggs, room temp
1/2 cup coffee (room temp or slightly warm, not hot – leftover coffee is fine; can sub with water)
1 package Oreo Cookies, divided
  • Preheat oven to 350 degrees.
  • In a large mixing bowl, combine the cake and pudding mixes, sour cream, oil, and coffee. 
  • Add in eggs, one at a time, stirring until just combined. Scrape down sides.
  • Beat mixture on medium speed for 2 minutes. 
  • Spray two cake pans with cooking spray, and line bottom of each pan with desired number of Oreo cookies. I used 11 whole cookies in each pan, but could have squeezed in a couple more!
  • Pour cake batter over cookies in prepared pans.
  • Bake for suggested time on back of cake mix box, or until top is springy to the touch and a wooden toothpick inserted comes out clean. 
  • Allow cake to cool in pan for 10-15 minutes, then invert onto cooling rack to cool completely before icing.
Oreo Whipped Cream Frosting
 
1 quart Heavy Whipping Cream
1/2 cup powdered sugar
1 teaspoon vanilla
12 Oreo Cookies (crushed with a rolling pin or pulsed in food processor until crushed in large crumbs. Do not over process.)
small “grab bag” mini Oreos (optional)
  • Place mixing bowl and mixer attachment in freezer for 10-15 minutes to chill.  
  • After chilling, add cream to bowl and mix on medium speed until it starts to thicken.
  • Add vanilla and sugar, and beat until mixture is to desired thickness and forms stiff peaks.
  • Fold in cookies. Keep refrigerated until ready to frost cake.
To Assemble:
Place one layer of cake on a plate. I would recommend Oreo side down on bottom layer, and up for top layer. Having the cookies in the middle made it a little more difficult to slice. Frost entire cake and keep chilled until ready to serve. If desired, add mini Oreo cookies on top for decoration.

This cake was inspired by , ,  Makin’ it Mo’Betta

This Oreo Cake with Whipped Cream Frosting was featured at:

I may be linking up at any of the following – (Monday)  (Tuesday) , , (Wednesday)  (Thursday)  (Friday) ,, ,

Lemon Supreme Pound Cake {starts with a mix}

This recipe is kickin’ it old school. It came out on the package of Duncan Hines cake mix back in the 70’s (according to it was 1978.) I was a mere babe back then and not yet baking, but I have been using a variation of it for years. I usually make a chocolate version (because I am a chocolate freak), but lemon/citrus cakes just scream SPRING and are quickly becoming a favorite as well. But if I’m being honest, have I met a cake I didn’t like? Probably not.

This was perfect for Easter, and forgot to include it in my last post. We have had an abundance of cakes going on around here! I do love a bundt cake. I’m not sure why!
And, just 4 ingredients + water…how convenient is that?
The version I usually makes also has a cup of sour cream (or yogurt). I didn’t think to add it to this one, but I think it would have made it even more moist and dense, like a traditional pound cake. Even so, it was delicious as is, and was really tasty with fresh strawberries and whipped cream!

Lemon Supreme Pound Cake

1 box Lemon cake mix
1 package instant lemon pudding mix (4-serving size)
1 cup water
1/2 cup oil
4 eggs

Glaze (optional)
1 cup confectioner’s sugar
1-2 tablespoons lemon juice (can also use milk, cream, half-and-half)
zest of lemon (optional)

  • Preheat oven to 350 degrees F. Grease and flour a bundt pan (I used the Baker’s Cooking Spray), set aside.
  • Add cake mix and pudding mix to a large mixing bowl. Add water, oil and eggs. Stir until combined.
  • Beat on medium speed for 2 minutes.
  • Pour cake mix into prepared pan. Tap pan on counter a couple of times to remove any air bubbles.
  • Bake for 40-50 minutes; cake is done when lightly browned and center springs back when gently pressed. Cool in pan for 20 minutes.
  • While cake is cooling, make glaze (if desired) by combing confectioners sugar with 1 tablespoon lemon juice. Slowly add in additional juice/liquid until desired consistency is reached. Mine ended up a little thinner than I would have liked, and could have been thickened up with more sugar, but I just left it as is. I also added the zest of a lemon to my glaze for extra lemon flavor.
  • Invert cake onto plate and drizzle with glaze.
Recipe Sources: and
Another great recipe that begins with lemon cake mix –

I may be linking up at any of the following – (Monday)  (Tuesday) , ,,  (Wednesday)  (Thursday)  (Friday) ,, ,

The Ultimate Carrot Cake with Cream Cheese Frosting

I like carrot cake. That’s not a big deal except I didn’t know I liked carrot cake until I made this one. This carrot cake is amazing. I’m not usually one to toot my own horn, but…oh wait…yes I am. So never mind.

I made this one for my family’s get together last Easter because carrot cake is one of my dad’s favorites, and it is perfect for Easter. Because it has carrots in it. And rabbits like carrots. And the Easter bunny is a rabbit. That’s my logic and I’m sticking to it. Seriously, this cake is fluffy and moist and full of flavor, and can convert people who don’t think they like carrot cake to people who loooove carrot cake. True story.

The cream cheese frosting is the ‘icing on the cake’. Well, literally, it is the icing on the cake. Good to know where that expression comes from. Cream cheese makes everything better it seems. It’s simple and pairs perfect with the sweet flavors of carrots and pineapple and spices that you have going on in the cake. And for those of you who are thinking ‘ewww, who wants carrots in a cake’…(yes, I was once one of those) they are soft and sweet once baked in the cake. It’s not like chowing down on a salad.

Toasting the pecans is optional, but makes it extra delicious. (Of course, the nuts can be left out all together if needed. My son is allergic to nuts, but doesn’t eat anything but chocolate cake, so I knew he wouldn’t be touching this.) I think black walnuts would be a good option as well.

The Ultimate Carrot Cake

1 1/2 cups sugar
2/3 cups firmly packed brown sugar
1 cup oil (I used canola)
1/2 cup buttermilk (or milk with a half tablespoon white vinegar, let sit for 5 mins)
4 large eggs, at room temperature
2 teaspoons vanilla extract
1/2 cup crushed pineapple, drained
2 1/4 cups all-purpose flour
1 1/2 teaspoons baking powder
1 teaspoon baking soda
1 teaspoon ground cinnamon
1/4 teaspoon ground ginger
1/2 teaspoon salt
1/4 teaspoon ground nutmeg
2 1/2 cups finely grated carrots
1 cup chopped pecans (optional) *toasted if desired
1 cup golden raisins (optional) *I used regular raisins because that’s what I had on hand

Cream Cheese Frosting:
16 ounces cream cheese, softened
1/2 cup (one stick) unsalted butter, softened
2 teaspoons vanilla extract
3-4 cups confectioners’ sugar, to taste

  • Preheat oven to 350 degrees F. Place oven rack in center of oven. Prepare two 9-inch cake pans by lightly coating with cooking spray and lining with parchment paper. 
  • In a large mixing bowl, beat the eggs, sugar, brown sugar, oil, buttermilk, vanilla, and pineapple together.
  • In a separate bowl, whisk together the flour, baking powder, baking soda, cinnamon, ginger, salt and nutmeg.
  • Add the flour mixture to the egg mixture and mix until blended together. 
  • Fold in carrots, pecans and raisins (if using) just until mixed in.
  • Pour batter into prepared pans and bake approx 30-40 minutes or until done (can check doneness by sticking a toothpick into the center of the cake, if it comes out clean, it’s done)
  • Cool cakes in pan for 15 minutes then, turn onto baking rack to cool completely before frosting. (remove parchment paper) 
  • While cakes are cooling, prepare frosting by mixing cream cheese and butter together until creamy and smooth. Mix in vanilla, then confectioners’ sugar, one cup at a time, until frosting has the desired consistency. 
  • Once cake has cooled, frost with cream cheese frosting. Add pecans to the top and /or sides of cake for decoration if desired. Chill. (This will help the frosting firm up some.)
Recipe Source:

This recipe is a little more work than my normal recipes, but it’s worth it! Definitely worthy of the Easter table and I will probably be making it again this year. Easter is coming so fast that I am not prepared at all. The weather is not cooperating either, I need Spring temps and sunshine!

And if you are looking for a healthier snack after indulging in this cake and all the kids’ Easter candy, check out my review of these low-carb, low sugar protein bars!

Come join me on !

I may be linking up at any of the following – (Monday)  (Tuesday) , , (Wednesday)  (Thursday)  (Friday) ,, ,

Easy Ice Cream Kit Kat Cake

I know, some of you are thinking ice cream?! As cold as it is? Is she nuts?! Well, uh..probably, but that’s not the point. The point is…my middle child had a birthday in January (she’s twelve!) and this is the cake she wanted.

She is also the reason behind the now infamous (at my house anyway) Kit Kat Candy Cake and last year’s Reese’s Peanut Butter Better Than $#% Cake (so.good.) This year, she wanted an ice cream cake – but not a traditional one with layers of cake and ice cream…she doesn’t allow her ice cream and cake to touch. *insert eye roll* Nope, this ‘cake’ is made entirely of ice cream. And candy of course. With some Oreos thrown in for good measure.

I have to admit, it was very good. It has also given me some great ideas for future ice cream cakes. It was also much easier than I thought it was going to be, which is always a plus. My only complaint is she didn’t want chocolate ice cream. Are we related? I’m not so sure. (I’m kidding daughter of mine. KissKiss LoveYouMeanIt). 

Don’t let the long list of “instructions” fool ya, it’s not difficult, I just added a lot of commentary in there. “Tips” if you will. You’re welcome or I’m sorry. Whichever fits.

Ice Cream Candy Cake 

  • 2 quarts of your ice cream of choice (We used mint chocolate chip and vanilla)
  • 1 package Oreo cookies
  • 1/4 c. milk
    Kit Kat candy bars (I used about 10 Kit Kat bars…which is 40 ‘sticks’)
  • toppings of choice (we used leftover Kit Kat bars, mini M’s, chocolate chips)
  • (optional) 1 tub Cool Whip, thawed enough to spread, for ‘frosting’
 
*You will also need a 9 inch springform pan*
  • Remove ice cream from freezer and let soften so that it is soft enough to remove from carton, but not completely melted (The more melted it is, the more the ice cream will ooze through the Kit Kat bars surrounding the cake. This isn’t a big deal, but just something I learned in the process. It can always be cleaned up afterwards, if you want it really “pretty” on the outside.)
  • While ice cream is softening, combine 24 Oreo cookies and the milk in a food processor (a blender would probably work for this as well). Set aside. This will form the bottom layer or “crust” for the ice cream cake.
  • Spray the springform pan with non-stick spray. Cut a piece of parchment or wax paper into the same size circle as the bottom of the pan. Line the pan with the paper, then line the Kit Kat bars (standing upright) around the inside of the pan. I find that working with the bars in pairs of two works best. Place bars as close as possible to each other, all facing out the same way. You may find that you need a single bar to close a gap. (Another tip I’ve learned along the way…if you are making Kit Kat cakes in the hot summer time, refrigerate the candy bars and remove from the fridge a few at a time. It makes handling them a little less messy.) 
  • Once Kit Kats are in place, press the Oreo crumb mixture evenly on the bottom of the pan.
  • Place in the freezer for 10 minutes.
  • Remove pan from freezer and spread one quart of ice cream evenly over the Oreo crust. I added some chopped Oreos over this bottom layer to kind of break it up. You could layer anything you wanted, or nothing at all…your choice! Place pan back in the freezer for 10 more minutes.
  • Remove from freezer again, and spread the second quart of ice cream over the first, and freeze again for 10 minutes.
  • At this point you can either leave cake in the freezer for 8-10 hours to firmly set or you can add the thawed Cool Whip topping as a ‘frosting’, then freeze for 8-10 hours. Since we used vanilla ice cream on top, I didn’t add the Cool Whip.
  • Remove from freezer 10 minutes prior to serving. Add your toppings of choice, and remove the springform outer ring of pan. Slice and serve! 
*Tip – buy an extra Kit Kat bar or two in case you have a few broken sticks in your packs. Perk: you get to eat all the broken ones.
Source:
I may be linking up at any of the following – (Monday)  (Tuesday) , , (Wednesday)  (Thursday)  (Friday) , ,

Cinnamon Roll Cake

This cake is all kinds of fabulous. And dangerous to have around! Thankfully I had a brunch to take it to, which kept me from face planting into it’s cinnamon goodness.

It’s very easy to throw together, as it starts with a cake mix. I was able to make it the morning of, so it was still nice and warm when we cut into it. We had it for brunch, but add a scoop of ice cream and it could very easily be dessert!
Icing, cinnamon sugar topping and swirled throughout, fluffy cake…and it got several compliments. #win. Oh, and it’s easy to make #doublewin.

Cinnamon Roll Cake

Cake:
1 box yellow cake mix
4 eggs
3/4 cup canola oil
1 cup sour cream (or plain Greek yogurt – I used a combination of both)
Topping:
1 cup brown sugar
1 tbsp cinnamon
Icing:
 2 cups powdered sugar
4 tablespoons half and half (or milk)
  •  Preheat oven to 350 degrees F.
  • In a large mixing bowl, stir together the yellow cake mix, eggs, canola oil and sour cream until combined. Pour into a greased 9 x 13 baking pan. 
  • In a small bowl, mix together the brown sugar and cinnamon.
  • Sprinkle sugar mixture over cake batter then take a knife and swirl the mixture into the batter. You want some cinnamon sugar on top and some mixed into the cake.
  • Bake approx 40 minutes. 
  • Remove from oven and cool 10-15 minutes before icing.
  • While cake is cooling, mix 2 cups powdered sugar and up to 4 tablespoons creamer, until desired consistency is reached. Pour over warm cake. 
Recipe Source:
 I may be linking up at any of the following – (Monday)  (Tuesday) , ,, (Wednesday) , (Thursday) , (Friday) ,,(Saturday) 

Delicious 5-Minute Chocolate Frosting

Over the years I’ve tried several different variations of frosting. Most are the same basic ingredients with slightly different sugar to cocoa ratios and varying amounts of added liquid (some call for milk, some cream, etc.). Finally, I think I’ve found THE one. This will be my quick and easy go-to recipe from now on because of its great chocolate flavor and super creamy, easy, spreadable consistency.

I love that it whips up in just a few minutes, with just a few ingredients.
And it’s creamy and spreadable..but not so soft that it slides right off!
You can take 5 minutes to whip this up with butter, sugar, vanilla, cocoa and milk or you can buy the canned version with palm oil, high maltose corn syrup, distilled monoglycerides, polysorbate 60, and the list goes on.
The key to a great frosting is not only the texture/consistency, but even more important…the flavor! The amount of desired chocolate flavor is going to vary from person to person. I love dark chocolate, but some of my family prefers milk chocolate.  For us, I found the perfect compromise by combining regular and dark cocoa powder.

5 Minute Chocolate Frosting

1 cup butter, softened
1 Tablespoon vanilla extract
1 cup cocoa (I used 3/4 cup regular Hershey’s cocoa and 1/4 cup Hershey’s Dark)
4 cups powdered sugar
1/3 cup half and half (mine was fat free, can also use milk of choice)
  • In a large mixing bowl, add softened butter and vanilla. Mix until creamy.
  • Add cocoa. Mix until blended.
  • Add 2 cups powdered sugar and half of the creamer (or milk). Slowly mix together (to prevent having sugar all over your entire kitchen!) Mixture is going to get thick.
  • Add remaining 2 cups powdered sugar and remaining milk. Stir until well blended and creamy.
If frosting is not at desired consistency: 
-too thick? add small amounts of milk until desired consistency is reached
-too thin? add small amounts of powdered sugar or cocoa until desired consistency is reached
Recipe adapted from
NOTE: I made a double batch to frost this 4 layer cake, however, I had a lot leftover. It freezes great! Place leftover frosting in a sealed container in the freezer, when ready to use again allow to thaw and then mix well to “fluff” it up again!
My son was very specific on what kind of birthday cake he wanted for his 6th birthday. He wanted four layers, chocolate cake, chocolate icing, with M&M’s and Kit Kats on top! He also picked out his Lego candles. Nothing fickle about this kid…he knows exactly what he wants! What can I say…my boy has his mama’s heart and generally gets what he wants!
I may be linking up at any of the following – (Monday)  (Tuesday) , ,,, (Wednesday) , (Thursday) , (Friday) ,,(Saturday) 

3-2-1 Skinny Mug Cake

Many of you may have seen this before…I’ve seen it several times on various blogs. I first tried this out about a year ago, and I have no idea why I haven’t written about it before.

I think it’s because I can never get a good picture…mug cakes are generally ugly. I’m also usually in a hurry to stuff something sweet in my face if I am making a cake in a coffee cup in the microwave! You know, desperate times and all.

I can’t say that I love these cakes, or that they are anything gourmet, but I can say that when you are craving something sweet in a hurry, and do not want to totally bust the calorie bank, these fit the bill. I really like them for the convenience…my children love to make them, and my girls can make them by themselves. That way, when they want a sweet treat, and I don’t want the temptation staring me in the face, they can go make themselves a cake. They are satisfied, and there are no leftovers sitting on the counter torturing me with their existence.

(See…the photos aren’t very good. Gotta work on that I suppose…which you know, means making more cakes!) My kids have had a good time coming up with variations…adding hot fudge (pictured, which is why it looks so gooey), peanut butter, nutella, etc.

The “skinny” part comes in because they are low in fat..you are combining a pack of regular cake mix (any flavor) with a box of angel food cake mix…that’s it! Store the combined dry mix in a container or plastic bag and use “as needed”…which is often in my house. It gets the name 3-2-1 because you need 3 T. of mix, 2 T. of water, and 1 minute in the microwave. Super fast, super easy.

3-2-1 Skinny Mug Cake

1 box of cake mix (favorite brand and flavor)
1 box of angel food cake mix
Combine 2 cake mixes in a large container or gallon size bag. When you want a cake, get a coffee mug or microwave safe bowl, add 3 Tablespoons of cake mix, 2 Tablespoons of water. Stir until just combined. (Can also add in a tablespoon of hot fudge sauce, peanut butter, chocolate chips, etc.) Microwave for 1 minute. Add cool whip or frosting if desired.
*The best I could calculate, the mug cakes were approximately 4 Weight Watchers Point Plus points without any additional add-ins. 
Do you have any single serving treats that you enjoy? Feel free to leave links or a recipe!
I may be linking up at any of the following – (Monday)  (Tuesday) , ,,, (Wednesday) , (Thursday) , (Friday) ,,(Saturday) 

Citrus Blueberry Loaf with Meyer Lemon Glaze {quick and easy version!}

Krusteaz provided me with complimentary product to help facilitate this post. No other compensation was received. All opinions are my own.

I don’t know about where you are, but Spring was here. It was awesome! And then it left….but hopefully by the weekend it will be back. (Fingers crossed!) The warmer temperatures and amazing sunshine really put me in the mood for everything citrus! Lemon, lime, orange…you name it, and I’ve probably pinned it in the past couple of weeks. The only problem with having a huge list of things on my “to bake” list is finding the time to actually make them. The kids have had sports, then they got sick with all the pollen and stuff floating around, my little guy’s asthma acted up…the list goes on. SO, enter the quick and easy recipes that I love so much – like this one!

This bread starts with a mix and has a hint of citrus from lemon and orange zest. Then it is topped with a glaze made with Meyer lemons that really gives it a pop of sweet lemon flavor that makes your taste buds do a happy dance!
Glaze is good. Am I right, or am I right?
Look at that gorgeous color! Mother Nature may not be screamin’ spring where you are, but this is! It gets the rich yellow color from the eggs, and I used farm fresh eggs (for the first time ever) and was amazed at their vibrant color. If you follow me on you probably saw a pic.

Citrus Blueberry Loaf with Meyer Lemon Glaze

  • 1 package Krusteaz Wild Blueberry Muffin Mix (you will need the pouch of mix and the can of blueberries that comes in the box)
  • 1/3 cup water*
  • 1/3 cup vegetable oil
  • 3 eggs
  • 2 teaspoons finely grated orange zest (I used the zest of one orange and one Meyer lemon)
*I used the juice of my orange, plus enough water to equal 1/3 cup
Meyer Lemon Glaze
  • 1 cup confectioners sugar
  • approx 1 T. Meyer lemon juice
Directions
  1. Preheat oven to 350 degrees.
  2. Lightly grease or spray an 8″ loaf pan with cooking spray.
  3. In a medium bowl, blend together the muffin mix, water, oil, eggs and zest.
  4. Drain and rinse blueberries and gently fold into batter.
  5. Pour batter into loaf pan and bake 45 minutes or until toothpick inserted into center comes out clean.
  6. Cool in pan for about 10 minutes, then place on wire rack.
Glaze – Mix powdered sugar and enough lemon juice to reach desired consistency. Pour over warm cake.
Recipe adapted from
The only thing I would do different is to add some additional fresh or frozen blueberries. You could also skip the glaze or use orange juice in the place of the lemon juice. For more quick and easy recipe ideas, check out the website. They have several recipes using their mixes as a base, which is pretty darn convenient. They even have a special section for ! Next on my list… made with their Country White Bread mix. My kids looovvveee cinnamon rolls!