Toffee Brownies {4 Ingredients!}

I love quick and easy recipes and this one satisfies a chocolate craving with just 4 ingredients. It’s a take on one of my blog’s most popular recipes, Chocolate Pudding Dump Cake but uses one of my favorite candies…Heath!

4 Ingredient Toffee Brownies EAH
I’ve shared the recipe for these deliciously easy Toffee Brownies over at , where I am a contributing writer. I’d love for you to head over and check it out!

Orange Creamsicle Pie

Yes, I’m still alive! I know it’s been three weeks since I’ve posted anything, but as usual, it’s been busy around here. The kids may be out of school for summer vacation, but it sure hasn’t slowed down much. We’ve still been going strong with sports…the long days of summer when we complained of how bored we were have disappeared for today’s youth it seems. At least for mine!

Creamsicle Pie

However, in the midst of practices, tournaments, and camps we have still found time to enjoy some fabulous desserts. I will always have time for dessert. This Orange Creamsicle Pie is perfect to have during this hot summer weather. It’s cool, light, and refreshing with it’s creamy orange flavor that will take you back to hot summer days eating frozen orange pops with the white ice cream center. With this pie however, you don’t have to worry about it melting down your hand, leaving it sticky, and no wooden sticks to contend with! (Is it just me, or does anyone else hate the flavor you get next to the wooden stick on a popsicle? It always grosses me out.)

Orange Creamsicle Pie

We loved the orange, but you could make other variations by changing out the jello flavor and fruit I’m sure. Also, I made my whipped cream (it’s so easy!) but you could use Cool Whip if desired. I went with a store bought graham cracker crust, but you could easily make your own there too.

[amd-zlrecipe-recipe:22]

Recipe Source: 
Other “no bake” pies you might enjoy:
 2- Ingredient 
I may be linking up at any of the following – (Monday) ,  (Tuesday) , , (Wednesday)  (Thursday)  (Friday) ,, ,

Low Carb Cheesecake (with optional Blueberry Topping)

For those of you following a low carb diet, or have ever tried following a low carb diet, you know how hard it can be to satisfy those cravings for something sweet. I have attempted to low carb it many times, each time failing miserably! My husband however, has been eating low carb for years now to help control his diabetes. This cheesecake is one of his favorite indulgences, minus the blueberry topping…he prefers his plain.

Low Carb Cheesecake

3 (8 ounce) packages Cream Cheese, softened (I usually use 2 ‘regular’ cream cheese and 1 reduced fat)
 
3 eggs, room temperature
 
3/4 cup Splenda (or artificial sweetener of choice. I’ve had good luck with xylitol, but haven’t used it for this yet.)
 
1 tablespoon lemon juice
1 tablespoon vanilla extract
  • Preheat oven to 300 degrees F.
  • Lightly spray pie plate with cooking spray.
  • Mix together cream cheese, Splenda, lemon juice and vanilla until well blended.
  • On low speed, add eggs, one at a time, mixing until just blended after each one.
  • Pour mixture into pie plate, bake 45 minutes or until center is almost set (but still slightly jiggly)
  • Cool, add fresh fruit or fruit topping if desired (see below for blueberry topping)
Recipe adapted from
Blueberry Topping
2 cups fresh or frozen blueberries
1 Tablespoon desired sweetener (less if berries are very sweet)
1 Tablespoon water
Heat on medium high heat until berries are bursting and sauce begins to thicken. Reduce heat and let simmer to desired thickness, stirring occasionally. Cool slightly and add to top of cheesecake.
This is a crustless cheesecake, but you could always add a low carb almond crust.
Anyone out there low carbing it? How’s it going? What’s your favorite low sugar treat?
I may be linking up at any of the following – (Monday) ,  (Tuesday) , , (Wednesday)  (Thursday)  (Friday) ,, ,

Paddle Boarding & Very Strawberry Shortcake {#SweetSwaps #IC #ad}

I participated in an Influencer Activation on behalf of Influence Central for the SPLENDA® Brand. I received a promotional item to thank me for my participation. All opinions and reviews are my own.

I, for one, am SO glad the summer season is upon us!! School is out, the heat index is rising, and it’s time to break out the pool floats, dust off the lounge chairs, and rinse out the coolers. Oh…and bathing suits. It’s time to break out the bathing suits…and for many of us (and by “us” I mean “me”), that can be majorly a little traumatic. BUT, the great thing about warm weather is that it is much easier to MOVE MORE! The blue sky, warm sun, and birds chirping just beckons us to get outside…maybe it’s working in the garden, walking around the block, yard work, etc. For my friends and family, it’s swimming, kayaking, boating, and now, paddle boarding!

 This was my first time on a paddle board, and I was surprised by how easy it was! I was expecting it to be much harder to stay balanced. Of course, I kept a slow and steady pace, but it was fun! And obviously, after spending the day with friends swimming, kayaking and paddle boarding…you work up an appetite. And nothing is more important to a backyard barbecue than dessert. Am I right, or am I right?!
Thankfully, it’s also strawberry season!! We have several farmer’s markets nearby that offer freshly picked strawberries, or you can go pick the strawberries right out of the field yourself.  Even my local grocery store (yes, that’s singular) has had some pretty good looking berries this year.

Since we had all spent the day in bathing suits (mine covered up by swim shorts and a tank), and getting some exercise in, the last thing we needed was a heavy, sugar laden dessert that would weigh us down…literally! I was happy to find a yummy  recipe that fits nicely into our lifestyle. 

You can save loads of calories by swapping out full sugar for SPLENDA®Sweetener Products. Being that my husband is diabetic, it is also nice to be able to make special treats that he can enjoy without all the sugar as well. *Fun Fact* Swapping one cup of sugar with one cup of No Calorie Sweetener, Granulated can save more than 600 calories.  
 
Very Strawberry Shortcake
 
Strawberry Filling
  • 3 cups sliced fresh strawberries
  • 2 tablespoons SPLENDA® No Calorie Sweetener, Granulated
  • 2 teaspoons balsamic vinegar
Shortcakes
  • 2 1/2 cups reduced-fat biscuit mix
  • 1/3 cup SPLENDA® No Calorie Sweetener, Granulated
  • 1 cup plain fat-free yogurt
  • 1 1/2 teaspoons vanilla extract
  • ¾ cup fat-free frozen whipped topping, thawed (I used homemade whipped cream)
  • 12 sprigs mint sprigs (optional) (I omitted)
DIRECTIONS
Strawberry Filling:
  1. Stir together strawberries, 2 tablespoons SPLENDA® No Calorie Sweetener, Granulated, and balsamic vinegar; let stand 1 hour, stirring occasionally.
Shortcake:
  1. Preheat oven to 425 degrees F.
  2. Combine biscuit mix and 1/3 cup SPLENDA® No Calorie Sweetener, Granulated, in a large bowl.
  3. Stir together yogurt and vanilla; add to dry ingredients, stirring just until moistened.
  4. Turn dough out onto a lightly floured surface, and knead 3 or 4 times. Pat dough to a ½-inch thickness. Cut with a 2 1/4-inch round cutter, reusing dough scraps, if necessary. Place shortcakes on an ungreased baking sheet. Bake 12 to 15 minutes. Serve warm with sliced strawberries and whipped topping. Garnish with mint springs, if desired.

Reprinted with permission from . Check out SPLENDA® on for more great swaps and recipes.

What’s your favorite way to “move more” in the summer? Have you ever tried paddle boarding?

Lemon Supreme Pound Cake {starts with a mix}

This recipe is kickin’ it old school. It came out on the package of Duncan Hines cake mix back in the 70’s (according to it was 1978.) I was a mere babe back then and not yet baking, but I have been using a variation of it for years. I usually make a chocolate version (because I am a chocolate freak), but lemon/citrus cakes just scream SPRING and are quickly becoming a favorite as well. But if I’m being honest, have I met a cake I didn’t like? Probably not.

This was perfect for Easter, and forgot to include it in my last post. We have had an abundance of cakes going on around here! I do love a bundt cake. I’m not sure why!
And, just 4 ingredients + water…how convenient is that?
The version I usually makes also has a cup of sour cream (or yogurt). I didn’t think to add it to this one, but I think it would have made it even more moist and dense, like a traditional pound cake. Even so, it was delicious as is, and was really tasty with fresh strawberries and whipped cream!

Lemon Supreme Pound Cake

1 box Lemon cake mix
1 package instant lemon pudding mix (4-serving size)
1 cup water
1/2 cup oil
4 eggs

Glaze (optional)
1 cup confectioner’s sugar
1-2 tablespoons lemon juice (can also use milk, cream, half-and-half)
zest of lemon (optional)

  • Preheat oven to 350 degrees F. Grease and flour a bundt pan (I used the Baker’s Cooking Spray), set aside.
  • Add cake mix and pudding mix to a large mixing bowl. Add water, oil and eggs. Stir until combined.
  • Beat on medium speed for 2 minutes.
  • Pour cake mix into prepared pan. Tap pan on counter a couple of times to remove any air bubbles.
  • Bake for 40-50 minutes; cake is done when lightly browned and center springs back when gently pressed. Cool in pan for 20 minutes.
  • While cake is cooling, make glaze (if desired) by combing confectioners sugar with 1 tablespoon lemon juice. Slowly add in additional juice/liquid until desired consistency is reached. Mine ended up a little thinner than I would have liked, and could have been thickened up with more sugar, but I just left it as is. I also added the zest of a lemon to my glaze for extra lemon flavor.
  • Invert cake onto plate and drizzle with glaze.
Recipe Sources: and
Another great recipe that begins with lemon cake mix –

I may be linking up at any of the following – (Monday)  (Tuesday) , ,,  (Wednesday)  (Thursday)  (Friday) ,, ,

The Ultimate Carrot Cake with Cream Cheese Frosting

I like carrot cake. That’s not a big deal except I didn’t know I liked carrot cake until I made this one. This carrot cake is amazing. I’m not usually one to toot my own horn, but…oh wait…yes I am. So never mind.

I made this one for my family’s get together last Easter because carrot cake is one of my dad’s favorites, and it is perfect for Easter. Because it has carrots in it. And rabbits like carrots. And the Easter bunny is a rabbit. That’s my logic and I’m sticking to it. Seriously, this cake is fluffy and moist and full of flavor, and can convert people who don’t think they like carrot cake to people who loooove carrot cake. True story.

The cream cheese frosting is the ‘icing on the cake’. Well, literally, it is the icing on the cake. Good to know where that expression comes from. Cream cheese makes everything better it seems. It’s simple and pairs perfect with the sweet flavors of carrots and pineapple and spices that you have going on in the cake. And for those of you who are thinking ‘ewww, who wants carrots in a cake’…(yes, I was once one of those) they are soft and sweet once baked in the cake. It’s not like chowing down on a salad.

Toasting the pecans is optional, but makes it extra delicious. (Of course, the nuts can be left out all together if needed. My son is allergic to nuts, but doesn’t eat anything but chocolate cake, so I knew he wouldn’t be touching this.) I think black walnuts would be a good option as well.

The Ultimate Carrot Cake

1 1/2 cups sugar
2/3 cups firmly packed brown sugar
1 cup oil (I used canola)
1/2 cup buttermilk (or milk with a half tablespoon white vinegar, let sit for 5 mins)
4 large eggs, at room temperature
2 teaspoons vanilla extract
1/2 cup crushed pineapple, drained
2 1/4 cups all-purpose flour
1 1/2 teaspoons baking powder
1 teaspoon baking soda
1 teaspoon ground cinnamon
1/4 teaspoon ground ginger
1/2 teaspoon salt
1/4 teaspoon ground nutmeg
2 1/2 cups finely grated carrots
1 cup chopped pecans (optional) *toasted if desired
1 cup golden raisins (optional) *I used regular raisins because that’s what I had on hand

Cream Cheese Frosting:
16 ounces cream cheese, softened
1/2 cup (one stick) unsalted butter, softened
2 teaspoons vanilla extract
3-4 cups confectioners’ sugar, to taste

  • Preheat oven to 350 degrees F. Place oven rack in center of oven. Prepare two 9-inch cake pans by lightly coating with cooking spray and lining with parchment paper. 
  • In a large mixing bowl, beat the eggs, sugar, brown sugar, oil, buttermilk, vanilla, and pineapple together.
  • In a separate bowl, whisk together the flour, baking powder, baking soda, cinnamon, ginger, salt and nutmeg.
  • Add the flour mixture to the egg mixture and mix until blended together. 
  • Fold in carrots, pecans and raisins (if using) just until mixed in.
  • Pour batter into prepared pans and bake approx 30-40 minutes or until done (can check doneness by sticking a toothpick into the center of the cake, if it comes out clean, it’s done)
  • Cool cakes in pan for 15 minutes then, turn onto baking rack to cool completely before frosting. (remove parchment paper) 
  • While cakes are cooling, prepare frosting by mixing cream cheese and butter together until creamy and smooth. Mix in vanilla, then confectioners’ sugar, one cup at a time, until frosting has the desired consistency. 
  • Once cake has cooled, frost with cream cheese frosting. Add pecans to the top and /or sides of cake for decoration if desired. Chill. (This will help the frosting firm up some.)
Recipe Source:

This recipe is a little more work than my normal recipes, but it’s worth it! Definitely worthy of the Easter table and I will probably be making it again this year. Easter is coming so fast that I am not prepared at all. The weather is not cooperating either, I need Spring temps and sunshine!

And if you are looking for a healthier snack after indulging in this cake and all the kids’ Easter candy, check out my review of these low-carb, low sugar protein bars!

Come join me on !

I may be linking up at any of the following – (Monday)  (Tuesday) , , (Wednesday)  (Thursday)  (Friday) ,, ,

Bubble Up Apple Pie {4 ingredients!}

If you have been on Pinterest or have been following my blog a while, you are probably familiar with the “bubble up” casseroles. I have made several over the years, and I see new variations popping up all the time. It’s basically a casserole made with cut up biscuits and your choice of meats, cheeses, veggies, you name it. However, now I’ve discovered a dessert version *insert big smiley face*. Biscuits and sugar. Carbs on carbs. You know it’s gonna be good!

It’s not super pretty, but you could dress it up with a powdered sugar or cream cheese drizzle. I had every intention of doing that…but it just didn’t last that long. You could also serve it with some vanilla or butter pecan ice cream!

“Bubble Up” Apple Pie

1 (8-count) can of Pillsbury Grands Biscuits, cut into 8ths (I used reduced fat)
1 (21 ounce) can Apple Pie filling (I used the ‘no sugar added’ variety)
1 teaspoon apple pie spice (or cinnamon)
1/2 cup chopped walnuts or pecans (optional)
 
*the original recipe called for 1 cup butterscotch chips, but I omitted*
  • Preheat oven to 350 degrees F.
  • Spray a 9×13 inch pan with cooking spray.
  • Open can of pie filling and take a sharp knife and stir around the can to slice up apples (just so they are not in big chunks).
  • Pour pie filling in a large bowl. Add biscuit pieces and apple pie spice. Stir.
  • Pour mixture into pan.
  • Top with chopped nuts, if using.
  • Bake 30 minutes or until biscuits are lightly browned and cooked through (check the center for doneness)
  • Remove from oven and cool slightly. Add glaze if desired. Serve warm or room temp.
recipe adapted from
This was a quick and easy dessert to throw together on a week night. In my opinion, it’s best served the same day it’s made, but leftovers can be stored in the fridge and re-heated in the microwave. I’m seeing different flavor combinations in my future…cherry pie filling with chocolate chips for a Black Forest bubble up…blueberry with lemon glaze….and I’m sure I will think of more!
Speaking of more – other Bubble Up recipes I’ve tried….
I may be linking up at any of the following – (Monday)  (Tuesday) , ,, (Wednesday) , (Thursday) , (Friday) ,,(Saturday) 

Chocolate Pudding Dump Cake – 4 ingredients!

I know, I know.  Chocolate again.  I just can’t help it.  There have been birthdays and stuff that have just required chocolate. (Not that I really need a reason, but it helps ease the guilt.)  Week before last, I volunteered (yes, volunteered. I should know better.) to make dessert for a church fundraiser/dinner.  I had all kinds of fabulous ideas floating around on Pinterest in my head that I wanted to try out.  Last week rolls around, and it’s time to make the dessert.  And guess what….sick kid.  Like 104 fever, coughing his guts out sick.  So, I stay home doctoring him for a couple of days and realize it’s getting worse instead of better, so we make a trip to the doctor.  Of course this happens to be the day I’m supposed to make the dessert.  We go to the doctor, Mr. Three has an ear infection, we go to the pharmacy….yada, yada.  So, by the time I get home to make said dessert, I don’t have a lot of time.  Nothin’ fancy is going to be happenin’ in my kitchen.

Thank goodness I had some quick and easy recipes pinned!  Like this ‘‘ by Eat, Live, Run.  It looked super delicious, but only required 4 ingredients.  Holla!  I was all over it.

This is all you need, plus milk.
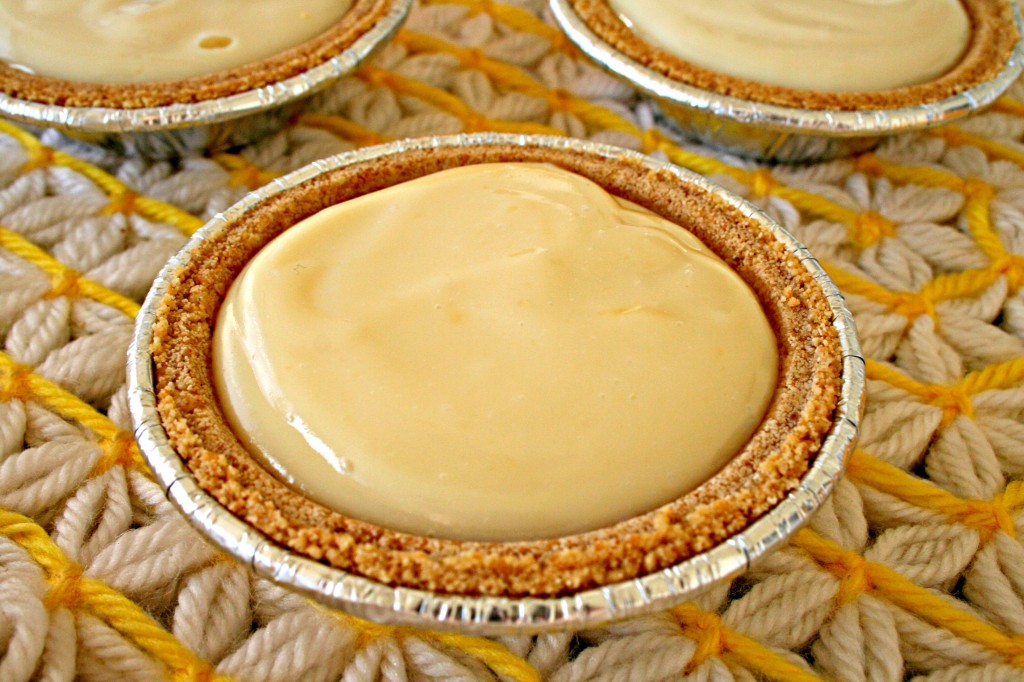
And you end up with this….
Total crowd pleaser!
I SO wanted to try it before I sent it to church, but (one) that would be tacky, and (two)….well, I don’t have a second thing.  It would just be downright tacky, and my mama taught me better than that 😉
However, I was nervous about sending something out the door without having been ‘taste tested’.  The batter was delicious, but that is all I could vouch for.  Anyways…sick kid, no time, no choice!
Chocolate Pudding Dump Cake
(‘dump’ cake is such a Southern thing I think.  Who wants to eat something chocolate with ‘dump’ in the title?!)  Well, me, apparently.  
1 box of chocolate cake mix
1 small box of chocolate instant pudding (I used the sugar free/fat free)
1 3/4 cups skim milk*
1 1/2 cups chocolate chips (I used semi sweet)
Preheat oven to 350 degrees.  Mix your pudding with the milk. *The original recipe said to prepare the pudding with the milk according to package directions.  My package said 1 3/4 cup milk for pie, and 2 cups for pudding.  Her directions called for 1 1/2 cups.  So…I just went with the 1 3/4 cup amount.  She used regular instant pudding, not sf/ff, so her box might have called for a different amount.  After mixing your pudding and milk, stir in your chocolate cake mix.  Just the dry mix, do not add anything to it.  The batter will be very thick.  (Like very thick frosting!).  It’s okay, just go with it.  Spread it into a greased 9×13 baking pan and scatter the chocolate chips on top.  Bake for 30 minutes, until the edges start pulling away from the pan.  My oven cooks hot, so I only cooked mine for about 25 minutes.
Looks good right?  I told my children they must taste it and let me know how it was!
Verdict? The kids said it was fantastic.  I was told it was the 1st dessert to run out.  Others were talking about it afterwards….sooo, I’m calling this one a keeper, even though I haven’t actually tasted it!  But with all that chocolate, how can you go wrong?!  You could also change this up and use different flavors of cake mix and pudding, and different chips.  Lots of possibilities, and it’s easy!  What would your favorite combination be? I’d love more ideas!
I have a giveaway going on for a $25 dollar gift card to sneakpeeq.com.  Be sure to check it out and enter! *GIVEAWAY ENDED*

I’m linking up today with , , , , , , , , , , Our Delightful Home, , , , , ,