Non-Scale Victories {#TheWinningMoment #WeightWatchersIceCream #ad}

This post brought to you by . The content and opinions expressed below are that of Makin’ it Mo’Betta.

I don’t know about y’all, but I get sick and tired of obsessing over everything I eat, everything my children eat, and constantly feeling like I am depriving myself. I have often had the mentality “I can’t eat that”…because it has too much fat or too many carbs, it has this in it or that…It can be exhausting! That’s one of the things I really like about the WW program, is that it takes a lot of the stress out of eating. The apps make tracking food easy, and counting points was much less stressful to me than counting calories. Now, it’s been a couple of years since I followed the program, but I still keep the basic principles in mind…I know if I eat pizza, I need to balance that with healthier options the rest of the day. Just knowing I CAN eat pizza or whatever you may consider your “forbidden” food, makes eating much more enjoyable. It’s all about moderation! It also helps a TON, that Weight Watchers® has many products available that are comforting and delicious, but still help maintain your goals. These non-scale victories make everything better!
 are satisfying, delicious, and if you are interested in the Points Plus values, they are listed right on the package. Less stress + yummy treats = A Winning Moment! Not to mention they come in a variety of flavors and are available in bars, cones, and sandwiches. They have flavors other than those pictures as well, like Dark Chocolate Raspberry! I’ve tried them all (you know, for research purposes *coughcough*) and I have to say that the Dark Chocolate Dulce de Leche was a favorite! Another great thing, they are sold in several convenient locations such as Walmart, Target, Kroger, Publix, Safeway, Stop & Shop, Shoprite, and Supervalue.

My kids were more than happy to dive into the treats, and being able to keep up with my children and enjoy life with them is definitely a winning moment as well. There are certainly more things in life to validate me, my life and my sense of self-worth other than a number on the scale.

It’s little changes that I am continuing to make each day that help me feel happy, healthy and content. Don’t get me wrong, I still want the number on the scale to go down…but I’m not obsessing over it. As a matter of fact, my daughter sneakily took the above picture of me, and I didn’t immediately delete it! Usually, I’m my own worst critic, and loathe seeing pictures of myself. Not only did I not delete it, I decided to post it here. Why? Because I can see progress. Those are my winning moments. 

And this…this is another non-scale victory and winning moment! Whenever I go over my step goal for the day (usually around 10,000), I feel a sense of accomplishment. It means I got my butt moving. It means I’m doing something for ME, but I’m also (hopefully) setting a good example for my children. When my kids see me exercising, preparing meals for the family, making healthier swaps with ingredients and food choices, and teaching them that foods are not to be considered the enemy or forbidden, but enjoyed and incorporated into a balanced life, I hope it sticks with them as they grow and make their own choices.

What do you consider some of your winning moments?

WEIGHT WATCHERS on foods and beverages is the registered trademark of WW Foods, LLC. WEIGHT WATCHERS for services and PointsPlus are the registered trademarks of Weight Watchers International, Inc. Trademarks are used under license by Wells Enterprises, Inc. ©2015 Weight Watchers International, Inc. All rights reserved.
National Donut Day! Recipes & Freebies

Not only is it Friday, which is awesome in itself, it’s also National Donut Day! If you follow me on (and you should! I share lots of stuff that doesn’t make it to the blog.) you already know this. Because some holidays are more exciting than others. ABC News released a list of all the places to score today…free donuts are definitely news worthy.

For the rest of us, who are trying to avoid fried dough like the plague, I have some healthier versions that can be baked up at home. Yes, I said baked. Yes, I know a baked donut is basically a muffin, but hey, we’re doin’ all we can here to fit into a dag blasted bathing suit. Yes, I said dag blasted. Because apparently I’m 80. 

So, here we go:
Baked Meyer Lemon Donuts (can be made with regular lemons or even oranges, or a combo of both!)


What’s your favorite donut? 

Fun Graduation Treats

Whether you are celebrating high school, college, or Kindergarten graduations soon, these fun graduation treats will make any age graduate feel extra special. We will be celebrating 1st, 6th and 8th grade graduations so I will have an excuse to make them as well! (As an added bonus, they are no-bake treats!)

Oreo Cake with Oreo Whipped Cream Frosting

I guess it’s Cake Week on the blog! I have almost always made my kids’ birthday cakes. My mom always made mine (and my siblings’…I would always choose chocolate cake with chocolate icing and my brother would want strawberry cake with chocolate icing and I would get mad. I hated strawberry cake! #itsallaboutme) Now that my girls are getting older, they like to go on Pinterest and find cakes that generally go beyond the “chocolate or vanilla – or strawberry“. I’m sure one day soon their requests will exceed my skill level, but for now, it’s pretty fun!
My oldest chose this Oreo Cake for her birthday this year. Somehow, I have a 14 year old. I’m not sure how this happened. Why does time speed up once you have children? (Unless they have a stomach virus in the middle of the night. Time slows WAY down then.)
The cake has Oreo cookies in the cake itself, Oreos in the icing, and then I added some mini Oreos on top. Both layers had Oreos baked right in, and I loved the flavor and crunch of the baked Oreos.
The only negative is that the whole Oreos made the cake a little difficult to slice. Next time I may use mini Oreos instead.
Oreo Cake with Oreo Whipped Cream Frosting
1 box chocolate cake mix (without pudding in the mix)
1 box (4 serving size) instant chocolate pudding mix (I used Hershey’s)
1 cup sour cream (can also use plain yogurt)
1/2 cup canola oil
3 eggs, room temp
1/2 cup coffee (room temp or slightly warm, not hot – leftover coffee is fine; can sub with water)
1 package Oreo Cookies, divided
  • Preheat oven to 350 degrees.
  • In a large mixing bowl, combine the cake and pudding mixes, sour cream, oil, and coffee. 
  • Add in eggs, one at a time, stirring until just combined. Scrape down sides.
  • Beat mixture on medium speed for 2 minutes. 
  • Spray two cake pans with cooking spray, and line bottom of each pan with desired number of Oreo cookies. I used 11 whole cookies in each pan, but could have squeezed in a couple more!
  • Pour cake batter over cookies in prepared pans.
  • Bake for suggested time on back of cake mix box, or until top is springy to the touch and a wooden toothpick inserted comes out clean. 
  • Allow cake to cool in pan for 10-15 minutes, then invert onto cooling rack to cool completely before icing.
Oreo Whipped Cream Frosting
 
1 quart Heavy Whipping Cream
1/2 cup powdered sugar
1 teaspoon vanilla
12 Oreo Cookies (crushed with a rolling pin or pulsed in food processor until crushed in large crumbs. Do not over process.)
small “grab bag” mini Oreos (optional)
  • Place mixing bowl and mixer attachment in freezer for 10-15 minutes to chill.  
  • After chilling, add cream to bowl and mix on medium speed until it starts to thicken.
  • Add vanilla and beat until mixture is to desired thickness and forms stiff peaks.
  • Fold in cookies. Keep refrigerated until ready to frost cake.
To Assemble:
Place one layer of cake on a plate. I would recommend Oreo side down on bottom layer, and up for top layer. Having the cookies in the middle made it a little more difficult to slice. Frost entire cake and keep chilled until ready to serve. If desired, add mini Oreo cookies on top for decoration.

This cake was inspired by , ,  Makin’ it Mo’Betta

This Oreo Cake with Whipped Cream Frosting was featured at:

I may be linking up at any of the following – (Monday)  (Tuesday) , , (Wednesday)  (Thursday)  (Friday) ,, ,

Lemon Supreme Pound Cake {starts with a mix}

This recipe is kickin’ it old school. It came out on the package of Duncan Hines cake mix back in the 70’s (according to it was 1978.) I was a mere babe back then and not yet baking, but I have been using a variation of it for years. I usually make a chocolate version (because I am a chocolate freak), but lemon/citrus cakes just scream SPRING and are quickly becoming a favorite as well. But if I’m being honest, have I met a cake I didn’t like? Probably not.

This was perfect for Easter, and forgot to include it in my last post. We have had an abundance of cakes going on around here! I do love a bundt cake. I’m not sure why!
And, just 4 ingredients + water…how convenient is that?
The version I usually makes also has a cup of sour cream (or yogurt). I didn’t think to add it to this one, but I think it would have made it even more moist and dense, like a traditional pound cake. Even so, it was delicious as is, and was really tasty with fresh strawberries and whipped cream!

Lemon Supreme Pound Cake

1 box Lemon cake mix
1 package instant lemon pudding mix (4-serving size)
1 cup water
1/2 cup oil
4 eggs

Glaze (optional)
1 cup confectioner’s sugar
1-2 tablespoons lemon juice (can also use milk, cream, half-and-half)
zest of lemon (optional)

  • Preheat oven to 350 degrees F. Grease and flour a bundt pan (I used the Baker’s Cooking Spray), set aside.
  • Add cake mix and pudding mix to a large mixing bowl. Add water, oil and eggs. Stir until combined.
  • Beat on medium speed for 2 minutes.
  • Pour cake mix into prepared pan. Tap pan on counter a couple of times to remove any air bubbles.
  • Bake for 40-50 minutes; cake is done when lightly browned and center springs back when gently pressed. Cool in pan for 20 minutes.
  • While cake is cooling, make glaze (if desired) by combing confectioners sugar with 1 tablespoon lemon juice. Slowly add in additional juice/liquid until desired consistency is reached. Mine ended up a little thinner than I would have liked, and could have been thickened up with more sugar, but I just left it as is. I also added the zest of a lemon to my glaze for extra lemon flavor.
  • Invert cake onto plate and drizzle with glaze.
Recipe Sources: and
Another great recipe that begins with lemon cake mix –

I may be linking up at any of the following – (Monday)  (Tuesday) , ,,  (Wednesday)  (Thursday)  (Friday) ,, ,

Easter Treats – Dessert Recipe Round-up

Easter is just around the corner, which doesn’t seem possible seeing as we had SNOW FLURRIES over the weekend! Most of the time, Spring is in full swing by Easter. However, the weather will not stop me from making bright and cheerful desserts. You gotta stand strong! Break out the pastel candy even if you are wearing jeans and sweaters! Bake up some lemony goodness despite the gray and cold! WILL IT to be Spring!! Okay, so maybe I got carried away.

Check out this round up of Easter Treats!

(Pictured above)
Cadbury ‘Deviled’ Eggs – No recipe – just Cadbury Eggs, cut in half and decorated with yellow frosting and sprinkles to look like deviled eggs. Very cute, VERY sweet! (It helps to chill the eggs for cleaner cuts)
Spring Kit Kat Cake
 
Thick and Chewy Cookies with Spring Chocolate Chips (or candy)
or
My favorite Chewy Chocolate Chip Cookie Bars – can also make with spring candy or chocolate chips
Quick and Easy Lemon Brownies (3 ingredients!)
I don’t know about y’all, but I’m hungry now! Have you made out your menu for Easter Sunday? I’m still deciding…
I may be linking up at any of the following – (Monday)  (Tuesday) , , (Wednesday)  (Thursday)  (Friday) ,, ,

The Ultimate Carrot Cake with Cream Cheese Frosting

I like carrot cake. That’s not a big deal except I didn’t know I liked carrot cake until I made this one. This carrot cake is amazing. I’m not usually one to toot my own horn, but…oh wait…yes I am. So never mind.

I made this one for my family’s get together last Easter because carrot cake is one of my dad’s favorites, and it is perfect for Easter. Because it has carrots in it. And rabbits like carrots. And the Easter bunny is a rabbit. That’s my logic and I’m sticking to it. Seriously, this cake is fluffy and moist and full of flavor, and can convert people who don’t think they like carrot cake to people who loooove carrot cake. True story.

The cream cheese frosting is the ‘icing on the cake’. Well, literally, it is the icing on the cake. Good to know where that expression comes from. Cream cheese makes everything better it seems. It’s simple and pairs perfect with the sweet flavors of carrots and pineapple and spices that you have going on in the cake. And for those of you who are thinking ‘ewww, who wants carrots in a cake’…(yes, I was once one of those) they are soft and sweet once baked in the cake. It’s not like chowing down on a salad.

Toasting the pecans is optional, but makes it extra delicious. (Of course, the nuts can be left out all together if needed. My son is allergic to nuts, but doesn’t eat anything but chocolate cake, so I knew he wouldn’t be touching this.) I think black walnuts would be a good option as well.

The Ultimate Carrot Cake

1 1/2 cups sugar
2/3 cups firmly packed brown sugar
1 cup oil (I used canola)
1/2 cup buttermilk (or milk with a half tablespoon white vinegar, let sit for 5 mins)
4 large eggs, at room temperature
2 teaspoons vanilla extract
1/2 cup crushed pineapple, drained
2 1/4 cups all-purpose flour
1 1/2 teaspoons baking powder
1 teaspoon baking soda
1 teaspoon ground cinnamon
1/4 teaspoon ground ginger
1/2 teaspoon salt
1/4 teaspoon ground nutmeg
2 1/2 cups finely grated carrots
1 cup chopped pecans (optional) *toasted if desired
1 cup golden raisins (optional) *I used regular raisins because that’s what I had on hand

Cream Cheese Frosting:
16 ounces cream cheese, softened
1/2 cup (one stick) unsalted butter, softened
2 teaspoons vanilla extract
3-4 cups confectioners’ sugar, to taste

  • Preheat oven to 350 degrees F. Place oven rack in center of oven. Prepare two 9-inch cake pans by lightly coating with cooking spray and lining with parchment paper. 
  • In a large mixing bowl, beat the eggs, sugar, brown sugar, oil, buttermilk, vanilla, and pineapple together.
  • In a separate bowl, whisk together the flour, baking powder, baking soda, cinnamon, ginger, salt and nutmeg.
  • Add the flour mixture to the egg mixture and mix until blended together. 
  • Fold in carrots, pecans and raisins (if using) just until mixed in.
  • Pour batter into prepared pans and bake approx 30-40 minutes or until done (can check doneness by sticking a toothpick into the center of the cake, if it comes out clean, it’s done)
  • Cool cakes in pan for 15 minutes then, turn onto baking rack to cool completely before frosting. (remove parchment paper) 
  • While cakes are cooling, prepare frosting by mixing cream cheese and butter together until creamy and smooth. Mix in vanilla, then confectioners’ sugar, one cup at a time, until frosting has the desired consistency. 
  • Once cake has cooled, frost with cream cheese frosting. Add pecans to the top and /or sides of cake for decoration if desired. Chill. (This will help the frosting firm up some.)
Recipe Source:

This recipe is a little more work than my normal recipes, but it’s worth it! Definitely worthy of the Easter table and I will probably be making it again this year. Easter is coming so fast that I am not prepared at all. The weather is not cooperating either, I need Spring temps and sunshine!

And if you are looking for a healthier snack after indulging in this cake and all the kids’ Easter candy, check out my review of these low-carb, low sugar protein bars!

Come join me on !

I may be linking up at any of the following – (Monday)  (Tuesday) , , (Wednesday)  (Thursday)  (Friday) ,, ,

The Best Cookie Icing!

Cookie (and cake) decorating is a fine art. I’ve seen some beautifully decorated and detailed cookies, and I think “Wow. I do not have the patience for that.” And really, if I put so much time into decorating a cookie, I certainly wouldn’t want anyone to just eat it. Therefore, I am not a cookie decorator. However, I am partial to slapping a glaze and some sprinkles on a cookie and calling it a day.

Sprinkles are fun. My kids love them, and let’s face it, icing is extra sugar so it makes cookies even better. Mo’betta if you will.
I love a good homemade cookie, but I don’t stick my nose up at a box mix either. When I saw this new Meyer Lemon cookie mix, I just had to give them a try. Did you catch my “all things Meyer Lemon” post? Love them. I thought adding some icing and sprinkles (and the mix came with the colored sugar) would make a pretty and Spring-y cookie. Since it was 20 degrees but felt like OMGthisisridiculous degrees, I needed something to get me through!
Sometimes you just have to bake your own sunshine.
In the past, I have made icing for cookies, but it usually stayed wet and sticky or got dry and flaky. This past Christmas, when making Gingerbread Men with the kids (that I forgot to post!), I stumbled upon the perfect icing. It hardens enough that you can stack a cookie or two on top of each other, but not rock hard so it’s crunchy. It’s like edible puff paint! It is now my go-to cookie icing, whether it’s gingerbread men or sugar cookies.
You can use different extracts to change the flavors, or add food coloring to make different colors and it always sets up nicely. My kids got very creative at Christmas!
Cookie Icing (Glaze)
1 cup powdered sugar, sifted
1 tablespoon milk
1 tablespoon corn syrup (light)
1 drop of lemon juice (we added several drops to give it a lemon flavor for lemon cookies above)
  • Add all ingredients to a small bowl and stir to combine. Add food coloring if desired. Top cookies with glaze and add sprinkles before the icing sets.
*For cookie decorating tips, such as flooding, outlining, etc. see the recipe source at *
I may be linking up at any of the following – (Monday)  (Tuesday) , , (Wednesday)  (Thursday)  (Friday) ,

Chewy Chocolate Chip Cookie Bars {my favorite bar recipe!}

I know I post a lot of cookies. Like…a lot.of.cookies. I love cookies. Cookies are probably my dessert of choice. And I’ve already typed cookies several times and I’ve just started. Well, I’m not breakin’ out the thesaurus. My point is I’ve baked a lot of cookies, and I have my “go-to” cookie recipe, but these are cookie BARS. Meaning, they are even easier because you don’t have to measure them out, space them, stand near by to bake batch after batch. Yep…these are homemade cookies, made easier, and just as awesome. You’re welcome.

This is my favorite cookie bar recipe to date. No waiting for butter to soften, no scooping out even amounts of dough, just mix it up, slap it in a pan, and bake. Did I mention they are soft, chewy and delicious? These were made with all chocolate chips, but we made some for Thanksgiving with chocolate chips and M and M’s.

I like the ease of this recipe, and you can cut them into any size you want, so they can feed a crowd if needed. I hate to say how quickly the 4 of us can go through a batch. It’s embarrassing.

Chewy Chocolate Chip Cookie Bars

2 1/8 cups flour
1/2 teaspoon salt
1/2 teaspoon baking soda
3/4 cup butter, melted and slightly cooled
1 cup brown sugar

1/2 cup white sugar

1 large egg
1 large egg yolk*
2 teaspoons vanilla extract
1 cup semi-sweet chocolate chips

*we have made this without the additional yolk and they were just as good, in my opinion
  • Preheat the oven to 325 degrees. Grease an 11×7 inch baking pan. (Can use a smaller pan for thicker bars or a 9×13 pan for thinner bars, adjust bake time accordingly.)
  • In a medium sized bowl, whisk together the flour, salt, and baking soda.
  • In a large mixing bowl, whisk melted butter, brown sugar and white sugar until combined.
  • Add the egg, egg yolk, and vanilla to the sugar mixture and mix well.
  • Add the dry ingredients to the wet, and mix just until combined; do not overmix. 
  • Fold in chocolate chips. (Can reserve a few for the tops if desired.)
  • Press the dough into prepared pan and level out with spatula (or hands). Sprinkle reserved chocolate chips on top if desired. 
  • Bake approximately 25 minutes (depending on pan size), until the top of the bars are a light golden brown. They should still be a little glossy on top, like they are not quite fully baked so they will be nice and chewy.
Recipe Source:
So…who’s ready to make cookies?! Above is my favorite homemade cookie bar recipe (as of this posting anyway!), this is my favorite for individual cookies, and this is my favorite cookie bar using a cake mix!
I may be linking up at any of the following – (Monday)  (Tuesday) , , (Wednesday)  (Thursday)  (Friday) ,

Meyer Lemon Recipe Round Up

I’m pretty much in love with Meyer lemons right now, so I thought I would do a little round-up. It’s helping me cope with the winter blues. I’m ready for Spring!

Low Fat Meyer Lemon Muffins – I know I just posted these, but just in case you missed them!
Citrus Blueberry Loaf with Meyer Lemon Glaze (this is a shortcut recipe using a mix)
Meyer Lemon Chicken Soup with Orzo –  I love this soup, and have some in my fridge right now!
Egg Free Lemon Curd – made with Meyer Lemons and would be really good on the above baked oatmeal!
Glazed Meyer Lemon Almond Cookies – I really need to make these again soon.
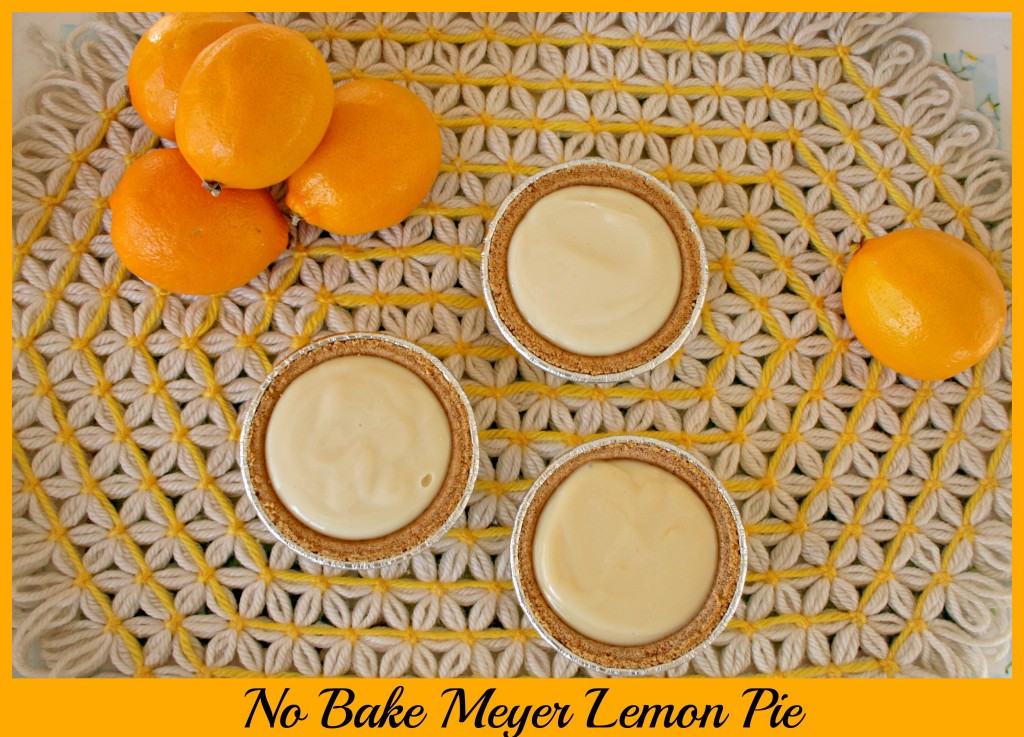
No Bake Meyer Lemon Pie – Love these, and only 2 ingredients…what’s not to love!
Are you Team Lemon? What’s your favorite lemon recipe?