Italian Meatball Sliders & GIVEAWAY!

This is a Sponsored post written by me on behalf of for . All opinions are 100% mine.
When I think of meatballs, I think of labor intensive and time-consuming. However, that’s not the case at all wtih this  recipe from . They came together quickly, baked up in less than 20 minutes, and tasted delicious!

I decided to make meatball sliders as a quick meal before heading out for my girls’ volleyball games. My middle child loved these! I loved the fact that they were simple to prepare, flavorful, had a great texture (sometimes meatballs have a weird texture that I don’t like), and they weren’t greasy in the least…

See…almost no grease! I used a very lean ground beef (90/10) but the original recipe calls for ground turkey, which would also work great as I use turkey quite often. Even though the meat was very low in fat, the meatballs had a great flavor from the blend of spices.

I threw in some red pepper flakes for a few of the meatballs (not all, since I knew my kids would not like any heat!) The  have a blend of basil, oregano, garlic, salt and pepper; combined with bread crumbs. I used plain Japanese Panko bread crumbs and spices by McCormick. I think next time I may reduce the garlic just a little, but that’s just a personal preference – we aren’t huge garlic fans. Meatballs can be used for any number of dishes, but since we were so short on time, I thought sliders would be a good option. I took a roll, split it, added a little pizza sauce, topped it with the meatballs and reduced fat mozzarella cheese, and baked for a few minutes – until the cheese was nice and melted.

YUM! I am definitely adding these to my “make again” list – I can see meatball subs, spaghetti and meatballs, meatball sub casserole, meatballs in sauce….all in our future. We enjoyed them so much, I made a video…I’m calling it the original ‘Cloudy with a Chance of Meatballs’. haha, enjoy my “movie”!

Now, onto the giveaway! How would you like to win this McCormick Gift Set?

Nice right?! I would personally love to win this myself! All you need to do to qualify is answer the question “What’s your favorite McCormick Spice?” in the comment section of this post!
For additional entries, you can also “like”  on Facebook;  on Twitter and  on Pinterest. Just leave a seperate comment for each additional thing you do.  (Shipping is only available within the US.)  *GIVEAWAY ENDS 10/20/13 at midnight EST*

Low Carb Cinnamon Crunchies

If you are following a low carb diet, you know how difficult it can be to satisfy that sweet tooth sometimes. Several years ago, a co-worker told me about these cinnamon snacks and I’ve been making them ever since. When I tell you the ingredients, you may think I’m a little nuts, but seriously, they are good! (I can’t say they are good for you, but there is a lot of debate about low carb diets and the amount of fat in them.)

These are similar to the cinnamon twists from Taco Bell. Can you figure out the main ingredient from the picture? Pork rinds! Yep, I’m not kidding…

Low Carb Cinnamon Crunchies

  • 1 bag plain pork rinds (full size bag, not snack size)
  • 4 T. butter, melted
  • 1 T. cinnamon
  • 1-2 tsp. sweetener of choice (I prefer to use stevia)
Place pork rinds in a gallon size ziploc bag. Pour melted butter over pork rinds. Close bag and shake until pork rinds are coated in butter. Mix together cinnamon and sweetener, sprinkle over pork rinds, shake bag again until pork rinds are coated in cinnamon mixture. Store in air-tight container.
You can also place the coated pork rinds on a baking sheet and heat for a few minutes to make them warm and extra crispy. You can also do this if they start to get soft and they will crisp up again. Ours usually don’t last long enough! You may need to play with the cinnamon-sweetener ratios to get your desired flavor. Check out my Pinterest Board for more recipes and ideas!

Peanut Butter Cookies {4 ingredients; GF; low carb option}

When I discover a recipe that allows me to make cookies by only messing up 1 bowl, 1 spoon and uses 4 ingredients…I’m so in. This is a great recipe for the kids to make for the same reasons – super easy, and not so messy! In fact, my kids made at least 3 batches of these cookies in one week! (One batch was included in the end of the year teacher gifts.)

You can make them with the traditional criss cross markings on top, which for whatever reason is my favorite.
You can make them as drop cookies or roll them into balls, AND you can add chocolate chips – if you want to make it 5 ingredients. Chocolate makes everything mo’betta.
You can also make these with regular peanut butter, natural peanut butter, or peanut butter replacements (WowButter, Sunflower butter). You can also make them with sugar substitutes, like Splenda, for a low carb, low sugar version. {and yes, I’m aware that some people are totally against Splenda. I personally prefer Stevia as a sugar sub, but Splenda seems to work better in baking. When you have a diabetic in your family, sugar substitutes are going to be a part of your life.}
We tried different versions, and the best texture comes from regular peanut butter and powdered sugar. The ones with Splenda were a little crumbly, with a slight artificial sweetener aftertaste, but were still good and a treat when you need something low in sugar and carbs. The ones with the natural peanut butter were also good, they are just a little greasier than when using regular peanut butter, but I always buy natural peanut butter (the no-stir kind with no hydrogenated oils), so this is how we will usually make them. When made with peanut butter replacements, they are going to taste like the replacement used, and depending on which one is used, they may be a little greasy or crumbly. I like the flavor of Sunbutter best (I have an easy homemade version here), but WowButter is cheaper and easier to find around here. *There are a couple of other cookies on the blog using PB replacements here and here*  These cookies are flourless, so they make a great snack for anyone who is following a gluten-free diet too! (Just make sure other ingredients used are gluten free.)
Peanut Butter Cookies
from
1 cup peanut butter
1 cup powdered sugar (or Splenda for sugar free)
1 egg
1 tsp vanilla extract
1/2 cup chocolate chips (optional)
Preheat oven to 375 degrees F. 
Line cookie sheet with parchment paper or silicone liner.
Add all of the ingredients to a medium size mixing bowl, and stir until combined and smooth.
Take about a tablespoon of dough and (1) roll in a ball, then use a fork to press down in one direction, then the opposite direction to make your criss cross markings on top OR (2) drop onto cookie sheet 2 inches apart and bake for 8-10 minutes. *The original recipe said 10, ours only needed 8-9 minutes*
Remove from oven and cool on cookie sheet for 5 minutes, then transfer to a wire rack to cool completely.
Have any low carb dessert recipes? I’d love to hear about them!
 
I may be linking up at any of the following – (Monday) , , , , , , , , , , ,  (Tuesday) , , ,,, ,  and , ,  ,  (Wednesday) , , , , , , ,   (Thursday)  ,, , , , (Friday) ,  , , , , ,, , , ,, , , ,, (Saturday) ,  , , ,  (Sunday) , , 

Chicken Parmesan Casserole

I know I have had a lot of sponsored posts as of late, and not as many recipes, but things have been a little crazy around here.  My 5 year old has been sick for over 2 weeks now, and I just haven’t had the time to do  the blog planning, menu planning, or cooking that I had been doing before.  My little one had been dealing with allergies, and was getting along pretty well, but then got a virus that went straight to his chest and caused  the worst asthma flare-up he has ever had.  We ended up in the ER for the first time ever.  Can I just say…NOT. FUN. As he was trying to get over all that, he has gotten a sinus infection on top of it. AND ‘pink eye’…in both eyes. He is really having a hard time, and his poor little immune system can’t take much more! So, say a little prayer for his health, and my sanity. He was up and down all night last night due to the fever and discomfort. Needless to say, mama is tired!  It’s days like this when I love the ease (and comfort!) of a casserole.

I have seen a version of this recipe from numerous sources on Pinterest, and the first time I made it, I followed the directions and used raw chicken in the casserole…letting it all cook at one time.  The flavor was really good, but the casserole had a lot of “liquid” in it.  All I could think of is…’ewwww, chicken juice!’  The idea of my casserole floating in chicken fat just kind of grossed me out. However, I love Chicken Parmesan and decided to give the casserole another shot, but pre-cooking my chicken.
This is definitely my preferred method. Yes, it is an extra step, but it eliminates all the extra liquid.  I actually cooked my chicken in the crock pot, so all I had to do was shred the chicken when I was ready to prepare my casserole. However, I think I would prefer chunks of chicken in this, so next time I will just boil it. (I know, I’m picky right?!)
Chicken Parmesan Casserole

adapted from:

2 lbs cooked boneless, skinless chicken breasts (shredded or cubed)
2 cloves garlic, minced
¼ tsp crushed red pepper flakes (or to taste)
¼ cup fresh basil, finely chopped
2 cups favorite pasta sauce 
2 cups shredded mozzarella cheese, divided
2 oz Parmesan cheese, divided (I didn’t actually measure this, I just sprinkled some on!)
3.5-5 oz bag of croutons, roughly crushed (I used a garlic and cheese flavor)


*Preheat oven to 350 degrees. 
*Spread the cubed chicken across the bottom of a 9 x 13 baking dish (lightly sprayed with cooking spray) in a single layer. 
*Sprinkle the garlic, red pepper flakes and basil evenly over the chicken. 
*Top chicken with the pasta sauce in an even layer.
*Sprinkle 1 cup of the Mozzarella and one ounce of the Parmesan evenly across the top. 
*Add the crushed croutons, then remaining cheese.
*Bake, uncovered, for 20-25 mins or until cheese is melted and sauce is bubbly.


I am linking this recipe up at (Monday) , , , , , , , , ,  (Tuesday) , , , ,, (Wednesday) , , , , , , ,  (Thursday)  ,, , , , (Friday) ,  , , , , ,, , , , ,,  (Saturday) ,  ,  (Sunday) 

Yay! This recipe has been featured at  and the !

Baked Bacon & Eggs

Are you looking for an easy and delicious Mother’s Day breakfast or brunch idea? This Baked Bacon & Eggs makes a large casserole dish full of cheese-y scrambled eggs, topped with bacon. They are probably the best eggs I’ve ever had!

I’ve never thought about cooking eggs in the oven, except as part of a breakfast casserole (which we are quite fond of as evidenced by this, this and this!) – but these are basically scrambled eggs baked in the oven! Convenience…I love it.  I originally got the idea from when she posted her family’s recipe for ‘Christmas Eggs’.  I decided I would make them for one of our many breakfast suppers. However, as per usual, I didn’t bother to read all of the instructions prior to making the dish.  I realized I was supposed to let the egg mixture sit overnight.  Oops. Time for plan B – I Googled baked eggs and found another recipe at that did not require sitting overnight.  I kind of merged the 2 recipes and came out with a delicious dinner, that did not require sitting overnight!

Baked Bacon & Eggs

1 dozen eggs (I like Eggland’s Best)
1/2 cup milk (I use skim)
4 oz. plain yogurt (or sour cream)
1 package pre-cooked bacon (or about 10 slices regular or turkey bacon)
1 cup shredded cheese (your preference, I used a blend of cheddar and Monterey)
salt and pepper – to taste
 
-Preheat oven to 350 degrees.
 
-Whisk together the eggs, milk, salt and pepper. (I omitted the salt since I was adding cheese and bacon.)
 
-In a large skillet, cook the eggs until set, but not cooked through (Side note – OR you can place your egg mixture into a greased 9×13 pan and place in oven, stirring occasionally so they cook evenly, until done. Approx. 15-30 mins. I opted to pre-cook mine.)
 
-Remove from the heat and allow eggs to cool. (I stuck mine in the fridge for a few minutes.)
 
-while eggs are cooling, cook bacon in microwave (if using the pre-cooked). Once done, crumble and set aside.
 
-When eggs are cool, stir in the yogurt (or sour cream if using).
 
-Spread the egg mixture into a greased/sprayed 9×13 dish.
 
-Top with crumbled bacon and cheese.
 
-Bake for 15-20 minutes until eggs are fully cooked and cheese is nice and melted.
 
I served ours with grits and biscuits. Delicious! I thought I would have leftovers since it was a dozen eggs for a family of 5 (and Mr. Three will not eat eggs), but nope…that casserole dish was wiped clean!
 
I’m linking this recipe up with  (Wednesday) , , , , , , , ,  (Thursday)  ,, , ,  , , (Friday) ,  , , , , ,, , , , ,,  (Saturday) , ,  ,  (Sunday)  and

This recipe was featured at:

Low Carb Pizza Crust (that you can pick up, hold and fold!)

I’m not a newbie to low carb, and I’ve experimented with different low carb pizza crusts before. There was the egg and cream cheese crust and a previous cauliflower pizza crust attempt. The cauliflower crust had potential, so I decided to give it another try after I saw ‘‘ by The Detoxinista.  The key, she said, was to really squeeze all the liquid from the cauliflower before mixing your other ingredients.  I gave it a try.

Tip: Make your crust thicker than you think you need bc it will flatten out quite a bit once cooked (because of the moisture drying out.)  Once you bake your crust, add toppings and bake a few more minutes.
We had a little meat lover’s action going on.
But check it out!  Low carb pizza that you can pick up, hold, and fold, just like regular pizza!  Pretty cool.
It is also pretty tasty.  The only thing I will do differently next time is to add more spices to the crust.  The cauliflower has a little natural sweetness to it once baked, so I think adding more spices would help.

 Cauliflower Pizza Crust 

adapted from  – my changes in italics
{makes 1 large crust}

4 cups raw cauliflower ‘rice’*
1 egg, beaten
1/3 cup mozzarella cheese
1 teaspoon dried oregano
1/2 teaspoon garlic powder
1/2 teaspoon basil
pinch of salt

*pulse cauliflower in a blender or food processor to achieve a rice-like consistency

  1. Preheat your oven to 400 F.
  2. Cook your cauliflower ‘rice’ by boiling about an inch of water in a large pot.  Add the cauliflower, and cover. Cook for about 4-5 minutes, then drain with a fine-mesh strainer.
  3. Place your drained cauliflower ‘rice’ on a clean, thin dishtowel. Wrap up the steamed rice in the dishtowel, twist it up, and squeeze all the water out! This is the key to having a crust that will hold together! Be careful, the cauliflower and water is hot, but squeeze it good (rubber gloves are handy for this step!)
  4. In a large bowl, mix your strained rice with the beaten egg, cheese, and spices. Mix well.
  5. Press the mixture onto a baking sheet lined with parchment paper or sprayed aluminum foil (mine still stuck to the foil a little, but not bad) into your desired pizza shape. Keep it about 1/3 to 1/2 inch in thickness.
  6. Bake crust for 35-40 mins in preheated oven. The crust should be firm and golden brown when done.
  7. Remove crust from oven and add toppings of choice.  I used pizza sauce, turkey pepperoni, turkey sausage, Canadian bacon, and real bacon bits, and cheese, of course!  Return the pizza to the oven, and bake an additional 5-10 minutes, until the cheese is hot and bubbly.
 **There are excellent step by step pics in the original post.
Verdict? Definitely the best low carb crust I’ve made so far, and I plan on making it again.
I am linking this recipe up at (Monday) , , , , , , , , , ,  (Tuesday) , , , , ,, (Wednesday) , , , , , , , ,  (Thursday)  ,, , ,  , , (Friday) ,  , , , , ,, , , , ,,  (Saturday) , ,  ,  (Sunday) 


Monterey Chicken {Chili’s Copycat recipe}

Cheese. Chicken. Bacon. Barbecue Sauce. You know it’s gonna be good.  Unfortunately, I took the pics when I was in a huge rush to get the kids out the door to volleyball practice, and the lighting was terrible, soooo….don’t judge the recipe by the picture! This blob of cheesiness was pretty darn tasty (and see for a much better picture). Monterey Chicken used to be a popular sandwich at Chili’s Restaurant, (and may still be, haven’t been in a while!) and contains some of my favorite things. I served mine on a plate with sides, but plan on trying it on a nice toasty bun one day soon.  Either way, it’s delish.

Monterey Chicken
source –   my changes in italics

Marinade:
3 T. Honey
3 T. reduced sodium Soy Sauce
3 T. Worchestershire Sauce
1/2 t. minced garlic
1/4 t. sea salt
4 boneless skinless chicken breasts

Topping:
8 oz. Monterey Jack Cheese
8 slices bacon (I used pre-cooked)
8 T. barbecue sauce (Sweet Baby Ray’s)

* Marinate the chicken in a mixture of honey, soy sauce, Worcestershire sauce, garlic and salt for at least an hour (but can be marinated overnight.)
* Preheat oven to 350 degrees. Pour a little of the marinade in the bottom of a large baking pan and place chicken on top. Cover with aluminum foil and cook for about 30 minutes or until the center is no longer pink and juices run clear. (Cook time will depend on the size of your chicken breasts).
* While chicken is cooking, fry up the bacon and set aside – or use pre-cooked bacon as I did.
* After chicken is cooked through, spread with barbecue sauce, top with bacon and cheese. Broil until cheese is bubbly.

Now, I have a little cheat for you – I had pre-cooked chicken breasts from the freezer (thawed), so I placed the cooked chicken in the marinade for a couple of hours (or could be done in the morning before work), then placed my chicken on a baking sheet, covered with barbecue sauce and baked until it was warmed throughout. Then I topped with my pre-cooked bacon and cheese stuck it under the broiler until the cheese was nice and melt-y. It took 15-20 mins at the most (start to finish).  The pre-cooked chicken absorbed the marinade well, and it was a time saver since we had to be out the door pretty quickly for the kids’ practices.  We had baked potatoes (cooked in the microwave in steamer bags) and a salad as quick and easy sides.

This recipe is a keeper!

I am linking this recipe up at (Monday) , , , , , , , , , ,  (Tuesday) , , , , ,, (Wednesday) , , , , , , , ,  (Thursday)  ,, , ,  , , (Friday) ,  , , , , ,, , , , ,,  (Saturday) , ,  ,  (Sunday) 

Crockpot Hamburgers in Gravy & Menu Monday

Recently, I posted how to cook ground beef in the crock pot (aka slow cooker), and it got me to thinking…what about hamburger patties in the crock pot?  I wasn’t sure if it would work or not, I was afraid the patties would just fall apart, but they didn’t!  It actually worked out well.  I started with lean frozen hamburger patties…

Excuse my terrible cell phone picture. The patties look gross and freezer burned, but they weren’t.
 I stacked 6 patties in my crock pot (with a liner – completely optional, it just makes clean up so easy!)  I added hamburger seasoning, water and beef bouillon. (You could use a cup of beef broth or beef consomme)  I would have added onions too, but I was out.  I let them cook for 6 hours on high.
If you have a packet of gravy mix, or a can of Cream of Mushroom, you could go ahead and add those too, I would think.  I, however, didn’t have either of those (can you tell I needed to go to the store!), so I removed the hamburgers at the end of the cook time and added the liquid to a skillet. To the liquid (basically beef broth, because I used lean ground beef), I added homemade cream of chicken and brought it to a boil so it would thicken up.  I then put the hamburger in the skillet with the gravy and let it all simmer together while I got the sides done and table set, etc.  It only took a few minutes.  As you can tell, I’m not a gravy connoisseur.  If you actually know how to make gravy, you may be able to do it all in the crock pot and skip this step, or make the gravy and add to it.  This is just what worked for me with the stuff I had on hand.

Crock Pot Hamburgers in Gravy

Lean Beef Hamburger Patties (I used 6)
1 cup water
1 tsp beef bouillon
homemade cream of chicken (equivalent to 1 can)
salt and pepper – to taste
Place patties (mine were frozen, I think you would need to reduce cook time if using fresh) in crock pot with water and beef bouillon (or beef broth). Cook on high for 6 hours.  Remove patties and use broth to make gravy. Add broth to skillet and add homemade cream of chicken soup, bring to a boil, stirring frequently, until thickened.  Add hamburgers, stir, and add salt and pepper as needed.  I don’t like to add salt at the beginning of a dish in the crock pot, b/c sometimes it ends up way too salty.
NOTES: As stated above, you could probably make the gravy in the pot with the patties if you have prepared Cream of Chicken, Cream of Mushroom, Golden Mushroom, gravy mix, etc.  Also, this is a very basic version of hamburgers in gravy.  If your family likes mushrooms, onions, peppers, garlic, etc., have at it!
I served this with Cauliflower Gratin and canned green beans. We love some canned green beans.  Exciting, I know.
Something new I am trying to do is MENU PLAN! I don’t know about y’all, but for me, it’s hard and time consuming!  However, it really helps me out during the week to have a plan.  Granted, it often changes, but at least I have a general idea of what I want to make based on the ingredients I have on hand.  I base our meals for the week on what is already in the pantry/freezer and then make a list of things I need to get to finish out a recipe.  I’ve been doing menu plans since January, and thought I would begin to post them on the blog.  Maybe it will help someone else out!  I can also keep up with what I have made, what worked, etc.  So here goes…
MondayChicken & Dumpling Casserole (I have a rotisserie chicken in the fridge that I am going to use)
TuesdaySausage, Egg & Biscuit Breakfast Casserole (We love breakfast for dinner. I have some homemade turkey sausage in the freezer.)
Wednesday – (hopefully I will make homemade buns to put it on, but we’ll see how that goes!)
Thursday – leftovers or pasta
Friday – French Bread Pizzas (loaf of bread in freezer, easy homemade pizza sauce in fridge)
Saturday & Sunday – I’ve left open because I don’t know what our plans are yet.
If you do not have time to menu plan, you should check out Eat at Home’s .  She does all the work for you!  You get a slow cooker AND traditional menu plan each week, emailed to you, with a grocery list, printable recipes, side dish suggestions and more, for only $4 a MONTH!
So what about you? Do you plan out your meals or just wing it?
I may be linking this recipe up at (Monday) , , , ,, , , , , , , ,  (Tuesday) , , , ,  , , ,, ,  (Wednesday) , , , , , , , ,  (Thursday) , , ,  , , (Friday) ,  , , , , ,, , , , ,,  (Saturday) , ,  , ,  (Sunday) 
London Broil

Yes, it’s actually a post about MEAT! It’s not something I’m very proficient at cooking, and mainly we eat some form of chicken…but since I have learned how simple it is to make , I think we will be having it more often.

This is a leaner cut of beef, and can be very tough and tasteless if not cooked properly.  However, it is super simple to make a great meal with it, and it’s FAST – so it’s easy to do on a week night.
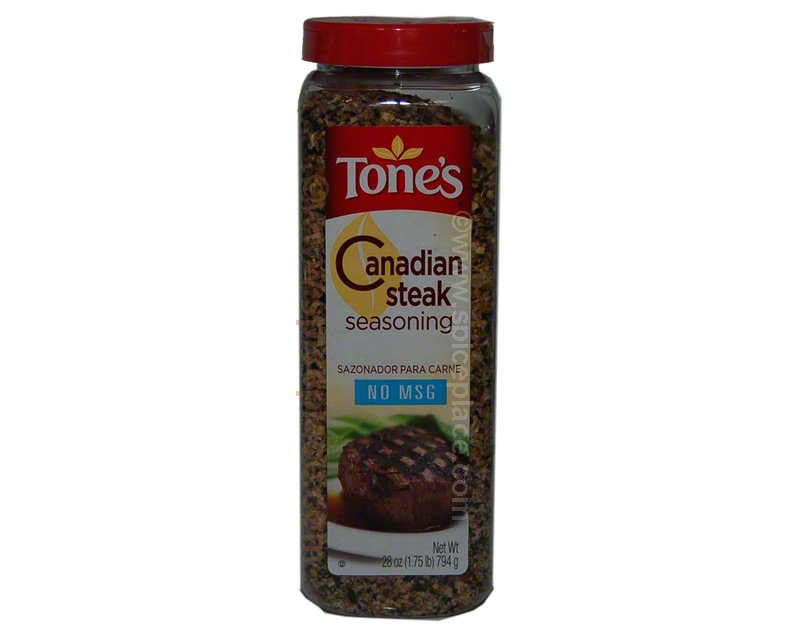
I use this….
 Tones Canadian Steak Seasoning 28oz 794g
and following the directions on the bottle, I marinate the london broil in a gallon size baggie or a casserole dish.  (All you need is the seasoning mix, water, oil and vinegar. I use olive oil and red wine vinegar.) Usually I will do this in the morning and leave it in the fridge all day until I’m ready to cook it.  It can also be done the night before.
When ready to cook it – just place on a pan (I use a cookie sheet/baking pan with sides to it) and place under the broiler on high for 7-10 minutes.  Flip meat, and broil on the other side for 5-10 minutes.  The time varies on the thickness of your meat and how rare you like it.  I think I usually have about a 2 pound steak and cook for abt 10 mins on one side and a little less on the other, so that I have it pink, but not bloody in the middle, and more well done on the ends (for the kids – they don’t like to see pink meat!)
kid’s plate – more well-done
my plate – medium
After broiling meat (which I usually don’t care for, but this is good and flavorful), let it rest for a few minutes so all the juices don’t ooze all out when you cut into it.
This is great plain (we had whole wheat cous cous, salad, and homemade bread – recipe to come!), but it also makes an awesome steak sandwich or salad topping, which is often what I do with leftovers.
So there you go….a quick, easy, fairly inexpensive meal, but very tasty!  (I buy my meat from Sam’s Club and very rarely tenderize my london broil. However, a lot of recipes recommend doing that to prevent toughness, since it is a lean piece of meat.  Use a meat mallot or rolling pin to pound your steak – I was going to say ‘beat your meat’, but that just makes me giggle b/c I have the mind set of an adolescent boy.)
The best part of this meal, other than being easy and delicious, is that my kids will eat it! (Except for Mr. Three….who, as you know, hates almost any “real” food)
Don’t forget to enter my giveaway going on right now for Cheerios! (Something my son will actually eat!)
I’m linking up today with , , , ,

Bacon Wrapped Green Beans

Leave it to me to take something healthy and ruin it.  Not that adding bacon is ruining it, it’s just that whole pesky eating in moderation thing.  Which my husband did not practice when eating these.  It’s not my fault…I have all these green beans coming in from the garden, and posted Green Bean Bacon Bundles.  What’s a girl to do?  Well, make some bacon wrapped green beans of course…

Green Bean Bacon Bundles 
from 
makes about 10-12 bundles *I made 14

1 pound fresh green beans

10-12 slices of thick-cut bacon  *I used regular bacon

2 tablespoons butter

1 tablespoon brown sugar

2 cloves of garlic, minced  *I only used one

1/4 teaspoon salt

1/4 teaspoon pepper

Preheat oven to 400 degrees F. Spray a 9 x 13 baking dish with non-stick spray.

  • Wash and thoroughly dry green beans, then season with salt and pepper. Bundle together about 5-8 green beans – this will depend on your size of beans and the amount of beans you get for one pound. Bundle together as many as you’d like! Using a slice of bacon, wrap it around the center of the beans to hold it together. Lay the bundle bacon seam side down in the baking dish to hold it together. Repeat with remaining beans.
  • Heat a small saucepan over low heat. Add butter, brown sugar and garlic and whisk until melted and combined. Using a pastry brush, brush the mixture over top of each green bean bundle. Cover the bundles with foil and bake for 35 minutes. Remove foil and bake for 10-15 (it took more like 25 minutes for me to get the bacon somewhat crisp, and I still ended up putting it under the broiler for a minute) minutes more, just until bacon gets crispy.

Verdict?  Bacon makes everything delicious. Even vegetables.

The only thing for me is that I baked them in a casserole dish, and the beans cooked in all that grease.  Which may be the point, but the green beans absorb a lot of that grease, which obviously is not good for you.  I think when (when, not if) I make them again, I’ll cook them in a roasting pan, with the wire rack, so the beans still get the juices of the bacon while it’s cooking, but a majority will drip down into the pan.  That should also get the bacon crispier without having to broil it.  (b/c I almost always burn everything I put under the broiler – see 1st pic)

These were definitely a winner with the hubs, not so much with the kids.  But as you may have noticed, my kids don’t like anything!

Since I’ve been blogging for a year now, I thought it would be fun to look back on previous posts.  Fun for me anyway 🙂  So…
Last year’s PostHealthy Choices (and ongoing struggle fo’ sho’)

I’m linking it up with , , Mouthwatering Monday @ , , Just Something I Whipped Up @ ,  at It’s a Blog Party, at All the Small Stuff,  , @ 33 Shades of Green, @ For The Love Of Blogs, , ,  , ,,  for Fat Camp Fridays,  (currently being held at ), , , , , for Savory Sunday; (Ingredient Spotlight: Bacon!), ,