Happy Thanksgiving & Acorn Cookies

I hope everyone who celebrates Thanksgiving has had a wonderful day full of food and family. I enjoyed both! It probably wasn’t necessary to try all the desserts, but I felt it was my duty as a food blogger 😉

You may have seen these Acorn Cookies on or ….

“Acorn” Cookies

  • Mini Nilla Wafer Cookies
  • Hershey Kisses
  • Mini Chocolate Chips
  • chocolate wafers, melted
Melt chocolate wafers, use the melted chocolate to “glue” the Hershey Kiss to the bottom of a mini wafer. Then use a small amount of melted chocolate to adhere the mini chocolate chip on top of the mini wafer. End result – cute little acorn cookies!
We used Caramel Hershey Kisses and they were tasty little treats. We also made Pumpkin Spice Rice Krispie Treats and added them with the acorn cookies to treat bags for the kids’ teachers. The treat bag tags were found at (free printable!). I have also discovered that you can cut the butter in the cereal treats back to 3 T., but it’s best not to cut it back to 2 unless you want really crispy Krispie Treats! Just a little FYI. Sorry teachers!
This recipe is linked up with

Warm Fruit Compote

If you are looking for a super easy, yet very tasty dish for your holiday table, this is it! Better yet, it can serve as a side dish for breakfast, brunch or dinner OR it would be tasty on top of pound cake or ice cream for dessert. The idea of warm fruit never really appealed to me, but a few years ago I stumbled across this recipe in an old cookbook (that I can’t find now!) and brought it to a Christmas brunch. It got so many rave reviews that I finally tasted it and realized it was yummy! I recently made it for a family get together and took a couple of pics so I could share it.

You can’t get much easier than this.
I’ve also made it with frozen fruit (just let it thaw, then drain).
Okay, so it’s not the most photogenic dish…but it really is good!

Warm Fruit Compote

1 can Pineapple Chunks
1 can Pineapple Tidbits
1 can Peach Slices
1 can Fruit Cocktail
1 can Mandarin Oranges
1 can Cherry Pie Filling
1/4 cup brown sugar
1/2-1 tsp cinnamon
1/4-1/2 tsp allspice
  • Drain the fruit (except for pie filling) and add fruit to 13 x 9 inch baking dish. Stir to combine.
  • Pour Cherry Pie filling over fruit and spread evenly.
  • Sprinkle brown sugar over pie filling.
  • Sprinkle spices over sugar.
  • Bake at 350 degrees for 35-40 minutes.
  • Remove from oven and gently stir. Careful, it’s HOT!
NOTES: You can really use any combination of fruit you like (pears work well). I used fruit that was canned in juice (except for the peaches and oranges, they had a light syrup), but I don’t know if it matters since you are draining the juice anyway. I used the 15-20oz cans (not the small ones and not the real large ones! I didn’t check the ounces on each can, sorry.) You could add raisins or nuts if desired. This reheats well and is also good over pancakes or waffles! This could also be made ahead of time and kept warm in a crock pot or reheated in the microwave. I’m sure the whole thing could be done in the crock pot, but I’ve never tried.

Ideas for Thanksgiving Sides

Well guys, it’s the week of Thanksgiving. I’m excited and surprised at the same time. Last week was a doozy of a week, and not in a good way. I’ve been under some serious parental stress and I am soooo looking forward to some relaxation on Thanksgiving Day with my family. Later, I’ll probably talk about what is going on, but for now, let’s talk FOOD! We know that turkey is usually the star of the show, but what about the sides? They play pretty important rolls too. (Rolls for roles…get it?! hahaha. I’m so witty.)

Here are just a few ideas from the blog:

I am hoping to try out a couple of new recipes this year too. I want to make homemade cranberry sauce and maybe some type of Ambrosia salad, which always reminds me of my Grandma. My mom will be making her awesome stuffing and chicken salad too. My daughters want to make pecan pie and chocolate chess pie, and I’m planning on a special dessert for my mom’s birthday that we will be celebrating too.
What about y’all? What sides will you be having on Turkey Day?

Live Smarter with Carton Smart (w/recipe links) {sponsored}

This is a Sponsored post written by me on behalf of for . All opinions are 100% mine.

So what does  mean? Do you ever think about the number of canned goods we use and then toss the cans away? Over the course of our lifetime, the number has got to be staggering. That is why I was pretty excited to learn about Tetra Pak cartons. Tetra Pak carton packages are designed for maximum efficiency and environmental friendliness which is just one way to live smarter. I believe that if everyone makes small efforts to improve our world each day, those small efforts will eventually have a big impact.

Tetra Pak® cartons are made of 70% paper – a renewable resource, from selectively harvested and re-grown trees that are FSC-certified (Forest Stewardship Council). They also use 1/3 of the packaging compared to cans, and are space saving. I love that they are so easy to store (cans take up so much space!) and open, and keep your pantry neat since they are stackable and less bulky. Another huge plus is the cartons maintain the flavor and nutrients of food without the use of preservatives due to the unique packaging process. 

Since the cartons are recycleable, they result in 60% less landfill waste than cans. AND, they are re-closable so you can use what you need and save the rest for later. No more using part of a can, then finding a storage container to put it in so it can be placed in the fridge. Less dish washing is always a bonus!

With all that in mind, wouldn’t you consider using one of your favorite products, packaged in Tetra Pak cartons, for your holiday dishes? 

Chicken stock is a staple in my house. I know I will be using quite a bit of it during the holidays (and all winter long…I love soup!) 

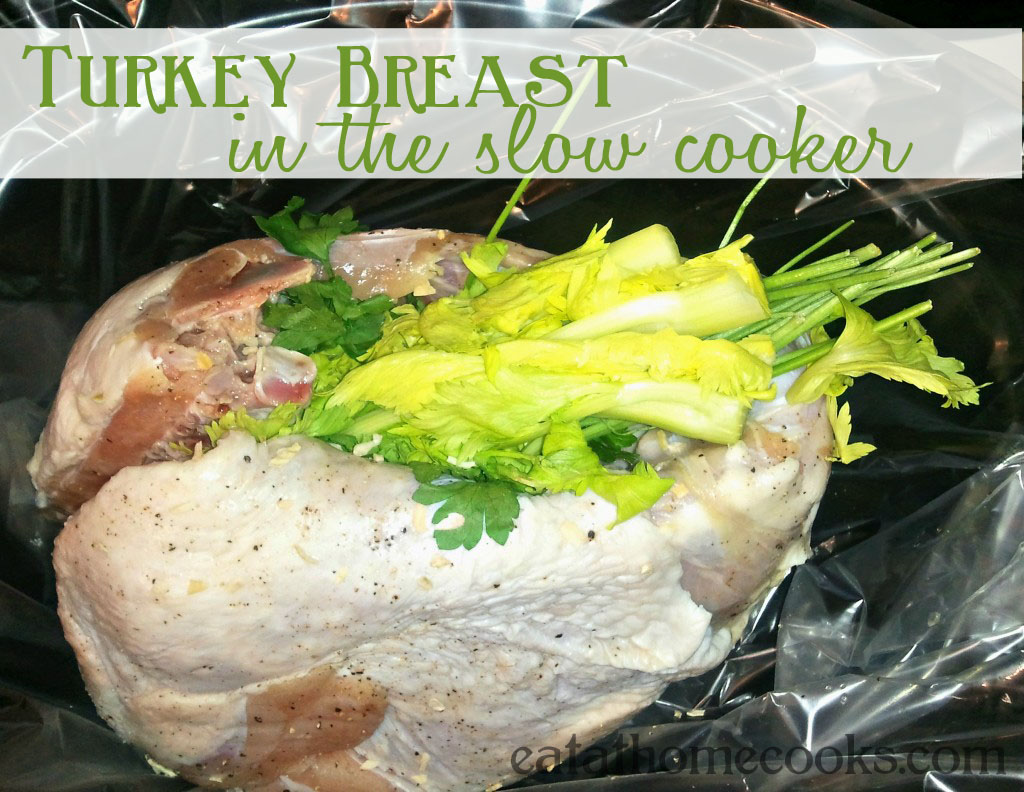
You can also use chicken stock to make this ! This is the only way I cook a turkey breast and I love it!

And pumpkin…don’t even get me started on pumpkin! If you follow my blog, you know how much! But this would make a great addition to the holiday table…

Pumpkin Cornbread!

And cranberry sauce…no Thanksgiving meal is complete without it. Also, if you have leftover turkey and cranberry sauce, you should make one of these!

Monte Cristo Sandwiches. SO GOOD! 

Anyone else hungry now?! To learn more about how to live smart and be carton smart, , they have some awesome boards! You can also join in the conversation by sending a . Let’s help spread the word, and make our baby steps turn into a giant step! How do you plan to be #cartonsmart this holiday season?

Healthier Sausage “McMuffin” Casserole

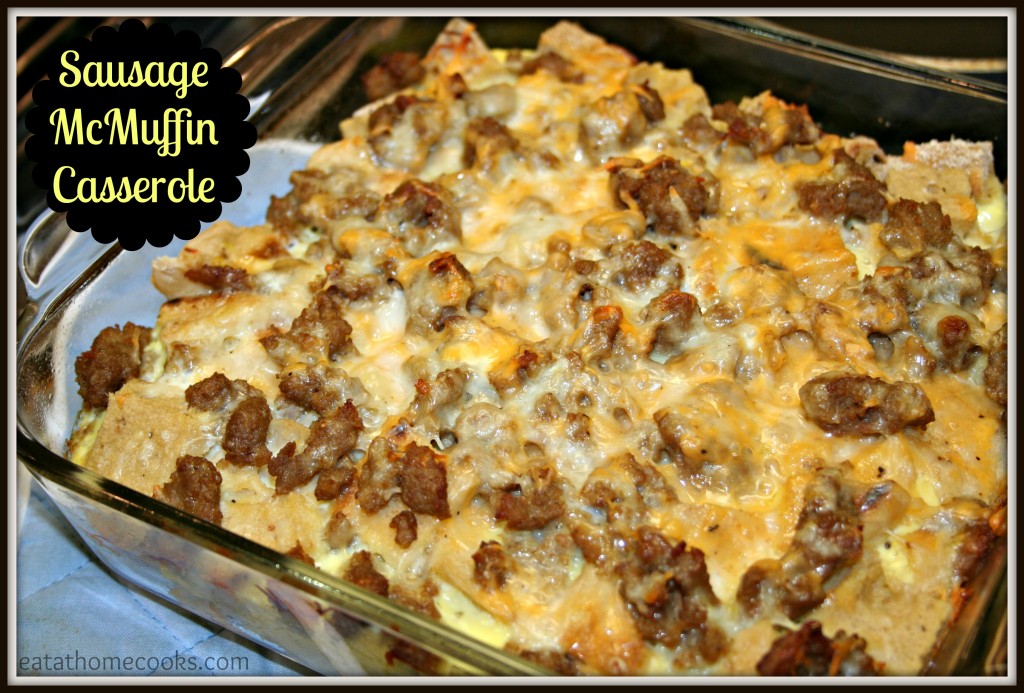
I know I just posted a breakfast dish yesterday, but what can I say, I really like breakfast food. As a matter of fact, we had breakfast for dinner just last night. This is a variation of the Egg ‘McMuffin’ Casserole I have on the blog. I have to say, I like the sausage version even more!
Sausage McMuffin Casserole EAH
I made an 8 x 8 dish, but you could double it to make a 9 x 13. Head over to where I have the recipe posted today!

Also, don’t forget to check out yesterday’s post, where I have a giveaway going on for Chinet Bakeware!

Blueberry Maple Biscuit Bake {aka Monkey Bread} & GIVEAWAY

Is anyone else fah-REAKING out that it is already November 19th?! The holidays are HERE people! I’m sorry to shout, but like I said, freaking out over here!! Am I ready for Thanksgiving? No. Am I ready for Christmas? HELLLOOO-NO. Am I the girl who lives not any where near civilization and shopping? Yes. Yes I am.

Wow. Thank goodness for online shopping and free shipping deals. Sorry to rant. I feel better now. *breath in; breath out*

One thing I do not have to stress about is breakfast during the holidays. With things like this Blueberry Biscuit Bake, I can throw it together with minimal effort and have it ready for everyone to feast upon so I can do more important things…like search for Black Friday Deals. Or wrap presents…b/c of course that will be done at the very.last.minute. Because that’s how I roll. 

But don’t these look scrum-dily-umptious?! That means good, in case you’re wondering. I make up words sometimes too.
This is similar to monkey bread…but it’s not made in a bundt pan (but you could, just double the recipe), and it’s made with blueberry biscuits! Have you seen them? Grands Biscuits makes them (there are probably other brands too, but that’s the one sold around here). I knew I wanted to make something with these new found treasures, but I didn’t want to make a traditional monkey bread…I wanted less cinnamon/brown sugar and more blueberry. And a little maple syrup thrown in for good measure. AND, a glaze of course. Can’t have blueberry biscuits without a glaze (are you familiar with BoBerry Biscuits? Bojangles, baby. That’s where it’s at. It’s a Southern thing.)

Blueberry Maple Pull Apart Breakfast Bake

1 can (16 oz) Pillsbury Grands Blueberry Biscuits
1/4 cup granulated sugar
1/2 tsp cinnamon
1/2 cup fresh or frozen blueberries (I used frozen)
3 T. maple syrup (or one of the little bottles pilfered from your last trip to Cracker Barrel. 🙂
2 T. butter
Glaze:
1 cup powdered sugar
1 t. vanilla extract
approx. 3-4 T. half and half (or milk/cream/flavored coffee creamer)
  1. Preheat oven to 350 degrees F.
  2. Grease an 8 x 8 baking pan (I used Chinet Bakeware)
  3. Cut biscuits into quarters and place in a medium bowl.
  4. Mix sugar and cinnamon together, then sprinkle over biscuits.
  5. Toss to coat biscuits in sugar mixture.
  6. Arrange coated biscuit pieces in the bottom of baking dish.
  7. In a small microwave safe bowl, heat blueberries and maple syrup for one minute. Add butter, and microwave for a minute more.
  8. Pour blueberry mixture over the biscuits.
  9. Bake for 20 to 30 minutes or until golden brown and no longer doughy in center. 
  10. Cool 10 minutes. 
  11. While cooling, mix up glaze in a small bowl – Mix powdered sugar, vanilla and whatever liquid you are using until desired consistency is reached. Pour over biscuit bake. 
Adapted from
Now, onto the giveaway I mentioned. Since I’m such a fan of , the thoughtful folks over at Chinet are allowing me to giveaway one last set of disposable Chinet Bakeware. What a perfect time to try these bad boys out! They are so convenient to bake in, then carry off, and then throw away! Or, if you are one of those super organized people, make some dishes up ahead of time, freeze them, then toss them in the oven whenever you are ready. Yes, Chinet Bakeware can go straight from freezer to oven!
The winner will receive a set of Chinet Bakeware including one of each size: 
 
8×8 Square Pan
7×11 Large Oval Pan
9×11 Rectangle Pan
7.25×9 Small Oval Pan
 
Please enter via the Rafflecopter form. If you are viewing this in an email, you will need to click over the actual post. Shipping only available within the US.
 
I received a complimentary set of bakeware and stipend for supplies from Chinet. All opinions are my own. This is part 4 of a 4 part series featuring Chinet.

Soft Batch Double Fudge Brownie Cookies

Sometimes I crave chocolate. (Okay, if I’m being honest, I crave chocolate almost ALL the time, but that’s beside the point.) Sometimes I crave my chocolate in the form of cookies. Sometimes, I don’t feel like getting in the kitchen and baking said cookies.  That’s why it is nice to have some very simple cookie recipes that you can turn over to your kids to make. Child labor at it’s best.

Please excuse the poor photos…it gets dark way to early nowadays! 
My 12 year old wanted to make cookies around Halloween, and I had these cute little orange and chocolate morsels, so we checked out my Pinterest Board and found this cookie recipe that uses a brownie mix. I knew my kid could handle it, so I set her on her way to make me some cookies.

Soft Batch Double Fudge Brownie Cookies

1/4 cup butter, melted

1/4 cup water
2 large eggs, beaten
1 box Fudge Brownie Mix (around 18 oz)
1 cup unbleached all-purpose flour
1/2 cup orange and semi sweet chocolate chips (*use any you like)
1/2 cup chocolate chips (Ghiradelli)

1. Preheat oven to 350 degrees F.

2. In a medium bowl, mix the butter, water, eggs, brownie mix and flour until just combined. 
3. Stir in chocolate chips.
4. Scoop dough on a cookie sheet lined with parchment paper or silicone mat. Bake at 350 for 8-10 minutes (depending on the size of your cookies, I think ours were about a tablespoon.) 
5. Cool on a wire rack.

*it is best to slightly undercook these so that they still look a little wet and shiny, otherwise they will get dry.

Recipe adapted from

These cookies taste like brownies. Enough said if you are a chocolate freak like myself.

Baked Pumpkin Oatmeal

I love oatmeal. L-O-V-E it. And adding pumpkin to oatmeal makes it even, you know….mo’betta 🙂 Especially when you add all the delicious Fall spices that makes everything with pumpkin taste like pumpkin pie. I already have Pumpkin Spice Oatmeal, Overnight Pumpkin Oats, and Pumpkin Pie Steel Cut Oats  on the blog, so it was only natural that I try a baked version. Baked oatmeal has been my least favorite way to eat my oats because it’s always seemed a little dry. However, that all changed with this recipe.

a little maple syrup on top didn’t hurt either

Baked Pumpkin Oatmeal

  • 2 cups pumpkin puree
  • 1-1/2 cups milk (I used unsweetened almond-coconut milk)
  • 1/4 cup brown sugar
  • 1/4 cup xylitol (can use sugar substitute or more brown sugar)
  • 2 large eggs
  • 1 teaspoon vanilla extract
  • 1-1/2 teaspoons  (I mix my own)
  • 1 teaspoon ground cinnamon
  • 3/4 teaspoon baking powder
  • 1/2 teaspoon salt
  • 2 cups old-fashioned oats
  • 1/2 cup Bob’s Red Mill 7-grain Cereal (or more oats)
  • 1/2 cup chopped pecans
  • 1/2 cup raisins
  • turbinado sugar for sprinkling on top (optional)
  1. Preheat oven to 350 °F.
  2. Spray an 8 x 8 baking dish with non stick cooking spray.
  3. In a large bowl, mix all of the ingredients from pumpkin through salt, until blended.
  4. Stir in oats, pecans and raisins. 
  5. Pour the oatmeal/pumpkin mixture into prepared baking dish and spread evenly. 
  6. Sprinkle the top with turbinado sugar if desired.
  7. Cover with foil and bake for 30 minutes, then remove foil and bake for additional 10-15 minutes or until center is set.
Recipe adapted from

This was great to prepare on Saturday and have the leftovers for the rest of the week. I cut mine into 9 squares, for about 5 Weight Watchers points per square. Some days I ate it with a little sugar free syrup over the top, and other days I added more milk and turned it into a creamy bowl of pumpkin oatmeal goodness.

I may be linking up at any of the following – (Monday) , , , , , , , , , , , (Tuesday) , , ,,, ,  and ,  ,  (Wednesday) , , , , , ,   (Thursday)  ,, , ,  (Friday) ,  , , , , ,, , , ,, , , ,, , (Saturday)  , , , 
Upside Down Pizza Casserole

Just in time for the weekend, I present this little twist on your regular pizza night. My family loves pizza in all shapes, flavors and forms. We eat low carb, crustless, thin crust, thick crust, with meat, without meat, you name it! So, when I saw this at Eat at Home, I knew I had to give it a try.

I’m glad I did! It was delicious. I’m not sure why it seemed even better than “regular” pizza, but it was to me. My girls thought it was too much sauce, but I felt it was just right. My son picked out the meat, but then he ate it. There just isn’t any pleasing all of my kids at the same time!
See, it’s literally an upside down pizza! However, it has a thicker, heartier filling and it is made in a 9 x 13 casserole dish, which is easy and convenient for me. Plus, it’s just something a little different. I get tired of the same ol’ thing.
If you serve it crust side down, it isn’t the prettiest. However, one bite of all that ooey, gooey, cheese will make you forget what it looks like.  Or you could always serve it crust side up, like a pot pie.

Upside down Pizza

1 premade pizza crust (I used Pillsbury)*
3 cups shredded cheese (I used an assortment of cheeses; great way to use up those partial bags!)
1 jar pizza sauce
Meat and/or veggies of choice (I used turkey pepperoni, Canadian bacon, and some leftover Italian Meatballs)
*If you want to make your crust from scratch, check out the one from . It looks simple, but the night I made this I was very short on time. My girls had to be on opposite ends of the county at the same time…anyone know how to clone? I could use another ‘me’ sometimes!
  • Preheat oven to 425 F (or as directed if using premade crust)
  • Grease a 9 x 13 inch casserole dish
  • sprinkle cheese in an even layer across bottom of pan
  • add meats and veggies over the cheese
  • pour sauce over the meat, spreading it over entire surface
  • Top sauce with pizza dough. Since I used a premade crust, I just opened the can, stretched it out enough to cover my casserole dish, and laid it over the filling.
  • Make a few slits in the top of the dough and bake 25 minutes or until golden brown and crust is done (check times on premade crust)
  • Enjoy!
I may be linking up at any of the following – (Monday) , , , , , , , , , , , (Tuesday) , , ,,, ,  and ,  ,  (Wednesday) , , , , , ,   (Thursday)  ,, , ,  (Friday) ,  , , , , ,, , , ,, , , ,, , (Saturday)  , , , 
Quick & Easy Shortcut Apple Crisp {#GIVEAWAY}

All you have to do is glance through my recipes and know that I like to keep things quick and easy. I like shortcuts, I like “semi” homemade, I like FAST. With 3 kids (and 2 dogs) always running around, I need to be able to make things that don’t require a lot of concentration or time! Or expense, for that matter. However, regardless of how long it takes to make, or the ingredients in it, the bottom line is you want it to taste good. Duh, right?!

I had a brunch to go to the other day, and wanted to make a couple of smaller dishes instead of one large one. (The other dish I brought was this Blueberry Maple Biscuit Bake) One of the nice things about the Chinet Bakeware I used is that not only is it disposable, but it comes in various sizes. For this apple crisp, I used the 7 x 11, and you can double the recipe to make a full 9 x 11. It will also work in an 8 x 8 or 7 x 9 inch pan, you’re layers will just be a little thicker, which would not be a bad thing! I adapted the crisp from one of my favorite desserts, Dump Cake! (Another quick and easy recipe that is always a hit.)
Quick and Easy Apple Crisp
1 can apple pie filling
1/2 box cake mix (dry) (Can use white, yellow, or spice flavor)
1/2 cup rolled oats
1/4 cup chopped pecans or walnuts (optional)
1/4 cup brown sugar
1 stick butter, melted
*I think raisins would be good in this to, but realized I was out at the last minute!
  • Preheat oven to 350 degrees F.
  • Spread apple pie filling in bottom of baking dish.
  • Sprinkle dry cake mix in an even layer over top, followed by oats, nuts (if using), then brown sugar.
  • Pour melted butter over the top and bake until golden brown, approximately 45 minutes or until golden brown on top and bubbly around the edges.
So simple, yet so tasty! It was great for brunch, but you could also plop some vanilla ice cream and caramel topping over it and make it dessert 🙂
I’ve talked about before (here and here) so you probably already know that they are disposable baking pans that come with plastic lids, so you can bake, cover, and carry all in the same dish. (And freeze if you want!) If you have not had the opportunity to try them yet, and would like to, Chinet has generously offered another giveaway for you!
One winner will receive a set of Chinet Bakeware including one of each size: 
8×8 Square Pan
7×11 Large Oval Pan
9×11 Rectangle Pan
7.25×9 Small Oval Pan
Please enter via the Rafflecopter form. If you are viewing this in an email, you will need to click over the actual post. Shipping only available within the US.
 
 
I received a complimentary set of bakeware and stipend for supplies from Chinet. All opinions are my own. This is part three of a 4 part series featuring Chinet, so if you don’t win this one, stayed tuned!