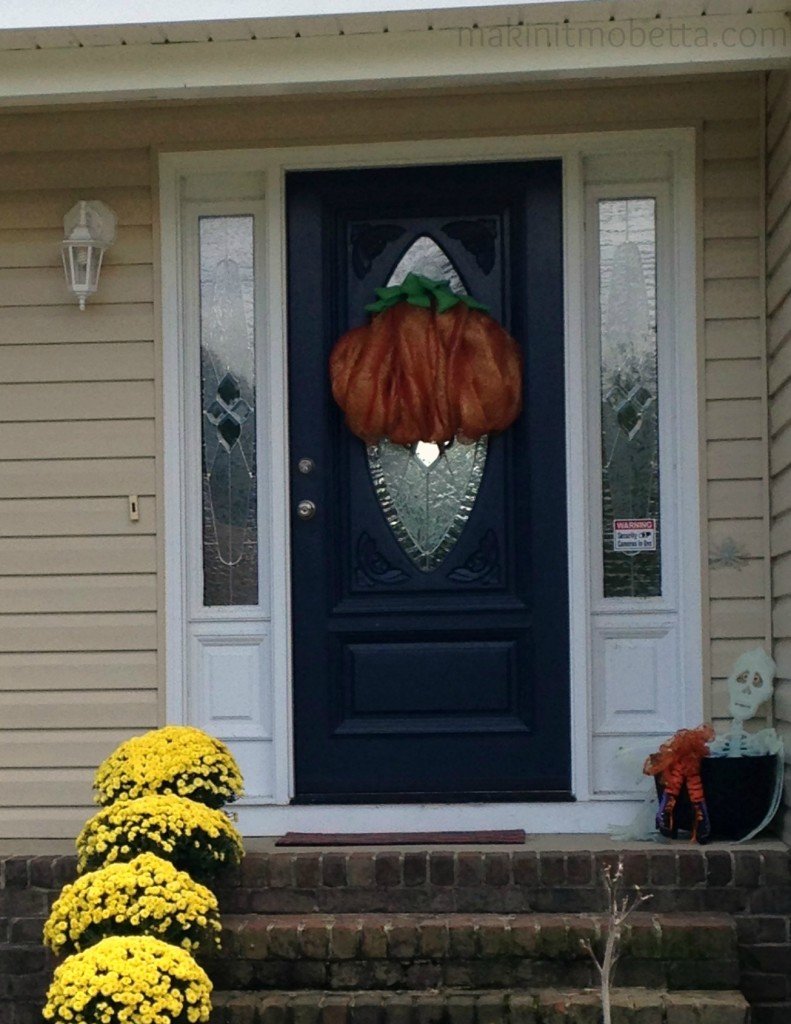
Pumpkin Mesh Wreath

First, YAY!! This is my first “official” post on my new site! And WOW…what a pain in the rumpkus (is that a word?) the Blogger to WordPress move has been. THANK GOODNESS for . Without them, this site would still be sitting here blank I’m afraid. I will spare you all of the details, but it has definitely been one thing after another. Oh, and did I mention that I happened to have surgery AND my computer crashed during all of this as well? Ha! Fun times. Not! Moving on…

Pumpkin Wreath

This Pumpkin Mesh Wreath is festive, (I think it’s cute), cheap, and super easy to make. I don’t do a lot of Fall decorating, but I usually have a Fall wreath, a couple of garden flags, mums, and pumpkins. Our weather has been so wacky, that my mums are already mostly dead (or lack of water could have caused that. Go figure.)

Since I’m a visual person, I’m going to show each step in pictures. I will explain the best I can, but it’s really easy.

Wreath Supplies

Step One: Supplies

  • One wire wreath (I bought mine at Walmart, I think it was $5)
  • Pipe cleaners (ideally in orange, but I already had these from another wreath. $1 from Dollar Tree)
  • long roll of mesh ribbon (This was from Walmart or Sam’s Club, also around $5)
  • ribbon for the top of pumpkin (I used green burlap – $1 from Dollar Tree. See Step 3)

How to begin

Step Two: Making Body of Wreath

  • Place six pipe cleaners at the top and six at the bottom of  the wreath form. If you look at it as a clock, place the first one at 10:00, the last one at 2:00, and put the other four randomly in between for the top. (You can adjust to exactly where you need them as you go along.) The bottom ones can go between 4 and 8:00.
  • Start at the top “10:00” pipe cleaner, attaching the end of your wire mesh. Pull the mesh down and attach at 8:00 as pictured above (is this clock reference getting old, or is it just me?!).

Body of wreath

  • Repeat the up and down pattern with the mesh until the wire wreath form is covered. If you want it fuller/thicker, just add more pipe cleaners to hold in place. Once the wire is covered, you can adjust/fluff wreath to get the look you want.

Final step

Step 3: ‘Stem’ of Pumpkin

  • I used the above pictured burlap ribbon. However, I think a wired ribbon would look better, and give the “stem” some shape and hold. The burlap kind of just lays there.
  • There is no technique for the stem…I just attached it to the top in and up and down pattern, using the ends of the pipe cleaners that were already in place holding the mesh.

And that’s it! I spent $12 and technically I already had the wreath form and pipe cleaners. You can remove the mesh and add something different for Christmas, or you can save the pumpkin to use next year. It’s nothing fancy, and I may tweak it here or there, but overall, I think it’s cute.

I never thought I would like the mesh wreaths, but somehow they grew on me. How about you? What kind of decorations do you have for Fall? Any Blogger to WordPress nightmares you’d like to share?!

This post has been featured at:


I may be linking up at any of the following – (Monday) , , , ,  (Tuesday) ,, ,  (Wednesday) , , ,  (Thursday) ,  (Friday) , , , , ,  
Happy Thanksgiving & Acorn Cookies

I hope everyone who celebrates Thanksgiving has had a wonderful day full of food and family. I enjoyed both! It probably wasn’t necessary to try all the desserts, but I felt it was my duty as a food blogger 😉

You may have seen these Acorn Cookies on or ….

“Acorn” Cookies

  • Mini Nilla Wafer Cookies
  • Hershey Kisses
  • Mini Chocolate Chips
  • chocolate wafers, melted
Melt chocolate wafers, use the melted chocolate to “glue” the Hershey Kiss to the bottom of a mini wafer. Then use a small amount of melted chocolate to adhere the mini chocolate chip on top of the mini wafer. End result – cute little acorn cookies!
We used Caramel Hershey Kisses and they were tasty little treats. We also made Pumpkin Spice Rice Krispie Treats and added them with the acorn cookies to treat bags for the kids’ teachers. The treat bag tags were found at (free printable!). I have also discovered that you can cut the butter in the cereal treats back to 3 T., but it’s best not to cut it back to 2 unless you want really crispy Krispie Treats! Just a little FYI. Sorry teachers!
This recipe is linked up with

Pumpkin Spice Bundt Cake {starts with a mix!}

Yes, I went there. I’m all about some “semi” homemade, and a doctored up cake mix can be pretty darn delicious if I do say so myself. Not to toot my own horn or anything, but….toot! toot! This cake was fabulous!

It was moist, not too dense; had a fluffy soft crumb, but wasn’t crumbly; and it was full of warm spiciness without being overbearing. This cake screams FALL! And the best part…it’s a cinch to make! (It also freezes well, which I had to do for portion control purposes!)
You may remember a couple of weeks back I discovered Pumpkin Spice Pudding Mix and jumped on it like a dog in heee……uhm…nevermind – scratch that analogy. Let’s just say I promptly bought a few boxes and immediately made the Pumpkin Spice Eclair Cake (another easy to make, yet crowd pleasing recipe. And it’s no bake!)
Since I’ve been doctoring up devil’s food cake mix with pudding mix for years, I decided to adapt my Chocolate Layer Cake into a Spice Cake….a Pumpkin Spice Cake! It was a winner.

Pumpkin Spice Bundt Cake

  • 1 box Spice Cake Mix (I don’t remember what brand I used)
  • 1 (4 oz) box Pumpkin Spice Pudding Mix *This is a seasonal item, so grab some while you can!
  • 1 cup canned or homemade pumpkin puree (not pumpkin pie filling)
  • 1/2 cup sour cream (I used fat free. Normally I use plain yogurt, but I was out.)
  • 1/2 cup canola oil
  • 3 eggs
  • 2 teaspoons vanilla extract
  • 1/2 tablespoon pumpkin pie spice
  1. Preheat oven to 350 degrees F.
  2. Grease and flour a bundt pan or use Baker’s Spray (cooking spray with flour mixed in).
  3. In a large bowl, mix the cake mix, pudding mix, pumpkin, sour cream, oil, eggs, vanilla and spices. Mix on medium speed for a couple of minutes until well combined.
  4. Pour into prepared bundt pan.
  5. Bake for time suggested on cake mix box for bundt pan cakes or until the top springs back when lightly pressed.
  6. Allow cake to cool for approx. 10 minutes in pan, then flip cake onto wire rack to finish cooling.
  7. Glaze, frost or sprinkle with powdered sugar once cooled. I used a simple glaze of 1 cup powdered sugar, a tablespoon (approx) of Pumpkin Spice Coffee Creamer, a tsp of vanilla, and a 1/2 tsp cinnamon. The glaze was a little too sweet for me, so next time I think I will just dust it with a little powdered sugar and cinnamon, just to make it look pretty. This is one of those cakes that can really stand alone as far as flavor, but I wouldn’t knock a little cream cheese frosting either 😉

This recipe is a keeper! Also, my dad claims to not like pumpkin but he really liked this cake. To me, it had the flavor of pumpkin pie, but in cake form….which is awesome for me since I like the flavor of pumpkin pie but not the texture.

I may be linking up at any of the following – (Monday) , , , , , , , , , , , (Tuesday) , , ,,, ,  and ,  ,  (Wednesday) , , , , , ,   (Thursday)  ,, , ,  (Friday) ,  , , , , ,, , , ,, , , ,, , (Saturday)  , , ,