Easter Treats {Round-Up}

I thought I would post a little round up of Easter treats in case you are in need of some last minute inspiration, and you know if I’ve done it, it’s pretty quick and easy! 

No recipe – just Cadbury Eggs, cut in half and decorated with yellow frosting and sprinkles to look like deviled eggs. Very cute, VERY sweet! (It helps to chill the eggs for cleaner cuts)
Blueberry Dump Cake and a round up of other quick and easy desserts
Margarita Cake  – starts with a cake mix!
Make use of that extra Easter candy…Cookies and Cream Cookies
Hot Cross Buns – I like recipe.
What are your Easter traditions? We are doing things a little different this year, and since my kids are out of school next week for Spring Break, I’ll be taking a break from the computer.  Hope everyone has a nice Easter and safe travels. Catcha on the flip side!

Homemade Peanut Butter Eggs

Somehow, Easter is right around the corner.  Like, this weekend around the corner! Things have been quite hectic around here.  Between volleyball for my 2 girls, and a nasty virus/strep going around the house, things have been out of sorts.  Everything was kind of on hold last week, b/c my 4 y/o was sick, and when you have a little one that is sick (high fever, headache, feeling miserable) he/she only wants their mommy!  Thankfully, towards the end of the week, he started feeling better.  Just in time for dentists appointments and Number One’s 12th birthday!  Yikes…I have a child that is almost a teenager!! (and the tween years are proving to be challenging as well.)  So, I feel stretched a little thin right now.  So much to catch up on, and so much to do this week.  BUT, I definitely wanted to share these homemade peanut butter eggs asap!
Homemade better-than-Reese’s Peanut Butter Eggs!!
I kid you not, these things are SO.GOOD.  And better yet, they are EASY.  Except for the whole dipping in chocolate thing.  I really suck at that.  Ever since the allergy doctor told me that I had a false positive on my peanut allergy test…I’ve been a little peanut butter obsessed.  (He said that adults can NOT develop a peanut allergy, but you can to all other nuts. I’ve been testing the theory out, and I have had no problems eating peanut butter.  I may need stretchier pants due to peanut butter cup consumption, but no rash, itching or hives!)  So…enough rambling, on with the copycat recipe!  I’ve played around with ingredients and combos, and this is my favorite ratio.

Homemade Peanut Butter Eggs

1/2 cup peanut butter* (your favorite brand, but I don’t recommend the kind that has to be stirred)
1/2 cup powdered sugar
1/4 cup finely ground graham cracker crumbs (I ground my own in a food processor)
a good pinch of salt (this amount will vary depending on your preference, and peanut butter used. Start with a small pinch, mix, taste, and add more if needed.)
chocolate chips (about a cup)
coconut oil/butter/criscoif needed to thin out chocolate, I used about a teaspoon of coconut oil
*I think these would still be delicious with Sunbutter or WowButter if you need to avoid nuts.  They won’t taste exactly the same, but still good! I made a version with soynut butter that was quickly devoured.
  • Add all ingredients into a bowl and mix, mix, mix.  It’s thick and difficult to incorporate, but keep at it and it will come together.  Or, use a mixer/food processor. I didn’t try this, since I was working with a fairly small quantity.  However, it only makes a few, so feel free to double the recipe. I wish I had!
  • After mixing the ingredients together, form into ‘egg’ shapes, place on wax paper, and place in freezer to get nice and firm.  I didn’t time this, but maybe 20-30 minutes?  While the eggs are in the freezer, melt your chocolate (and oil/butter if needed) in a microwave safe bowl.  (Place in microwave for 1 minute, stir well, continue heating in 30 second intervals until completely melted)
  • When chocolate is melted, remove peanut butter eggs from freezer. Dip peanut butter into chocolate, one at a time, to coat.  When peanut butter is completely covered in chocolate, place on wax paper to cool and harden.  If the peanut butter starts to soften too much, put back in freezer.
Other than me not being much of a chocolatier, these were pretty easy to make, and they tasted great.  My girls and I loved them, and I just had to compare them to a real Reese egg, and I have to say, I thought mine were better!  I think it’s because the homemade version had more filling and a thicker layer of chocolate.  I also used a semi-sweet chocolate instead of milk.  YUM.
This made about 6 good size eggs…but I also did some taste testing of the filling 😉  Research people. Research!
I am linking this recipe up at (Monday) , , , ,, , , , , , , ,  (Tuesday) , , , , , ,, ,  (Wednesday) , , , , , , , ,  (Thursday) , , ,  , , (Friday) ,  , , , , ,, , , , ,, , (Saturday) , ,  , ,  (Sunday) ;
This recipe was featured at

Sara Lee Heart Healthy Recipes for National Nutrition Month {GIVEAWAY}

Did you know that March is ?  Good health is so closely tied in to good nutrition, and I don’t know about y’all, but I need to refocus.  I need to reevaluate my family’s diet, and get back to the basics of fresh, wholesome meals and snacks.  I’m working on fitting more ‘super foods’ into our diet, as well as increasing our fiber.  I also need to really watch my sodium and focus more on a heart-healthy diet.  As I’ve mentioned before, heart disease is very prevalent on my mom’s side of the family.  My mother was hospitalized a few months back due to dangerously high blood pressure, which caused symptoms of a heart attack, including arm pain and numbness, nausea, headache, etc. It was extremely scary, since my mom lost her father when he was in his early 60’s from a massive heart attack.

Obviously, I can’t control genetics, but I can control other risk factors like diet, stress and exercise.   is here to help with the diet part!  Also, having some of these quick and easy, yet delicious nutrition-minded recipes at your fingertips will also help decrease stress levels when it comes to meal planning 🙂

It’s no secret that I love a good deli sandwich, so I was immediately drooling over this Spicy Turkey Wrap.

This wrap has some of my favorite things – avocado, lime juice, jalapeno and cilantro!
Spicy Turkey Wrap
Prep Time: 10 minutes 
Makes: 1 serving 
1 7-8” whole wheat flour tortilla 
2 tablespoons fresh mashed avocado 
1 teaspoon lime juice 
2 ounces thinly sliced of sliced-to-order Sara Lee® Premium Oven Roasted Turkey Breast 
1/4 cup shredded lettuce 
2 tablespoons chopped tomato 
1 teaspoon chopped fresh jalapeno pepper 
2 tablespoons chopped cilantro (optional) 

Directions: 

1. Spread tortilla with avocado combined with lime juice. 
2. Fill with remaining ingredients; roll up and serve immediately.

  
Nutrition per serving: serving size:1 tortilla, Calories: 260, Fat: 9g, Sat Fat: 1g, Cholesterol: 30 mg, Carbohydrates: 28g, Fiber: 5g,Sodium: 690 mg, Protein: 17g

Maybe you’re more of a salad person? No problemo – 
Cilantro-Lime Chicken Salad
Prep Time:   20 minutes                                               
Makes:4 servings (about 2-1/2 cups each)
Ingredients:

Cilantro Lime Vinaigrette:
1/4   cup fresh lime juice
1      tablespoon canola oil
1/4   teaspoon ground cumin
1/8   teaspoon ground red pepper
Salad:
8     cups fresh baby mixed salad greens
1     cup frozen corn, cooked, drained
2     medium tomatoes, seeded, chopped
1/2  cup black beans, rinsed, drained
1/2   lb. piece sliced-to-order Sara Lee® Premium Lower Sodium Oven Roasted Chicken Breast, cut into thin strips
2     corn tortilla, cut into 1-inch strips
        Cooking spray
1/4   cup reduced fat Mexican cheese blend
Directions:
1.     For dressing: Combine lime juice, oil, cumin and red pepper; mix lightly. Set aside.  
2.     For salad: Combine salad greens, corn, tomato, black beans, green onion and chicken; toss lightly.
3.     Spray small fry pan with cooking spray. Cook and stir tortilla strips over medium heat until crispy.  
4.      Toss salad with dressing; sprinkle with cheese and tortilla strips, before serving.
Nutrition per serving: serving size:1/4 salad, Calories: 280, Fat: 9g, Sat Fat: 2g, Cholesterol: 35 mg, Carbohydrates: 29g, Fiber: 8g,Sodium: 620 mg, Protein: 21 g


or maybe this one?
Turkey Citrus Avocado Salad
Prep Time:   20 minutes                                               
Makes:4 servings
Ingredients:
Citrus Vinaigrette:
1/2   cup fresh grapefruit juice
2      tablespoons honey
2      tablespoons extra virgin olive oil
Salad:
6      cups fresh baby spinach
1       grapefruit, peeled, sectioned
1/2   avocado, peeled, pitted and thinly sliced
1      cup cherry tomatoes
1/2    cup thinly sliced red onions
1/2    lb. piece sliced-to-order Sara Lee® Premium Lower Sodium Oven Roasted Turkey Breast
2      tablespoons pumpkin seeds (optional)  

Directions:
1.     For dressing: Combine grapefruit juice, honey and olive oil.
2.     Combine spinach, grapefruit, avocado, tomato and red onion; mix lightly.  
3.     Add salad dressing; toss lightly. Sprinkle with pumpkin seeds, before serving, if desired.
Nutrition per serving: serving size:1/4 salad, Calories: 240, Fat: 9g, Sat Fat: 1g, Cholesterol: 30 mg, Carbohydrates: 29g, Fiber: 6g,Sodium: 420 mg, Protein: 15 g
So….I’m starving now! To help you make one of these recipes, or your own nutritious dish, Sara Lee has provided me with some coupons to giveaway!  I will give one winner (2) coupons good for a FREE 1/2 lb. of Sara Lee meat or cheese at the service deli or ONE package of any Sara Lee pre-sliced meat or cheese located in the deli section (up to $6.29).  Personally, I’m for anything that helps me out with the grocery bill!

Just enter via the rafflecopter form. You may need to go to the actual blog post for the form to load if you are reading this via email.

Recipes, photos and coupons were provided by Sara Lee, no other compensation was received.  All opinions expressed are my own.

Google Reader no more….

So…I’m tryin’ to get on board with the whole ‘no more Google reader’ thing and figure out what to do next.  I’m following some other bloggers and checking out Bloglovin’, but first, I have to claim my blog! There are some great tips for bloglovin’ .

Stay tuned…I have a giveaway coming up soon!

Chicken and Dumpling Casserole

(updated pics – 6/1/13)
This is one of those dishes that the picture does not capture its awesomeness.  I’ll admit, I was skeptical. Being a Southern girl and all, being brought up eating traditional chicken and pastry/chicken and dumplings, I did not think this would be all that great.  I was WRONG!  This was delicious – comfort food at its best.  My husband and I ate the entire thing, minus one little portion.
I think one of the reasons it was so delicious is that I made a little boo-boo in melting my butter, and actually browned my butter instead.  Best mistake I ever made! Browned butter is really awesome. Like, awesome x 10.  This dish had so much yummy, buttery flavor, that I think the amount of butter could be reduced and it would still be the bomb.
Chicken and Dumpling Casserole 
adapted from

3-4 cups of cooked chicken (I used a rotisserie chicken)
2 cups chicken broth
1/4 cup unsalted browned butter
1 cup flour
1 1/4 tsp baking powder
1/4 tsp salt
1 cup skim milk
1 can Campbell’s Cream of Chicken soup (I’ve also made with Cream of Mushroom) 
         *I use this homemade Cream of Chicken recipe

  • Preheat oven to 400.
  • Place butter in a 9×13 pan and put in oven while it is preheating, to melt and brown. Once butter is melted, watch for it to start turning brown. You will also probably start to smell it.  It would be good to stir it a couple of times while it is browning, but I didn’t (b/c I forgot all about the butter being in the oven until I started smelling it!) You can also brown the butter on the stove, which will give you more control over even browning, and prevent burning. Once the butter has browned, remove from oven – be careful, it will spatter! You will see some little brown bits from the browned butter, this is okay.
  • Shred the chicken and spread it on top of the butter.
  • Whisk together the milk, flour, baking powder and salt.  Pour over the chicken, but do not stir.
  • Whisk together chicken broth and cream of mushroom (or chicken) soup. 
  • Pour over the top of casserole, again, do not stir.  

Bake uncovered for 35 to 45 minutes. It will start to brown in spots, and look thick and bubbly.

This is definitely going to make a regular appearance on our dinner table.  As a matter of fact, I think I am going to make it again this week since I have some leftover crockpot beer chicken from last week. (update – I did, and it was delicious! The more flavorful your chicken, the better this dish is!)

Speaking of this week’s menu….we have 3 nights of volleyball games, un-solidified birthday plans (Number One is turning 12!) and now my little one has a terrible cold…so it will be interesting…and probably not in a good way. Wish me luck! You can check out the menu here.

I am linking this recipe up at (Monday) , , , ,, , , , , , , ,  (Tuesday) , , , ,  , , ,, ,  (Wednesday) , , , , , , , ,  (Thursday) , , ,  , , (Friday) ,  , , , , ,, , , , ,,  (Saturday) , ,  , ,  (Sunday) 

**I have had some people inquire about my casserole dish…it came from 🙂

Menu Plan #4

With a sick child, 3 nights of volleyball games, and a birthday this week, dinner is going to be….uhm, challenging!  I’ve opted for more simple dishes…

Monday – 

Speedy Sausage Muffins (made with Bisquick!), fruit, carrots. Leftovers for the hubs.

Tuesday – 
 for husband, kids
 for me!
Salad

Wednesday –

Chicken and Dumpling Casserole (recipe this week!)
Hamburgers (for the kids, they won’t eat the casserole)
corn on the cob

Thursday – 
 (from last week, I never made it b/c it has a long cook time)
Leftovers or Rotisserie chicken (store bought)
green beans

Friday –
Number One’s choice – it’s her birthday!

Saturday –
Pizza (from Sam’s Club, if we don’t have it Friday)

Sunday – 
Mom and Dad’s house 🙂

I’m linking up my menu plan over at 

Ritzy White Trash & Green Beer

If you feel like having a little fun with your food this weekend, here are a few easy things…

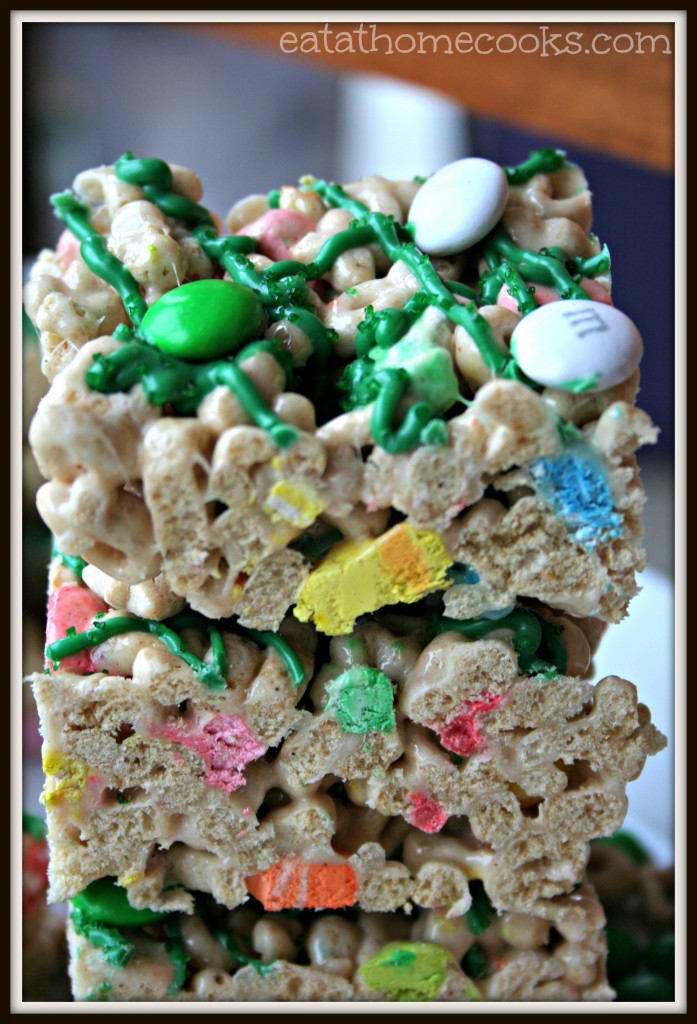
The ever popular White Trash can be made for any holiday…just change out your candy colors.  Lucky Charms would have been great to use in this, but I was out after making yesterday’s 


. What I didn’t use in the recipe, the kids devoured immediately b/c I don’t buy them very often!  I made this White Trash a little ‘ritzy’ (hardy har har) by using Ritz crackers in the place of the pretzels I normally use.  Ritz crackers go amazingly well with chocolate. Basically, you need 12 cups of whatever cereals/snacks you have in your pantry…8 cups of some form/combo of cereals and 4 cups of something salty – popcorn, pretzels, crackers – it’s all good.  Then a package of white almond bark or 20-24 oz of white chocolate chips.  You can then add whatever mix-ins you like, we always use some kind of M&M;’s.  So go ahead, get trashy 🙂

And as long as you are trashin’ things up, gotta have some green beer (or any light colored beverage would work – I might make some green ginger ale or Sprite for the kiddos)

All you need is 2 drops of liquid green food coloring in the bottom of the glass, then pour in your beer.  It is such a pretty color, and makes cool green foam. (I’m easily amused.) 

Someone had fun taking pictures of the green beer.  And then drinking it.  

Also, I attempted to turn my Copycat ‘King’s Hawaiian’ Bread green.
It’s not as green as I would have liked. My daughter informed me it looked like moldy bread.  I, of course, thought it was cool.  Here again, I just added a few drops of food coloring to the dough while it was kneading in the bread machine.  It is probably best to add the coloring to the liquid ingredients, but I forgot.  The bread still tasted awesome, regardless of the color!
Now, I know some people are against adding artificial coloring to their food, and I understand that. However, I tried the au naturel approach last year…
Cute right?! All natural food coloring. But how did they taste…
That’s a 3 y/o equivalent to a ‘thumbs down’!  They had potential, but I haven’t revisited the recipe.  It definitely needed some work!
What will you be doing for St. Patrick’s Day?

No Bake S’more Pudding Pie and PI Day!

Pi Day is an annual celebration commemorating the  . Pi Day is observed on March 14 (or 3/14 in month/day ), since 3, 1 and 4 are the three most  of π in the decimal form. In 2009, the   supported the designation of Pi Day. 

Well, if there is random holiday out there I can get behind, I guess Pi day would be it! I mean seriously, a day all about pie? I knew math would be useful for something.  (Math is actually quite useful in cooking…my girls were amazed when I was re-calculating the measurements on a recipe the other day.  I said “see, that’s why you need to study your math!” So you can change recipe quantities…we all need a goal people.) 

Easy No Bake S’more Pudding Pie

1 box sugar free/fat free chocolate pudding (large box)
2 cups skim milk
1 container Cool Whip (Regular, Free, Lite, Sugar Free – any will work)
graham cracker crust
1/2 cup chocolate chips
handful marshmallows*

Melt 1/2 cup chocolate chips in microwave (reserving a few for decoration if desired). Pour melted chocolate into bottom of graham cracker crust.  *At this point, you could add some marshmallows on top of the chocolate. (I didn’t, but I think I will next time. If you do this, then you will need more than a handful of marshmallows.) Stick crust in fridge for chocolate to harden.

Empty box of pudding mix in a medium size bowl.  Whisk in 2 cups cold milk.  Stir until it starts to thicken.  Fold in container of Cool Whip. Mix until incorporated.  Pour pudding mixture into pie crust, on top of harden chocolate (and marshmallows if using).

Add marshmallows and chocolate chips to top if desired. Place in freezer, but give it time to thaw a little before cutting.

This makes a quick and easy dessert that is low in sugar and fat depending on the ingredients used.

For other Pi(e) Day recipe ideas, check out –
Cherry-Blueberry Pie
Dark Chocolate Chess Pie

Deep Dish Cookie Pie (with a surprise ingredient!)
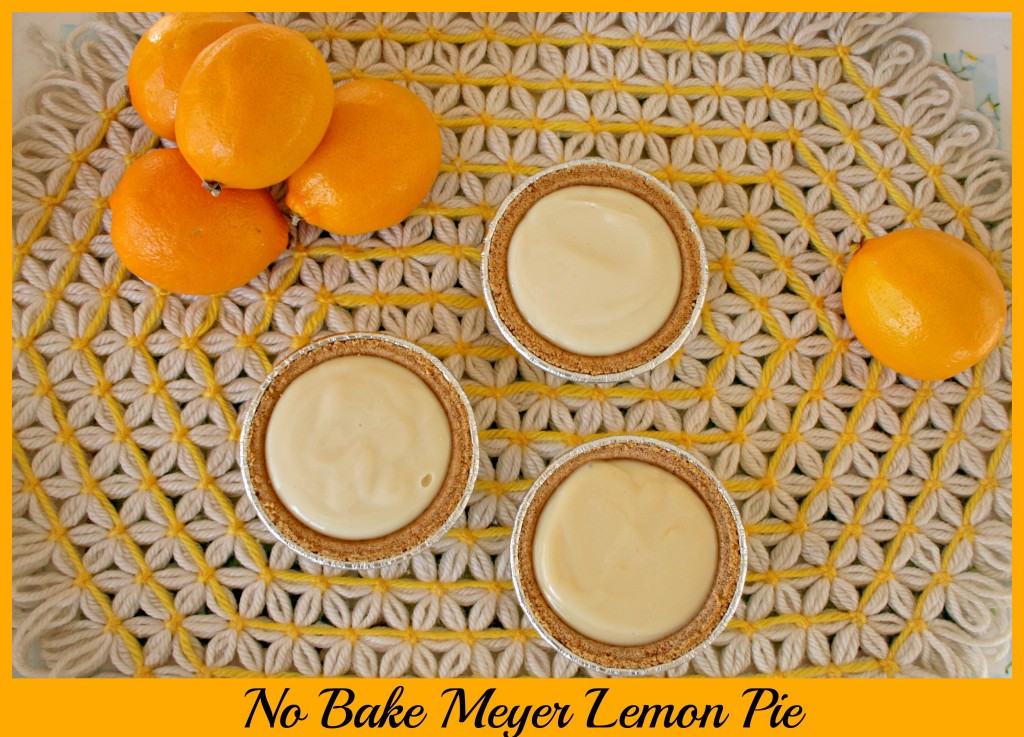


Come join the Pi/Pie party!