My experience with Biz Stain Fighter #BizChallenge #sponsored

This is a Sponsored post written by me on behalf of . All opinions are 100% mine.

I was invited to participate in the ‘Biz Challenge’ and with 3 kids, of course I accepted! I had the opportunity to try Biz Stain Fighting Liquid and immediately I had a doozy of a stain to tackle. But before I get to that….check out how they sent the product…

How fun is that? It made me happy just opening it! (They have updated their look, so if you have been using Biz for years, it’s the same product.) But back to the major stain I had to tackle….

RED.DYE. Yes, red dye on a brand new, never worn shirt! I was so upset because I thought red dye would never come out. The back story on the stain is this – I bought my middle child this cute denim shirt and a pair of RED jeans at the same time. They were in the same bag and as I was leaving the store, it was raining. I’m guessing the jeans got wet, rubbed off on the shirt, and then they sat in a bag for several days before I took them out to wrap them for her birthday. Since I wait until the last minute to do everything, I was wrapping her presents right before it was time to open them, so I didn’t have time to do anything with the shirt. SO, she opened her shirt with a stain on it….oopsies. I really have to stop procrastinating! Anyway, I wanted to see if I could get the stain out. So Biz showed up just in time!

Close up of the stain. Ughhhh! Thankfully,  and I gave it a shot. l pretreated the stain with Biz by pouring some on the stain, rubbing it in, and letting it sit for 5 minutes or so. Then I added some Biz to the load of clothes along with my regular detergent. I have to admit I was skeptical it would ever come out.

BOOYAH! No more stain!! I was pleasantly surprised and very relieved.

The only evidence there ever was a stain are these 2 tiny little faded spots! Awesome. So, if you have some tough stains you want to tackle, find out  and  before heading out to grab some. You can have your own little Biz Challenge going on! You can also find Biz  where you can share your stain stories and learn more.

What kinds of stains do you have to deal with? This one was out of the ordinary, it’s usually grass stains, chocolate, mud or blood. Yes, my kids are constantly scraping something and bleeding. I hope this is normal?!

So what about you, are you a Biz fan?

Pumpkin Spiced Gingerbread Granola & a GIVEAWAY!

Since Mother Nature has decided we are still in full winter mode, I think it’s still the perfect time for the warmly spiced flavors of this granola. Actually I eat pumpkin year round, and this homemade granola is healthy and delicious. It’s also very easy to make, which is always a bonus.

My 11 year old loves to eat granola for breakfast, and I like to mix it in yogurt. Making it at home ensures that quality, wholesome ingredients are used, and it’s easily adapted to whatever you like and have on hand. And the best part about this granola?!

CLUSTERS!!
I feel good about letting my daughter eat this granola full of super foods like oats and pumpkin; nutritious wheat germ, healthy fats from nuts, and naturally sweetened with molasses. I lovelove molasses. However, if it’s not your cup of tea, you can substitute honey. It will have a milder, less ‘gingerbready’ flavor.

Pumpkin Spiced Gingerbread Granola

1/3 cup pumpkin puree
1/4 cup molasses
1/4 cup oil (I used a canola/olive oil blend)
1/4 cup packed brown sugar
1 tsp vanilla extract
2 tsp pumpkin pie spice
1 tsp ground cinnamon
1/4 tsp ground ginger

3 cups old fashioned oats
1/2 cup wheat germ (I use )

1/4 cup almond meal (ground almonds)
1/4 cup chia seeds
1 cup almonds

1/2 cup pecans, chopped
  • Preheat oven to 325°F and line a large baking sheet with parchment paper.
  • In a medium bowl, whisk together the pumpkin puree, molasses, oil, brown sugar, vanilla extract, and spices.
  • In a large bowl, combine the oats, wheat germ, almond meal, chia seeds and nuts. 
  • Pour wet ingredients over the dry, and stir until well coated. 
  • Spread granola out in an even layer on the baking sheet.
  • Bake for approx 45 minutes, stirring every 15-20 minutes. If you want clumps, keep the stirring to a minimum (as in don’t stir it too aggressively, trying to keep some places undisturbed) but be sure to keep an eye on the edges as they will burn. Mine got a little over cooked, but just on the very edges. 
  • Allow granola to cool and store in an airtight container. 

Recipe adapted from

Now, onto the GIVEAWAY! has agreed to provide 2 jars of wheat germ to a Makin’ it Mo’Betta reader. And WHY would you want to win jars of wheat germ?! Because it’s a nutrition power house! It’s a great way to add extra nutrition into your family’s diet, and it has such a nice nutty crunch. Also, it has only 50 calories per 2-tablespoon serving. Win-Win!

Per their website, includes:
Vitamin E: This fat-soluble antioxidant helps to protect cells and tissues from damage and may ward off certain diseases.

  • Folic Acid: A must-have for pregnant women—and a good idea for everyone else—this B vitamin helps make healthy new cells to protect against certain cancers.
  • Magnesium: This mineral helps keep your heart, bones and immune system strong. Recent data also suggests it may even slash your Type-2 diabetes risk.
  • Thiamin: This B vitamin helps convert carbohydrates into energy. It’s also essential for the proper functioning of the heart, muscles and nervous system.
  • Phosphorous: Working with calcium to build strong bones and teeth, this mineral is also necessary for the growth, maintenance and repair of all tissues.
  • Zinc: Your body uses this mineral for hundreds of functions, such as fighting off viruses, helping wounds heal, DNA synthesis and proper cell division.
BONUS: Wheat germ is also a fiber-rich source of high-quality non-animal protein and only contains heart-healthy polyunsaturated fat. Extra bonus: There’s no sodium.

So that’s why you want to incorporate wheat germ into your diet! Plus, it’s great mixed in yogurt, in granola recipes as above, baking, and I like to use it in a low fat topping for muffins….

To enter, just use the Rafflecopter form! Shipping is only available within the US.

Disclosure: A jar of Kretschmer Wheat Germ was provided for sampling. No monetary compensation was received and I was under no obligation to post. I enjoy the product and all opinions are my own. 

ALPO® Wet Dog Food – #HappyStartsHere {#sponsored}

This is a Sponsored post written by me on behalf of for . All opinions are 100% mine.

With all the hussle and bussle of the holidays, don’t forget about your loyal companions. I’m sure they will enjoy a stocking filled with goodies, even though my little dog should probably get a stocking full of coal! But I’m sure he would just eat it. The stocking and all. (That’s a story for another day.) Right now, I want to share a cute and funny video…

! You can  on the . 

As I shared in my last Alpo post, my dogs love Alpo Wet Dog Food. This guy was seriously salivating, waiting patiently to dig in…

And I love how they are watching my every move while I was getting their food ready – 

 Alpo Wet Dog Food is 100% complete and balanced for all life stages. So my one year hotdog can enjoy it just as my 7 year old Staffy. Two happy, healthy dogs! Learn more about Alpo’s nutrition, and how it is beneficial for your dog at .

Lancome DreamTone Product Review – Project #bareselfie

I was very excited to review this product because I have a splotchy, uneven skin tone that even at age 41, is prone to breakouts. I also have some dark spots from too much time in the sun without protection. However, has come out with a product that is changing the way women view their skin. DreamTone is being called the “next generation in dark spot correction.”  It is a serum that is formulated to visibly correct dark spots, color imperfections and give you a more even-looking skin tone. There are 3 serums available so you can get one customized for your skin tone – 1- Fair, 2 – Medium, 3 – Dark. 
 
Lancome provided the following results from people after using DreamTone –  results are based on global self-assessments of women of multiple ethnicities in an 8-week study. 72% reflects 8 weeks of use.

IMMEDIATELY:
• 74% saw glowing skin

7 DAYS:
• 70% noticed a more even skin tone

4 WEEKS:
• 69% saw the appearance of dark spots reduced

8 WEEKS:
• 78% saw color imperfections reduced
 
My personal results were not quite that impressive, but I have only been using the product for 4 weeks, and the first week I only used it once a day to make sure my super sensitive skin could handle it. After not having any sensitivity issues the first week, I began using it twice a day as recommended (when I didn’t forget!)
 
My first thoughts were that it was a nice, light serum that didn’t cause my skin to breakout, but that it wasn’t really doing anything. Then I looked at my photos….
The one on the left was taken before I started using Lancome DreamTone. (The pictures were taken at different times of day, so the lighting was different….I didn’t think about that beforehand!) The picture on the right was taken after 4 weeks of using the product as described above. Even with the different lighting, I can tell that my skin is definitely more even, less blotchy and the redness is reduced. I was really surprised and looking forward to more pronounced results after 8 weeks of use. 
  and  challenged bloggers to join the   movement and post a selfie sans makeup. Yikes! (and no, I’m not mad, I just feel silly grinning at myself in the mirror trying to take a picture!) Even though my skin is still red and splotchy, it’s way better than the original photo I took before using DreamTone (which is why you don’t see the entire photo. It was AWFUL!) I’m looking forward to seeing continued improvement. And geez, get those eyebrows done! And hey, maybe I’ll start taking selfies as much as my 12 year old does! NOT. 
 
So a little more about Lancôme DreamTone – it retails for $98 for a 1.3 fl oz. bottle and is available for purchase at  and department stores nationwide. For best results, you should apply the product twice per day, in the morning and evening under your moisturizer. And, they are active in social media, so get involved and join the #bareselfie movement! 
  
Lancôme on Twitter: 
Lancôme on Facebook: 
DreamTone website: 

Click  for more info on Project #bareselfie. 

So how many of you go out (or post pics) without makeup? What are your tips for good looking skin?

Disclosure: SheSpeaks/Lancôme sent me a bottle of DreamTone to review for this campaign, but all opinions are my own.

Live Smarter with Carton Smart (w/recipe links) {sponsored}

This is a Sponsored post written by me on behalf of for . All opinions are 100% mine.

So what does  mean? Do you ever think about the number of canned goods we use and then toss the cans away? Over the course of our lifetime, the number has got to be staggering. That is why I was pretty excited to learn about Tetra Pak cartons. Tetra Pak carton packages are designed for maximum efficiency and environmental friendliness which is just one way to live smarter. I believe that if everyone makes small efforts to improve our world each day, those small efforts will eventually have a big impact.

Tetra Pak® cartons are made of 70% paper – a renewable resource, from selectively harvested and re-grown trees that are FSC-certified (Forest Stewardship Council). They also use 1/3 of the packaging compared to cans, and are space saving. I love that they are so easy to store (cans take up so much space!) and open, and keep your pantry neat since they are stackable and less bulky. Another huge plus is the cartons maintain the flavor and nutrients of food without the use of preservatives due to the unique packaging process. 

Since the cartons are recycleable, they result in 60% less landfill waste than cans. AND, they are re-closable so you can use what you need and save the rest for later. No more using part of a can, then finding a storage container to put it in so it can be placed in the fridge. Less dish washing is always a bonus!

With all that in mind, wouldn’t you consider using one of your favorite products, packaged in Tetra Pak cartons, for your holiday dishes? 

Chicken stock is a staple in my house. I know I will be using quite a bit of it during the holidays (and all winter long…I love soup!) 

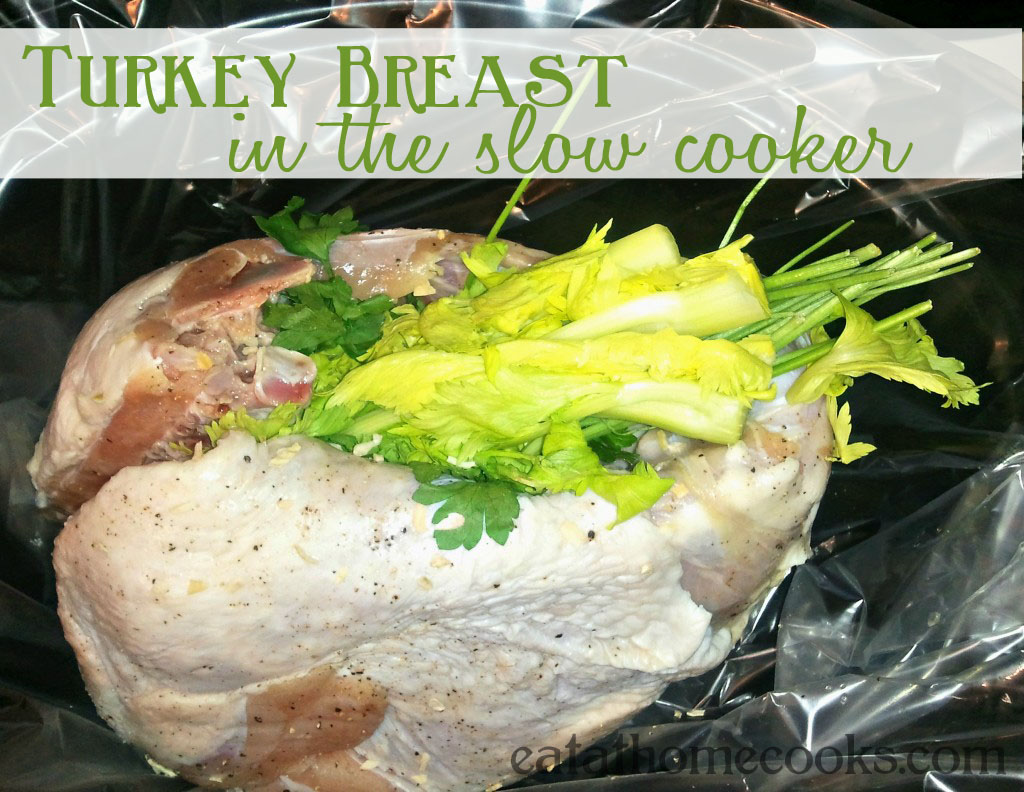
You can also use chicken stock to make this ! This is the only way I cook a turkey breast and I love it!

And pumpkin…don’t even get me started on pumpkin! If you follow my blog, you know how much! But this would make a great addition to the holiday table…

Pumpkin Cornbread!

And cranberry sauce…no Thanksgiving meal is complete without it. Also, if you have leftover turkey and cranberry sauce, you should make one of these!

Monte Cristo Sandwiches. SO GOOD! 

Anyone else hungry now?! To learn more about how to live smart and be carton smart, , they have some awesome boards! You can also join in the conversation by sending a . Let’s help spread the word, and make our baby steps turn into a giant step! How do you plan to be #cartonsmart this holiday season?

Blueberry Maple Biscuit Bake {aka Monkey Bread} & GIVEAWAY

Is anyone else fah-REAKING out that it is already November 19th?! The holidays are HERE people! I’m sorry to shout, but like I said, freaking out over here!! Am I ready for Thanksgiving? No. Am I ready for Christmas? HELLLOOO-NO. Am I the girl who lives not any where near civilization and shopping? Yes. Yes I am.

Wow. Thank goodness for online shopping and free shipping deals. Sorry to rant. I feel better now. *breath in; breath out*

One thing I do not have to stress about is breakfast during the holidays. With things like this Blueberry Biscuit Bake, I can throw it together with minimal effort and have it ready for everyone to feast upon so I can do more important things…like search for Black Friday Deals. Or wrap presents…b/c of course that will be done at the very.last.minute. Because that’s how I roll. 

But don’t these look scrum-dily-umptious?! That means good, in case you’re wondering. I make up words sometimes too.
This is similar to monkey bread…but it’s not made in a bundt pan (but you could, just double the recipe), and it’s made with blueberry biscuits! Have you seen them? Grands Biscuits makes them (there are probably other brands too, but that’s the one sold around here). I knew I wanted to make something with these new found treasures, but I didn’t want to make a traditional monkey bread…I wanted less cinnamon/brown sugar and more blueberry. And a little maple syrup thrown in for good measure. AND, a glaze of course. Can’t have blueberry biscuits without a glaze (are you familiar with BoBerry Biscuits? Bojangles, baby. That’s where it’s at. It’s a Southern thing.)

Blueberry Maple Pull Apart Breakfast Bake

1 can (16 oz) Pillsbury Grands Blueberry Biscuits
1/4 cup granulated sugar
1/2 tsp cinnamon
1/2 cup fresh or frozen blueberries (I used frozen)
3 T. maple syrup (or one of the little bottles pilfered from your last trip to Cracker Barrel. 🙂
2 T. butter
Glaze:
1 cup powdered sugar
1 t. vanilla extract
approx. 3-4 T. half and half (or milk/cream/flavored coffee creamer)
  1. Preheat oven to 350 degrees F.
  2. Grease an 8 x 8 baking pan (I used Chinet Bakeware)
  3. Cut biscuits into quarters and place in a medium bowl.
  4. Mix sugar and cinnamon together, then sprinkle over biscuits.
  5. Toss to coat biscuits in sugar mixture.
  6. Arrange coated biscuit pieces in the bottom of baking dish.
  7. In a small microwave safe bowl, heat blueberries and maple syrup for one minute. Add butter, and microwave for a minute more.
  8. Pour blueberry mixture over the biscuits.
  9. Bake for 20 to 30 minutes or until golden brown and no longer doughy in center. 
  10. Cool 10 minutes. 
  11. While cooling, mix up glaze in a small bowl – Mix powdered sugar, vanilla and whatever liquid you are using until desired consistency is reached. Pour over biscuit bake. 
Adapted from
Now, onto the giveaway I mentioned. Since I’m such a fan of , the thoughtful folks over at Chinet are allowing me to giveaway one last set of disposable Chinet Bakeware. What a perfect time to try these bad boys out! They are so convenient to bake in, then carry off, and then throw away! Or, if you are one of those super organized people, make some dishes up ahead of time, freeze them, then toss them in the oven whenever you are ready. Yes, Chinet Bakeware can go straight from freezer to oven!
The winner will receive a set of Chinet Bakeware including one of each size: 
 
8×8 Square Pan
7×11 Large Oval Pan
9×11 Rectangle Pan
7.25×9 Small Oval Pan
 
Please enter via the Rafflecopter form. If you are viewing this in an email, you will need to click over the actual post. Shipping only available within the US.
 
I received a complimentary set of bakeware and stipend for supplies from Chinet. All opinions are my own. This is part 4 of a 4 part series featuring Chinet.

Quick & Easy Shortcut Apple Crisp {#GIVEAWAY}

All you have to do is glance through my recipes and know that I like to keep things quick and easy. I like shortcuts, I like “semi” homemade, I like FAST. With 3 kids (and 2 dogs) always running around, I need to be able to make things that don’t require a lot of concentration or time! Or expense, for that matter. However, regardless of how long it takes to make, or the ingredients in it, the bottom line is you want it to taste good. Duh, right?!

I had a brunch to go to the other day, and wanted to make a couple of smaller dishes instead of one large one. (The other dish I brought was this Blueberry Maple Biscuit Bake) One of the nice things about the Chinet Bakeware I used is that not only is it disposable, but it comes in various sizes. For this apple crisp, I used the 7 x 11, and you can double the recipe to make a full 9 x 11. It will also work in an 8 x 8 or 7 x 9 inch pan, you’re layers will just be a little thicker, which would not be a bad thing! I adapted the crisp from one of my favorite desserts, Dump Cake! (Another quick and easy recipe that is always a hit.)
Quick and Easy Apple Crisp
1 can apple pie filling
1/2 box cake mix (dry) (Can use white, yellow, or spice flavor)
1/2 cup rolled oats
1/4 cup chopped pecans or walnuts (optional)
1/4 cup brown sugar
1 stick butter, melted
*I think raisins would be good in this to, but realized I was out at the last minute!
  • Preheat oven to 350 degrees F.
  • Spread apple pie filling in bottom of baking dish.
  • Sprinkle dry cake mix in an even layer over top, followed by oats, nuts (if using), then brown sugar.
  • Pour melted butter over the top and bake until golden brown, approximately 45 minutes or until golden brown on top and bubbly around the edges.
So simple, yet so tasty! It was great for brunch, but you could also plop some vanilla ice cream and caramel topping over it and make it dessert 🙂
I’ve talked about before (here and here) so you probably already know that they are disposable baking pans that come with plastic lids, so you can bake, cover, and carry all in the same dish. (And freeze if you want!) If you have not had the opportunity to try them yet, and would like to, Chinet has generously offered another giveaway for you!
One winner will receive a set of Chinet Bakeware including one of each size: 
8×8 Square Pan
7×11 Large Oval Pan
9×11 Rectangle Pan
7.25×9 Small Oval Pan
Please enter via the Rafflecopter form. If you are viewing this in an email, you will need to click over the actual post. Shipping only available within the US.
 
 
I received a complimentary set of bakeware and stipend for supplies from Chinet. All opinions are my own. This is part three of a 4 part series featuring Chinet, so if you don’t win this one, stayed tuned!

Halloween Chicago Mix

My kids and I loooove a mix. I’ve made several over the years, and they almost always have a sweet and salty combo. When I recently had the opportunity to try Popcorn, the Chicago Mix was love at first bite! (A little Halloween humor) I was skeptical of a cheese and caramel corn popcorn mix, but I had already heard how good it was, and what can I say. It’s the bomb. Once we polished off a bag at warp speed, I couldn’t stop thinking about the cheesy/salty and sweet combo, and this Halloween Chicago Mix was born. I thought that it would be fun to have to munch on during the week of Halloween. Yeah, right. I made a huge bowl that lasted all of ONE day. Oh well, guess I need to make more!

Halloween Chicago Mix

4 cups Chicago Mix popcorn (or 2 cups cheese popcorn and 2 cups caramel corn)
2 cups cereal (I used Life and Corn Chex)
1 cup pretzels
1 cup cheese crackers
1 cup candy corn (or any candy)
1 cup M and M candies
Combine all the ingredients in a large bowl and snack away! It’s cheesy, salty, crunchy, sweet and chewy. It’s fabulous!
Make it your own by using your favorite cereal, candy and crackers. I’m not a fan of candy corn, but I threw that in there for my kids. This mix is great for any occasion, just change up the candy you use. I’m sure there will be a Christmas Chicago Mix at our house too 🙂
Has anyone had G.H. Cretors popcorn before? It really is delish – just check out how big and fluffy the popcorn is!
I am definitely a fan. I’ve not seen it for sale around here, but it can be ordered (they have varieties other than the Chicago Mix too). You can find them on too if interested.
Disclosure: G.H. Cretors sent me a sample box of popcorn to try. All opinions expressed are my own.
 
If you are a fan of mixes, I also have this Pumpkin Spice Chex Mix
Are you a sweet and salty fan?
I may be linking up at any of the following – (Monday) , , , , , , , , , , , (Tuesday) , , ,,, ,  and ,  ,  (Wednesday) , , , , , ,   (Thursday)  ,, , ,  (Friday) ,  , , , , ,, , , ,, , , ,, , (Saturday)  , , , 

Smokehouse Brisket – slow cooked food, FAST! {sponsored}

This is a Sponsored post written by me on behalf of for . All opinions are 100% mine.

Imagine this….beef brisket cooked low and slow for at least 13 hours, piled high on a toasted bakery style bun with smoked Gouda cheese, crispy onions, BBQ sauce and mayo. Need a visual?

Are you drooling? I know I am. Now imagine that you can get this slow cooked goodness in the time it takes to whip through a drive-thru at Arby’s. Is it possible….YES! Slow cooked goodness, fast! Of course, you can also go inside and have a nice sit-down lunch or dinner – but as usual, on the day I had this deliciousness I was in a thousand hurries. But what a nice break it was to have this…

The Smokehouse Brisket sandwich with a side of curly fries, because no trip to Arby’s is complete without curly fries (and Arby’s sauce)!


and a nice iced tea to wash it all down. Please ignore my flat hair and lack of makeup – it was a long day! So, do you want to hear how the slow cooked beef brisket was piled nice and thick or how the bun was made of really good bread (not just some dry bun), or maybe how the creamy gouda was the perfect accompaniment to the crispy onions, beef and barbecue sauce?

Here, have a bite. That was mean, I know. Maybe you don’t want to hear anything else about this amazing sandwich and you just want to  as quickly as possible. I don’t blame you 😉 Just make sure that when you visit, especially if it’s in the drive-thru, that you make sure you have plenty of napkins! Yes, I had this magnificent sandwich and fries dripping with Arby’s sauce, and not nary a napkin in sight. *sigh* But that’s okay, tissues work in a pinch! Now I’m hungry for Arby’s Smokehouse Brisket all over again…

Are you an Arby’s fan? What’s your favorite thing on the menu? 

Easy Blueberry-Pineapple Cobbler & Chinet GIVEAWAY!

Cobblers are one of those things that I don’t make often, and when I do, I’m like “this is so good! Why don’t I make these more often?!” They make an excellent dessert, but a cobbler is great for a brunch too. I mean, with all that fruit, it’s basically a health food. Okay, maybe we won’t go that far.

Another thing about cobblers is that you can make them year ’round. Just use whatever fruit is in season, or even frozen or canned fruits. Talk about easy! AND, to make it even easier…this one has a biscuit like topping made with Bisquick. AND to make it even easier than that, it was baked in Chinet Bakeware!

The above cobbler is all ready to stick in the oven. Since I was transporting this to my parents’ house, after baking, I placed the lid on it and was on my way. I love the convenience of these disposable pans! I don’t like to transport glass, so these are sturdy, yet I can throw them away when done. I don’t have to worry about scooping out leftovers so I can take my pan back home, I don’t have to transport a dirty dish in my car, and when I take something to church, I don’t have to worry about keeping up with my pan!
And just a little tip…when covering something hot with a lid, if you place a paper towel or dish towel between the lid and pan, it will keep the steam from forming water droplets on the top of the lid and dripping back onto your food. Now, back to the cobbler!

Blueberry-Pineapple Cobbler

Fruit Filling:
  • 1½ cups blueberries, fresh or frozen
  • 1/2 cup crushed pineapple (canned)
  • 3/4 cup water
  • 1/2 – 3/4 cup sugar*
  • 1/2 tsp cinnamon
  • 2 tbsp. cornstarch

Biscuit Topping:

  • 1 cup Bisquick (I use the ‘Heart Smart’)
  • 2 tsps. sugar (I omitted)
  • 2 tbsp. butter, melted
  • ¼ cup milk
  • Turbinado (raw) sugar for sprinkling on top (optional)
Instructions:
  1. Preheat oven to 350 F.
  2. Mix together Bisquick, sugar (if using), butter and milk in a small bowl. Set aside.
  3. Combine blueberries, pineapple, water, sugar, cinnamon and cornstarch in a medium pot.
  4. Bring to a boil.
  5. Cook for approximately 2 minutes.
  6. Pour fruit filling into baking dish. I used the Chinet Bakeware 7 x 9. (You could also use an 8 x 8, or 7 x 11 pan)
  7. Cover filling with biscuit topping by dropping by heaping spoonfuls. It will be thick, and doesn’t have to completely cover the fruit – just make sure it’s basically even in thickness so it will all cook through at the same time. Sprinkle with raw sugar if desired.
  8. Bake until golden brown, about 25 to 30 minutes. Cobbler is excellent served warm or at room temp!
*Since I added pineapple to my filling (which is naturally very sweet), 3/4 cup sugar was too much in my opinion. I think 1/2 cup would have been better. However, since I omitted the sugar in the biscuit topping, they worked together to balance each other out okay. The level of sweetness is going to vary by individual preferences as well as the type and ripeness of fruit used. So, in other words, play with the sugar amounts to suit your needs 🙂
Recipe adapted from
NOW – if you missed my first Chinet Bakeware giveaway, that’s okay! You have another opportunity!
One winner will receive a set of Chinet Bakeware including one of each size: 
8×8 Square Pan
7×11 Large Oval Pan
9×11 Rectangle Pan
7.25×9 Small Oval Pan

Please enter via the Rafflecopter form. If you are viewing this in an email, you will need to click over the actual post. Shipping only available within the US.

I received a complimentary set of bakeware and stipend for supplies from Chinet. All opinions are my own. This is part two of a 4 part series featuring Chinet, so if you don’t win this one, stayed tuned!