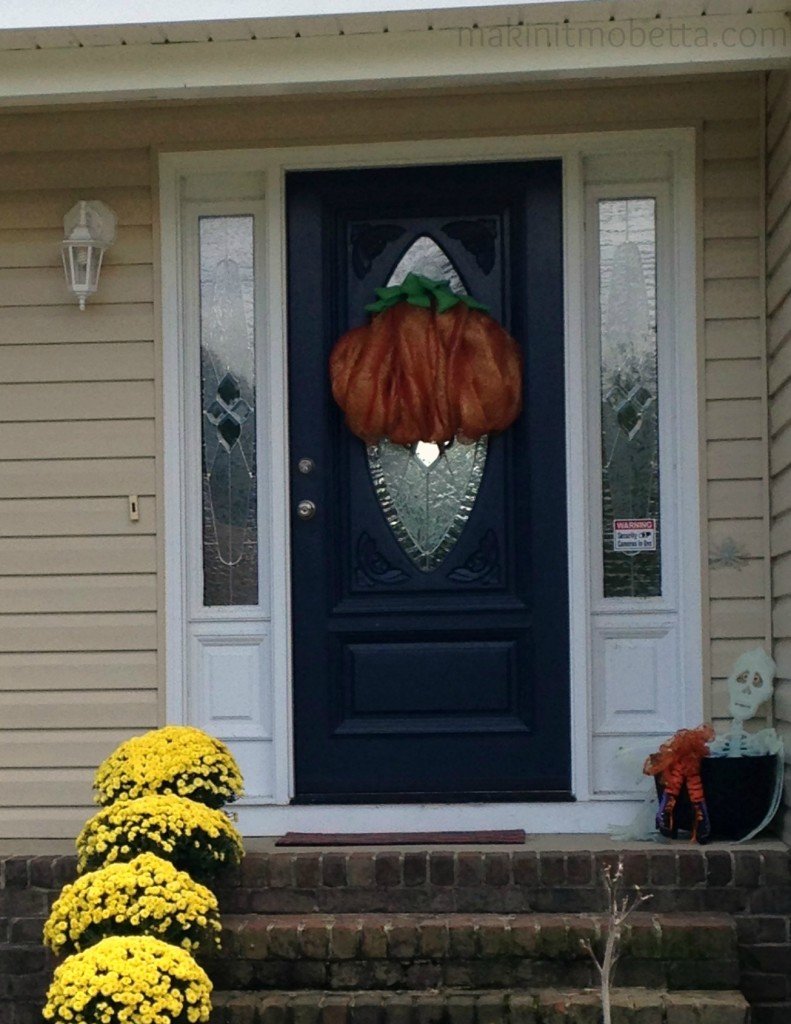
Pumpkin Mesh Wreath

First, YAY!! This is my first “official” post on my new site! And WOW…what a pain in the rumpkus (is that a word?) the Blogger to WordPress move has been. THANK GOODNESS for . Without them, this site would still be sitting here blank I’m afraid. I will spare you all of the details, but it has definitely been one thing after another. Oh, and did I mention that I happened to have surgery AND my computer crashed during all of this as well? Ha! Fun times. Not! Moving on…

Pumpkin Wreath

This Pumpkin Mesh Wreath is festive, (I think it’s cute), cheap, and super easy to make. I don’t do a lot of Fall decorating, but I usually have a Fall wreath, a couple of garden flags, mums, and pumpkins. Our weather has been so wacky, that my mums are already mostly dead (or lack of water could have caused that. Go figure.)

Since I’m a visual person, I’m going to show each step in pictures. I will explain the best I can, but it’s really easy.

Wreath Supplies

Step One: Supplies

  • One wire wreath (I bought mine at Walmart, I think it was $5)
  • Pipe cleaners (ideally in orange, but I already had these from another wreath. $1 from Dollar Tree)
  • long roll of mesh ribbon (This was from Walmart or Sam’s Club, also around $5)
  • ribbon for the top of pumpkin (I used green burlap – $1 from Dollar Tree. See Step 3)

How to begin

Step Two: Making Body of Wreath

  • Place six pipe cleaners at the top and six at the bottom of  the wreath form. If you look at it as a clock, place the first one at 10:00, the last one at 2:00, and put the other four randomly in between for the top. (You can adjust to exactly where you need them as you go along.) The bottom ones can go between 4 and 8:00.
  • Start at the top “10:00” pipe cleaner, attaching the end of your wire mesh. Pull the mesh down and attach at 8:00 as pictured above (is this clock reference getting old, or is it just me?!).

Body of wreath

  • Repeat the up and down pattern with the mesh until the wire wreath form is covered. If you want it fuller/thicker, just add more pipe cleaners to hold in place. Once the wire is covered, you can adjust/fluff wreath to get the look you want.

Final step

Step 3: ‘Stem’ of Pumpkin

  • I used the above pictured burlap ribbon. However, I think a wired ribbon would look better, and give the “stem” some shape and hold. The burlap kind of just lays there.
  • There is no technique for the stem…I just attached it to the top in and up and down pattern, using the ends of the pipe cleaners that were already in place holding the mesh.

And that’s it! I spent $12 and technically I already had the wreath form and pipe cleaners. You can remove the mesh and add something different for Christmas, or you can save the pumpkin to use next year. It’s nothing fancy, and I may tweak it here or there, but overall, I think it’s cute.

I never thought I would like the mesh wreaths, but somehow they grew on me. How about you? What kind of decorations do you have for Fall? Any Blogger to WordPress nightmares you’d like to share?!

This post has been featured at:


I may be linking up at any of the following – (Monday) , , , ,  (Tuesday) ,, ,  (Wednesday) , , ,  (Thursday) ,  (Friday) , , , , ,  
Easy crafts for gift giving

Somehow Christmas Day came and went in a blurrrrr. Wow! I can’t believe it is over! But, I figured I would go ahead and post these little crafts/ideas anyway. Just a couple of projects we had going on…

Scarf with ribbon
A couple of gifts my 10 y/o gave to her besties. All you need is a scarf (great deals can be found at Old Navy and Wal-Mart), then embellish them with your choice of ribbon. I sewed mine, but you could probably use the iron on adhesive too. I don’t know how well that would hold up with washing, etc. I’m not much of a seamstress, so I don’t know how well mine will hold up either! However, I thought the end result was pretty cute. (zebra print is still the thang with my girls.)
Candy Sleighs
My girls made these candy sleighs for some friends and teachers. Forgive the horrible photos, the lighting is terrible in my house at night, and these were taken with my cell phone. Always in a hurry around here!
My girls used the hot glue gun to hold them together, and no, my daughter does not have a tattoo. Why does she insist on writing on herself?!
We also tied some red curling ribbon around each one, but I didn’t get a picture of that. I think these turned out really cute! All you need is 2 candy canes for the bottom, a Kit Kat bar, some Hershey’s miniatures, and we used Hershey’s Peppermint Bark Bells for the top. Who doesn’t like a little chocolate for Christmas?!
Now, could someone send over some cleaning elves? My house is a wreck!
I hope you and yours are enjoying great family time and have a Happy New Year!
Time to think about NYEve appies!

Pinterest Inspired Craft Projects

Yep, Mo’Betta’s been craftin’.  Pinterest not only inspires me to cook (and eat!), but to also get my craft on.  With a new Hobby Lobby in town…well, it’s a pinner’s paradise.  And if you are wondering what the fudge is Hobby Lobby….it’s like Michaels, a large craft store.  {That sells Christmas ornaments year round!!!  I looove Christmas ornaments.}

 I have seen several “rope” projects, like one, and decided to make one for my sister for her b-day….
I decided my 1st project should be something small, so I did a single glass vase.  It is so simple! Just take rope, (I started at the bottom – don’t know if it matters) and wrap it around whatever you are covering, in this case, a vase.  Use hot glue to hold your rope to the vase.  I glued it where I started and then every couple wraps I would add some glue.  Then glue at the top where your rope ends.  Hopefully keeping it nice and secure.  My sister hasn’t mentioned that it has fallen apart yet, so maybe all is well.
My next project was inspired by the many wreaths I’ve seen on Pinterest, like one.   This is a work in progress.  I have also discovered Mod Podge.  Watch out people!
I bought a large pre-cut letter from Hobby Lobby, scrapbook paper, & Mod Podge (which I will be checking out making my own after I use the bottle I have now!)
I covered my letter with the scrapbook paper (adhering and sealing with the Mod Podge).
I plan on attaching it to a rope wreath something like this one…
photo from
So what has Pinterest inspired y’all to do?
I wish I could get inspired to do all these exercises I keep pinning!
I’m linking up this week with , , , , , , ,