First, YAY!! This is my first “official” post on my new site! And WOW…what a pain in the rumpkus (is that a word?) the Blogger to WordPress move has been. THANK GOODNESS for . Without them, this site would still be sitting here blank I’m afraid. I will spare you all of the details, but it has definitely been one thing after another. Oh, and did I mention that I happened to have surgery AND my computer crashed during all of this as well? Ha! Fun times. Not! Moving on…
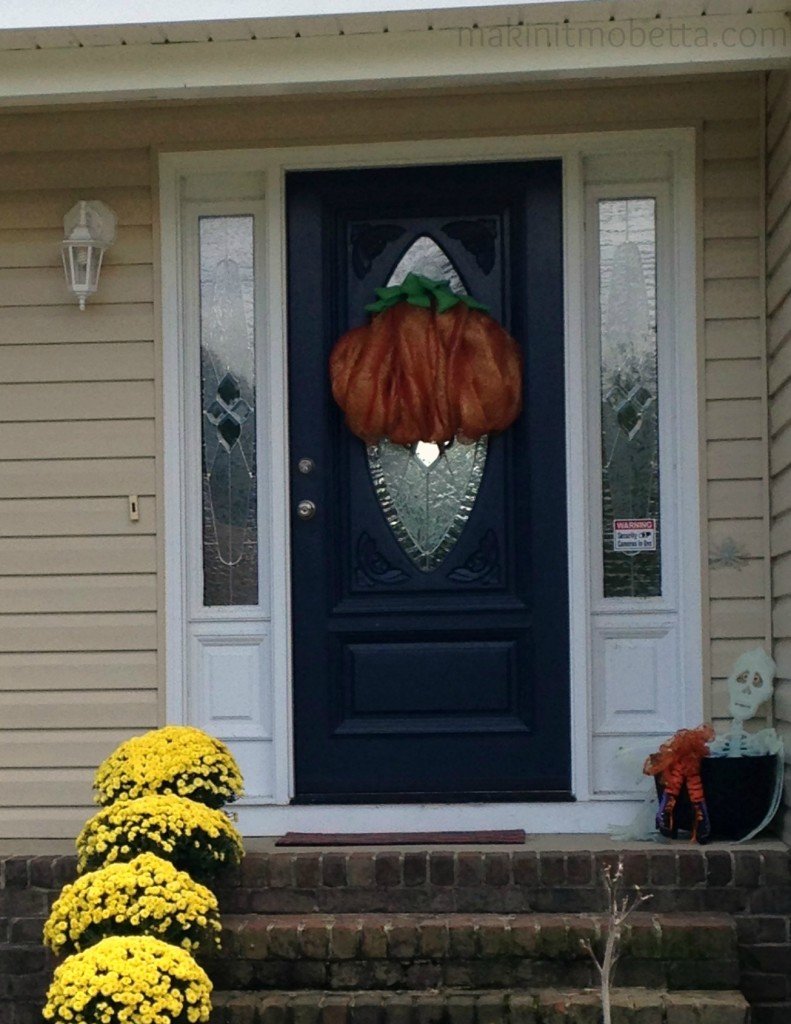
This Pumpkin Mesh Wreath is festive, (I think it’s cute), cheap, and super easy to make. I don’t do a lot of Fall decorating, but I usually have a Fall wreath, a couple of garden flags, mums, and pumpkins. Our weather has been so wacky, that my mums are already mostly dead (or lack of water could have caused that. Go figure.)
Since I’m a visual person, I’m going to show each step in pictures. I will explain the best I can, but it’s really easy.
Step One: Supplies
- One wire wreath (I bought mine at Walmart, I think it was $5)
- Pipe cleaners (ideally in orange, but I already had these from another wreath. $1 from Dollar Tree)
- long roll of mesh ribbon (This was from Walmart or Sam’s Club, also around $5)
- ribbon for the top of pumpkin (I used green burlap – $1 from Dollar Tree. See Step 3)
Step Two: Making Body of Wreath
- Place six pipe cleaners at the top and six at the bottom of the wreath form. If you look at it as a clock, place the first one at 10:00, the last one at 2:00, and put the other four randomly in between for the top. (You can adjust to exactly where you need them as you go along.) The bottom ones can go between 4 and 8:00.
- Start at the top “10:00” pipe cleaner, attaching the end of your wire mesh. Pull the mesh down and attach at 8:00 as pictured above (is this clock reference getting old, or is it just me?!).
- Repeat the up and down pattern with the mesh until the wire wreath form is covered. If you want it fuller/thicker, just add more pipe cleaners to hold in place. Once the wire is covered, you can adjust/fluff wreath to get the look you want.
Step 3: ‘Stem’ of Pumpkin
- I used the above pictured burlap ribbon. However, I think a wired ribbon would look better, and give the “stem” some shape and hold. The burlap kind of just lays there.
- There is no technique for the stem…I just attached it to the top in and up and down pattern, using the ends of the pipe cleaners that were already in place holding the mesh.
And that’s it! I spent $12 and technically I already had the wreath form and pipe cleaners. You can remove the mesh and add something different for Christmas, or you can save the pumpkin to use next year. It’s nothing fancy, and I may tweak it here or there, but overall, I think it’s cute.
I never thought I would like the mesh wreaths, but somehow they grew on me. How about you? What kind of decorations do you have for Fall? Any Blogger to WordPress nightmares you’d like to share?!
This post has been featured at:
I may be linking up at any of the following – (Monday) , , , , (Tuesday) ,, , (Wednesday) , , , (Thursday) , (Friday) , , , , ,


Wow, love the wreath! Looks so beautiful on your door! I will be pinning and wanted to thank you for taking the time to link up with us at Brag About It. I will be featuring your wreath on the next Brag About It link party!! Hope you will join us – party starts next Monday at Midnight!
~Laurie
That’s so awesome! Thanks Laurie!