picked a peck of pickled peppers

I have searched the internet on how to pickle banana peppers and finally found something that seemed easy enough and did not require a canner.  It came from a discussion forum at .  Someone posted their recipe ‘Connie’s Pickled Banana Peppers’…so, thanks Connie!  I will not know if they actually turned out for 2 weeks, I’ll update then!  I only did 2 pints today, but plan on doing more when I get the time.  I also want to do pickled jalapenos!  I need to do it pretty soon, my plants are FULL of peppers!  As you can tell from the above pic, I used a variety of peppers…sweet banana peppers, hot banana peppers, and a few jalapenos.  I’m excited to see how these taste, b/c I love them on sandwiches!

What you need to pickle your peckers…oops, I mean peppers –

  • 1/2 cup salt (I used pickling salt, b/c I read somewhere else that regular salt would turn your peppers a dark color)
  • 1/2 cup sugar
  • 1 quart white vinegar
  • 1/2 t. mustard seed
  • 1 t. peppercorns
  • 1 t. celery seed
  • 1 t. turmeric **I omitted this
  • 2-3 pods of garlic (I used 2 cloves – 1 in each pint jar)
  • 2 sliced jalapeno peppers*
  • 2 packed cups sliced sweet banana peppers, seeded*

*I used a variety of peppers and sliced enough to fill 2 pint jars

Bring first 6 ingredients to a boil, then let simmer for 30 minutes.  Pack banana pepper rings, jalapenos and garlic into jars.  Pour hot vinegar solution into filled jars.  Allow to cool, then store in refrigerator.  Let stand 2 weeks before opening.

The spices and vinegar smelled really good!
and they look so pretty 😀
Just beware – when all the recipes advise wearing gloves…WEAR GLOVES.  I, of course, did not because I thought I was dealing mainly with sweet banana peppers and it wouldn’t be a problem.  However, just a few hot peppers can cause some burnin’!!  My fingers were on fire for a while after.  Thank goodness it wasn’t too bad, but I definitely know to wear them next time – especially when I pickle jalapenos!

healthy makeovers!

This weekend was full of the kids favorites – pizza, french toast…(ok, my favs too – I’ve mentioned before that I have the palate of a 7 year old).  Just because I want my kids to eat healthier and make good choices does not mean they have to go without their favorite foods.  I have figured out that, as I’ve mentioned before, if you make things “from scratch”, and get away from pre-packaged & take-out food, then you can control the quality of ingredients used and make your un-healthy favorite dishes into something yummy, healthy and food you feel good about eating and serving your children.  I’ve already done a post or two (or three?) about the different pizzas I make, but wanted to share the pizza crust recipe I’ve used the past few times and it always turns out well.  And before you say “I don’t have time to make pizza crust” – check it out.  It’s very simple AND it can be made ahead….sometimes I’ll prepare the dough, cover it in a little olive oil, then wrap it in plastic wrap and throw it in the fridge.  Then a few days later, I’ll have the dough all ready to go.  Or, I’m sure you could prepare your crust, (go ahead and flatten it out) and then freeze it.  Which is what I should do…why haven’t I thought of that earlier?  See, blogging is good for the mommy brain…Anyway, before I digress….

Pizza Crust Ingredients (original recipe ) –

1 cup warm water (110 F/45 C) *I basically guess at temp and it’s never a problem, you just don’t want it so hot that it                                                                   kills your yeast)
1 T. sugar
2 1/4 t. active dry yeast (I use one “packet”)
2 T. olive oil
2 1/2 cups whole wheat flour   * Sometimes I mix whole wheat and bread flour – it’s whatever you prefer – using all whole wheat is healthier
spices/herbs of choice (garlic powder, basil, italian seasoning are the ones I use)

Stir water, sugar and yeast together until dissolved.  Add olive oil and salt.  Stir in flour and seasonings until well blended – you can also wait and put your herbs/spices on top of your dough, which is usually what I do, that way, the kids have less seasonings and I have MORE!  Let dough rest for 10 minutes.  (I usually sit the bowl on top of the pre-heating stove with a dish towel over it).  Pat dough into pan or pizza stone (I spray a little Olive Oil Pam on my fingers and spray my pans). 

I spread mine very thin (it will rise a little while baking) and make 2 pizzas from this dough recipe.  If you want a thick “hand tossed” type crust, make one.  Less bread = Less carbs! 
Pre-bake crust for 5 minutes for thin, about 7 for thick, then add your favorite sauce/toppings and bake for another 7 minutes or so at 425 degrees.  You don’t have to pre-bake the crust, but I like it a little crisper.
I use a reduced fat blend of cheeses and mini turkey pepperoni.
As you can tell, everyone in my house wants something different!  I wanted a spinach pesto pizza on half….but do you notice anything missing?  Yep, no spinach.  Pulled the bag out of the fridge and it was…well, let’s just say, it was gross.  So, it was pesto and feta.  Still yummy!  The other half has peppers from the garden!
This morning, my 7 year old asked for french toast.  This is super easy to make a healthier version – I used whole wheat bread and dipped it in a mixture of Egg Beaters, with a little skim milk and lots of cinnamon!  She put a little powdered sugar on hers, and I added a sprinkle of walnuts and heated some Sugar Free Cherry Preserves and put on mine.  I would love to eat another plate just like this one.  And I used my fine china, so minimal clean up (paper plates! gotta love ’em).
So, while some kids are raised on soy milk and tofu and bean sprouts (and more power to you), my kids  eat regular crap like everybody else.  So, my job is to make the crap a little healthier – yeah, that just sounds disgusting!  But, you get my point.  And I think it’s helping, b/c the last 2 or 3 times they have been off with friends or relatives and they ordered out pizza, my kids have talked about how “gross” it was, and the crust was “yucky”.  Yet, my youngest two kids always eat my pizza without complaint.  My oldest….well, I just don’t know about her – she’s being very picky nowadays.  Something about turning 9…
What are your favorite food “makeovers”?  I’d love to have some more ideas! 

i really like your peaches….

The other day I took my kids to the grocery store with me.  Mistake number one.  They saw a very nice looking display of peaches, and said “ahhhh, I looove peaches, will you buy some? Pleeeezzz.”  I was skeptical, because as I recall, they don’t really looove peaches.  (Nor do I)  So, I said “are you sure you’re going to eat them?  I don’t want to buy them and then they go bad sitting in the refrigerator.”  They of course responded “yes, yes we promise we’ll eat ’em“.  I, being the dumb@*# good mother I am, bought the peaches.  Mistake number two.  Today, I have 3 peaches getting overly ripe in the fridge.  Sooooo, I went on the search of a good semi-healthy recipe to use up the peaches my kids promised they would eat.  And, of course, ended up with a muffin recipe.  I’ve added peaches to blueberry lemon muffins before, and they were quite good.  This time, I decided to let the peaches fly solo.  I found the original recipe at allrecipes.com under and made a few changes. 
Spiced Peach Oatmeal Muffins

1 c. quick cooking oats
1 c. plain yogurt (I used my homemade yogurt!)
1/3 c. brown sugar
1/3 c. unsweetened applesauce
1/4 c. molasses
1 egg substitution (1 T. vinegar, 1 T. water, 1 t. baking powder) – original calls for 2 eggs
1-1/3 c. all-purpose flour (I used 1/2 cup white and the rest wheat)
1 t. baking soda
1 t. baking powder
1-1/2 c. pitted and diced fresh peaches
topping: 2 T. white sugar and 1/2 t. cinnamon
  1. Preheat oven to 400 degrees F. Grease muffin cups or line with paper muffin liners.
  2. In a large bowl, mix together oats, yogurt, brown sugar, applesauce, molasses and eggs or egg replacement.
  3. In a separate bowl, stir together flour, baking soda and baking powder. 
  4. Stir dry mixture into wet mixture, just until moistened. Fold in peaches. Spoon batter into prepared muffin cups.
  5. Bake in preheated oven for 15 minutes. While muffins are baking, combine 2 tablespoons sugar and 1/2 teaspoon cinnamon. After 15 minutes of baking*, remove muffins from oven and sprinkle with cinnamon sugar. Return to oven and continue baking for 3 minutes, until a toothpick inserted into center of a muffin comes out clean.
*The only thing I would change is that my muffins were done at 15 minutes, so the cin/sugar didn’t “stick”, should have done this step at maybe 10 minutes.
miss helper who refused to even TRY the muffins
These are very hearty muffins, with the oatmeal and whole wheat, not light and fluffy.  I was stuffed after eating one…..okay, I ate two.  They aren’t super sweet, which I think is a good thing, but if your peaches are very sweet, you may want to increase the sugar or make more of a crumble on top.  All in all, I thought they were good – but as I said, Number One wouldn’t eat them, even though she still claims she loves peaches.  Number Two ate one, but decided she doesn’t like peaches “warm” and Mr. Three ate most of a mini muffin, but stopped when he got to a peach.  With these crazy kids, I probably would have done better to chop them up really small, but I thought, hey, they LOOOVE peaches, so why should I?  Why do I listen to my kids?!  This recipe also made a lot of muffins….12 regular and 6 minis!
So, anyone want a peach muffin 🙂
I’m linking this up with : Spotlight – PEACHES!, and

i grow (good) bacteria (Homemade Yogurt)

I was wary, but excited about trying my hand at making yogurt IN THE CROCKPOT! I first heard about this from and she used  which is what I followed.  It seemed simple enough….

  • set the crock pot on low, add 1/2 gallon of milk – I used whole milk since this is my first time and that was the suggestion.
  • Let it “cook” for 2&1/2 hours (I love things I don’t have to stand over and watch!) then turn it off and let it sit for 3 hours. 
  • After 3 hours, take out 2 cups of milk and add 1/2 cup of plain, store-bought yogurt (any brand that has “live yogurt cultures”).  Whisk together then add back to slow cooker. 
  • Wrap entire pot in heavy towel and let sit 8 hours or overnight. (mine sat for 14, b/c 8 hours was up at 1 AM, and I was not gettin’ out of bed for yogurt)

The next morning I was fully expecting a crock pot full of curdled, cottage cheese looking stuff.  But to my surprise –

I had this wonderfully thick, creamy, smooth plain yogurt!!!  It worked! It worked! It really, really worked!  Can you tell I was excited?  I think part of it was just surprise that it turned out.  So now I have a fridge full of fresh yogurt! 
After letting it chill for a few hours, I had to try it out.  I added some NuNaturals Stevia (check out article regarding Stevia), fresh blueberries and strawberries, and oats. 
It was DEE-LISH!  Of course, it was made with whole milk, so not exactly low fat – but very filling.  Next time I want to make it with low fat milk, but I read you have to add gelatin or something b/c it’s so thin.  Or strain it to make Greek yogurt, which is probably what I’ll do.  Which will be a lot cheaper than buying it!  I like the fact that you can completely control the ingredients.  My kids were thinking of things they could add to theirs (like M&M;’s and cookies) but my 7 yr old tried mine and ended up eating half of it!

This was WAY easier than I thought it would be, you just have to be available to turn your slow cooker on and off, add in the starter (initially store bought, but now I can reserve a half cup of what I made for my next starter – this can be done up to 5 times before you need to “refresh” your cultures) and wrap it up in a towel…then you just leave it to do it’s thang.  I don’t like to think too much about the bacteria growing and the fact that milk is sitting at room temperature.  But I ate it without getting sick…so we’re good to go.  Mama’s in the yogurt business!  I feel like I should go hug a tree.  My next “project” is either pickled banana peppers or healthy, lowfat, granola!  Maybe both….granola would go great with the yogurt!

Update 10/12/11 – I have made this several times with skim milk and it does fine! It’s a little thinner than store-bought, but not too thin.  I usually strain it anyway, b/c I LOVE greek style yogurt!


I’m linking this recipe up at (Ingredient Spotlight – Milk!)

vampire repellent

Of course, the vampires I’ve seen are HOT, so who wants to repel them anymore?  Just sayin’.  Anyway, as I’ve mentioned before, I have a shitload abundance of basil and have been putting it on everything!  Since we were having pasta for dinner, I decided to make more  and add it to whole wheat spaghetti noodles.  It was soooo good!  Pesto=garlic=vampire tie in.  in case you live under a rock were not followin’ the whole vampire thing.  Sorry…I need a vacation.
The kids took one look and saw green stuff and wouldn’t even try it. They had their noodles with cheese only. bor-ring.

 
Number One loves some noodles! and sporting a new haircut – isn’t it cute?!  And my goodness, those are behemoth portion sizes.  They didn’t seem that large as we were stuffing our faces with them….I think it’s the angle, or the lighting. (yeah, uh-huh – you believe me right?)
This was Terrible Two’s response to dinner.  He had an apple.  and Rice Krispies.
This was my response to his pouting and refusing dinner.
I ate TOO much and didn’t exercise. blah! I was giving my blister the day off, hoping it would heal up quickly.  Such a pain….literally!  We also started our yogurt, so there will be a post about it soon!
Also, I’m getting lots of peppers from my garden, any suggestions on what to do with them all?  I have frozen some, but was thinking about a pepper relish or something. 
Anyone pickled banana peppers before?  I love them on sandwiches, but I’m intimidated by the whole pickling/canning process.  However, I’m feeling very empowered since I think my yogurt turned out pretty well….I’ll know in just a little while…and you’ll know tomorrow!  I know everyone is waiting in breathless anticipation to my yogurt post…that’s sarcasm.  Don’t hate. *kiss kiss*

i make an awesome sandwich

Remember the giveaways I mentioned the other day?  Well, I WON one!!  YAY!!  I heart free stuff and this is something I can REALLY use, as in every day starting the end of August!  It was for the and I’m totally syked (can you tell I’m a product of the 80’s) about being able to pack lunches in these containers instead of baggies….hundreds and hundreds of baggies!  One small step for mankind…..The giveaway was hosted by Ashley at !  Check out her blog – Thanks Ashley!!!

This workout really….umm, well, worked me out!  I am so sore!  I know some people will look at this and laugh – and are probably just getting warmed up at this point.  But not me….I’m so not in shape.  And my cardio sucks needs improving!  AND I have a huge blister to contend with….yes, I’m whining.  But anyway, I’m still committed to seeing it through.  Since I was hot, tired and just didn’t feel like cooking, I fixed an awesome, super duper, fan-tabulous sandwich for dinner instead. 

Of course, it still involved turning on the oven…oh well.  I love a good sammy.  It had everything but the kitchen sink….I went light on the meat and cheese and loaded it up with fresh veggies.  All the peppers and the tomato were from my garden!!  Speaking of garden…today I “found” 3 more watermelons growing!!!!  If you are wondering how you can miss a watermelon, it’s because that one plant has gone insane.  It takes up 1/4 of the garden area and is growing everywhere, up the fence, through the fence – you get the picture – or you would, if I could remember to take one.  And there is grass growing under the plant, which I don’t want to mess with too much for fear of damaging the plant and destroying my melons!  My husband just loves when I start talkin’ about my “melons”! haha.  Anyway….back to dinner – the kids, of course, only want ham and cheese and lettuce.  My oldest will now add cucumbers.  They just don’t know what’s good! 

I loaded that baby down with turkey, a little cheese, lettuce, spinach, red onion, green, red and banana peppers, pickled jalapenos, Grey Poupon mustard, a little mayo, turkey bacon, tomato, balsamic vinegar, garlic powder…..did I forget anything?!  It took a while to assemble all that, but it was worth it!!  So good!  I put it all on wheat french bread and toasted it in the oven. 

Normally I would wrap it in aluminum foil, but did I have any? Of course not.  Ran out when I had to use it for the No Bake Chocolate cookies – b/c I was out of wax paper.  I’m seeing a pattern here…..  Anyway, we also had a fruit salad – that my girls made on their own today. (blueberries, strawberries, grapes and apples)  And I had a Michelob Ultra.  oops.

The girls also made this yesterday morning!  My husband woke up to find them in the kitchen, with the biscuits mixed up and the oven pre-heating.  I tried not to freak about them turning the oven on while we were SLEEPING, and I knew Number One could handle this….but OMG…I’m not ready to give them that much independence!!  But the hubs helped them finish their masterpiece…and they turned out quite good – but I SO did not need to eat a biscuit with cheese for breakfast! Of course, I ate one and raved about how delicious it was.  However, I need to teach them how to make something else…I’m thinking we’ll try homemade yogurt today!!  You know there will be a post about it!

Betty Crocker meets Home & Garden

This weekend flew by so fast, I didn’t even have time to post anything.  So you’re probably thinking I had some awesome weekend and getting ready to post some really fun stuff.  But that would be wrong.  I didn’t do anything amazing.  Just family stuff.  But, when you have 3 kids, life is busy.  Saturday was spent in Chapel Hill visiting my parents with my .  As mentioned in a previous post, my Dad is recovering from a .  He was diagnosed with Leukemia this past October.  I could talk/write for hours about transplants and leukemia, etc., but I’ll spare you the gory details.  Today anyway!  see for info on becoming a bone marrow donor!
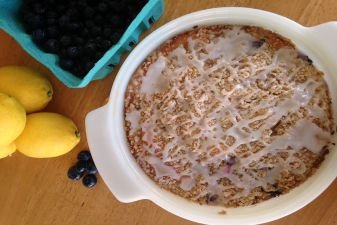
There was lots of cooking/baking going on this weekend.  and I’m all about some food, so let me share!  First, I made the hubs a sugar free cheesecake (again).  He has quite the sweet tooth.  I’ve already posted about that here and here.  But doesn’t it look yummy!?  This one is with a regular graham cracker crust, but it is MO’BETTA with the nut crust in the earlier posts.

My little man helped me make the cheesecake!  He tasted it frequently (before adding the eggs).

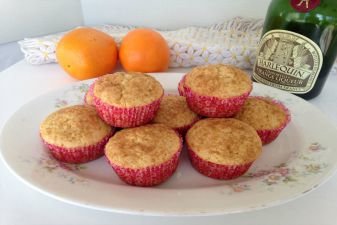
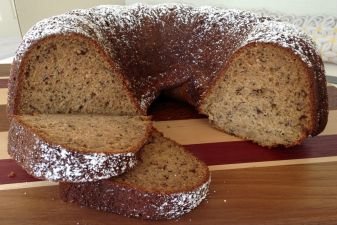
I also made an to take to mom and dad.  My dad likes spice cake and this one was super simple.  However, I forgot to take a picture! 

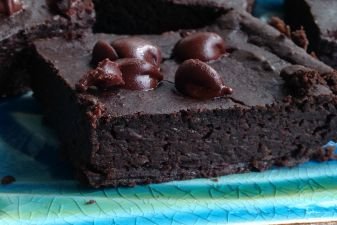
And look what my children made for me….

Doesn’t that look….um….yummy? 
They had a little trouble melting chocolate – but of course, I ate it!  It was sweet that they wanted to make mommy a treat.

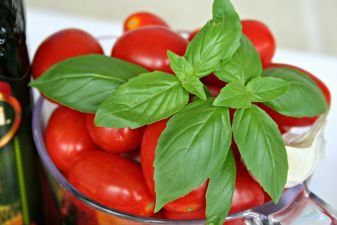
Sunday was spent hangin’ with the kiddies and working in the garden.  The grass was trying to take over my garden (and winning).  Also the sunflowers and some of the cucumber plants needed to be pulled up.  Needless to say, I am sore from using the tiller and pulling grass.  But the garden looks sooo much better.  And maybe it will help get rid of some of these stupid bugs!!  Not to mention it had to be a good workout.  Now, the only things I have producing in the garden are carrots, peppers (green, banana, jalapeno), basil, green beans, and the tomatoes are trying to do a little something, but they aren’t doing much.  AND we have a watermelon 🙂  My girls go out and check the melon everyday, they can’t wait to pick it!  At this point, it will be a while.  Thankfully we’ve had a little rain over the last couple of days, so that should help a bunch.

All I can say is….I’m that’s awesome!

After working in the garden, I made chicken and pastry (sort of).  I used Anne’s Whole Wheat Pastry.

They were  pretty good (not as good as my mother-in-law’s homemade pastry) but much healthier since they were whole wheat.  I didn’t get a good, thick broth, so I have got to learn the secret to that (I used cornstarch, but it didn’t help much).  I guess my MIL uses a lot of flour.  One of my favorite time savers is….if you don’t know about this you will love me for it……you can take FROZEN chicken (I’ve only done this with boneless, skinless breasts) and stick them in the crock pot and forget about it!!!  Just leave the chicken to cook on high (2 lbs cooks in about 6 hours or less, but I just leave it in the crock pot until I need it) and at the end of the day, you have really tasty chicken that you can shred (it just falls apart) and use in so many different recipes.  Since it cooks in it’s own juices, it stays moist and has a really good flavor.  I love it b/c I don’t have to thaw anything or think too far in advance about what’s for dinner, or watch the pot boil!  Anyway, made the pastry and my daughter made drop biscuits (from Heart Healthy Bisquick) all by herself – it’s super simple, but she was proud!  I also cooked my fresh snaps a different way.  I boiled them for a few minutes, then added them to a pan with a little olive oil and garlic.  Sauteed them a bit and added a crumbled slice of turkey bacon.  Then topped it with some Parmesan cheese!  Leave it to me to take a really healthy dish and add fat! 

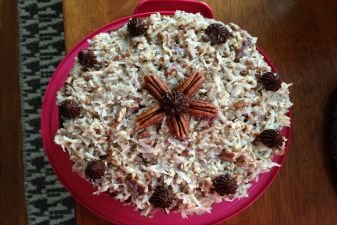
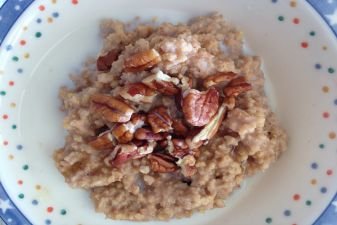
After dinner the girls wanted to make a dessert.  In looking through my recipes I came across   I have been wanting to make something substituting almond butter for the peanut butter, so this was my chance.  AND I didn’t have to turn the oven back on.  The original recipe is from Allrecipes.com, but I made several changes.

Ingredients –
2 cups 1&1/3 cups white sugar
1/2 cup (skim) milk
1/2 cup 1/4 cup margarine (I used Smart Balance 50/50)
3 cups rolled oats (I used 2 cups quick cooking oats and 1 cup Thick and Rough – that’s actually the name! Scary!)
1 t. vanilla extract
3 T. unsweetened cocoa powder
1/2 cup flaked coconut almond butter (I used MaraNatha)

I then followed the cooking directions as listed in the original recipe.  They are so GOOD!!  The almond butter has a milder flavor in these than I remember the peanut butter having, but it’s been many years since I’ve eaten them.  They also have a good, rich chocolate flavor, and I love the hearty texture from the oats.  My girls and I enjoyed them, but my little Terrible Two doesn’t get any 🙁  Can’t have almonds.  Maybe next time I’ll try them with Sunflower Butter. (or you can omit the nut butters all together.  the original recipe calls for coconut instead). 

So that was my weekend.  I’m sore from gardening…and I have to get back to my PLAN.  I don’t know how many miles I have to do today, but I’m sure it’s more than I’d like!  I did workout Saturday evening – 3 miles (the minimum!), but I accidentally deleted the picture.  Really. I did do it.  It was about 9:00pm, and I was already tired, so it sucked.  Note to self – workout early in the day.  I also got new tennis shoes (yay!), but wore them immediately to do my walk/run and got a big blister (boo!)  I know, you’re thinking what a .  I should have broke them in a little before exercising in them.  What ev’ – too late now!!

Hope everyone had a good weekend.  Anyone make any Beer Margaritas?!  I never got around to it…maybe next weekend!  Or hell, maybe in the next few days depending on how the week goes…you never know when you may need a drinkipoo (or two)!  Holla –

Another edible veggie, who knew?

Would you believe that cauliflower really can taste good?! Even like french fries?! Okay, not exactly like french fries….but definitely close to homemade baked fries. I saw this recipe over at – and my curiosity was piqued. I am always searching for new ways to fix veggies so my kids (okay, and me too) will eat more of them. So, I bought a head of cauliflower (which is kind of expensive, I’ll have to look into growing it!) and have had it sitting in the fridge, waiting for its big debut. And last night was the night. I chopped it up, tossed it in olive oil, salt and pepper and spread it out on a baking sheet. Very much thinking that the person who thought this was like a french fry was on crack at the time. But to my amazement….it was GOOD!! Not just okay, but GOOD! I had to get past the mental part of “ewww, it’s cauliflower” and I have to say that I ate almost the whole pan. (which may have caused a teensy bit of gas…oops) 

The kids tried a teeny, tiny little piece of my new “fries” – Number One said it was good, but didn’t eat anymore. Number 2 said this is gross. Leave it to her to put it out there. My husband’s first reaction was along the lines of Number 2….but then he went back and had a second piece. Progress. But, they are battling with the whole “ewww, it’s cauliflower”. They have not reached the level of maturity I have in my dedication to eating my vegetables. hahahahahaha – only the ones who know me will find this statement hilarious. If it’s not dipped in chocolate, or stuffed in a muffin, my dedication to eating it is….not so much. Anyway, I kid you not, this was pretty good, and something you should try. Even if you don’t like cauliflower!

So…..it’s not the prettiest dish you’ll ever make.  But just eat it.  Because I said so.  I sure wish that worked with my kids.

Day 4

I realize nobody wants to see a picture of my treadmill, but (1) posting it each day makes me feel accountable and (2) I just like doing it, looking at it gives me a sense of accomplishment!  Today is Day 4 of the “Beginner Training Plan: 6 weeks to a 5K” and I like to affectionately refer to it as my TORTURE PLAN.  Today’s instructions were: Walk 1 mile.  Run 3 mins. every half mile until you reach 3.5 miles.  Walk 0.5 mile. – CHECK 😀  and I believe there will be Tylenol PM in my future.  I sure wish I had started this in my 20’s….

Beer Margaritas!

The fabulously funny  is hosting
This can be an adult or kid friendly version….but I’m all about a good “adult beverage”.  Or several, depending on the situation (mainly, do I have a babysitter?!)  Since I have THREE children, it’s rare that I get to partake in such situations that would allow more than one or two “beverages”…but anyway, moving on.  I am not a lush.
One of my favorite things to make is from the annoying Sandra Lee (Semi-Homemade chick). 
BEER MARGARITAS!!! 
The recipe can be found .
 
  • All you do is take 2 bottles of your favorite beer….(I used the above, but also good with Corona)
  • add 1/2 cup limeade (from concentrate, in the freezer section, let thaw) and 1/2 cup chilled Tequila!!
  • Mix in a pitcher and serve. 

 It’s super easy and REALLY good – if you like margaritas (and who doesn’t?!). It sounds a little odd, but trust me, they are mo’betta! I may have to make some very soon….like, tomorrow 🙂